How to Configure and Manage Sales Channels in O2VEND
Learn how to configure and manage sales channels in O2VEND.
Step-by-step tutorial to connect Amazon, Flipkart, WhatsApp, and social media for unified online and offline business operations.
Sales Channels
Sales Channels in O2VEND allow businesses to connect and manage multiple selling platforms such as Amazon, Flipkart, WhatsApp, Instagram, and retail stores under one system.
Each sales channel acts as a bridge between the business and its customers, ensuring unified control over inventory, pricing, and order processing.
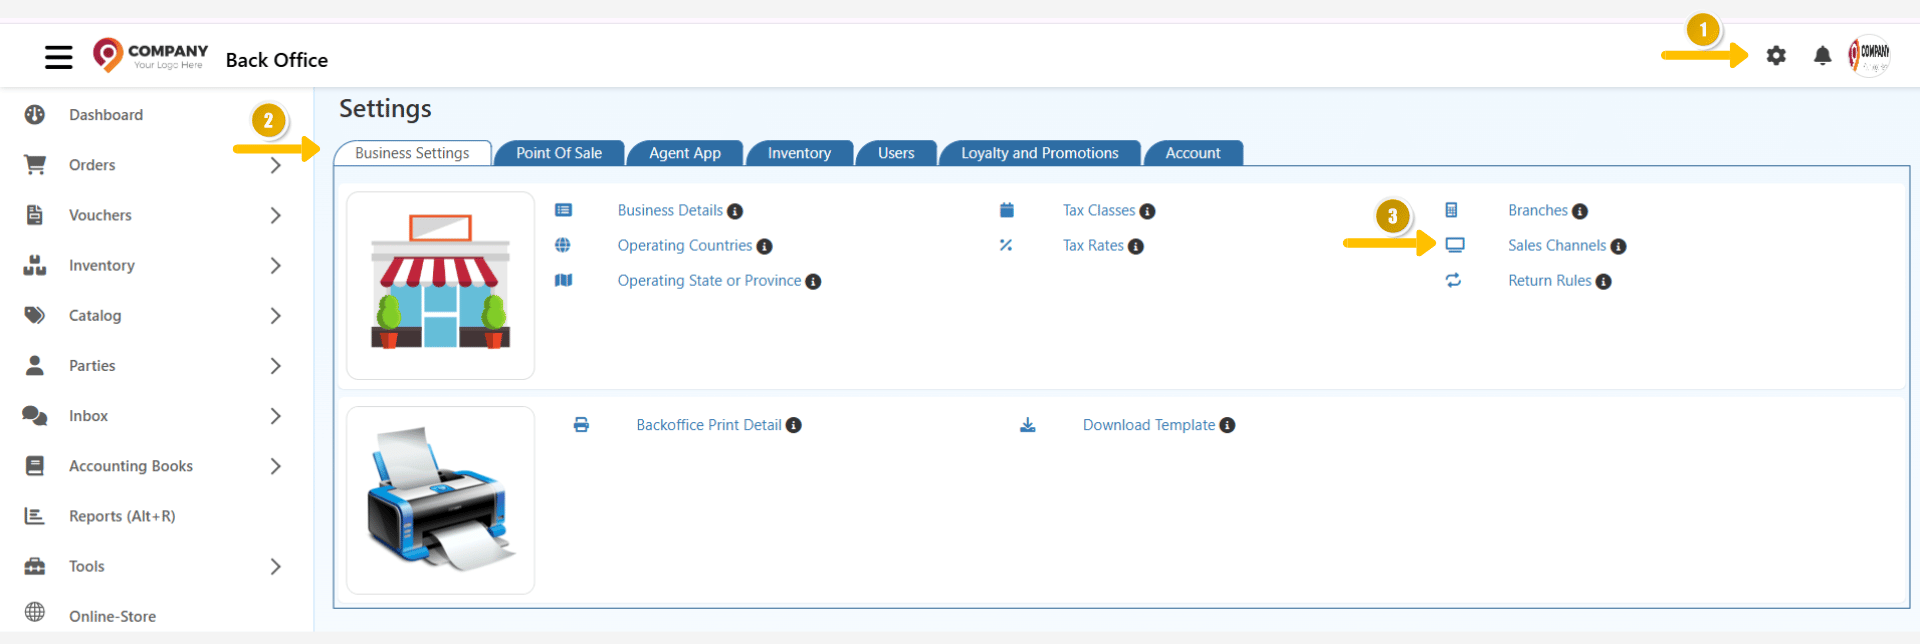
Access the Sales Channel Page
Steps:
- Go to the Settings menu in the main dashboard.
- Select Business Settings.
- Choose Sales Channels from the available options.
- This opens the Manage Sales Channels page, which lists all active and connected platforms.
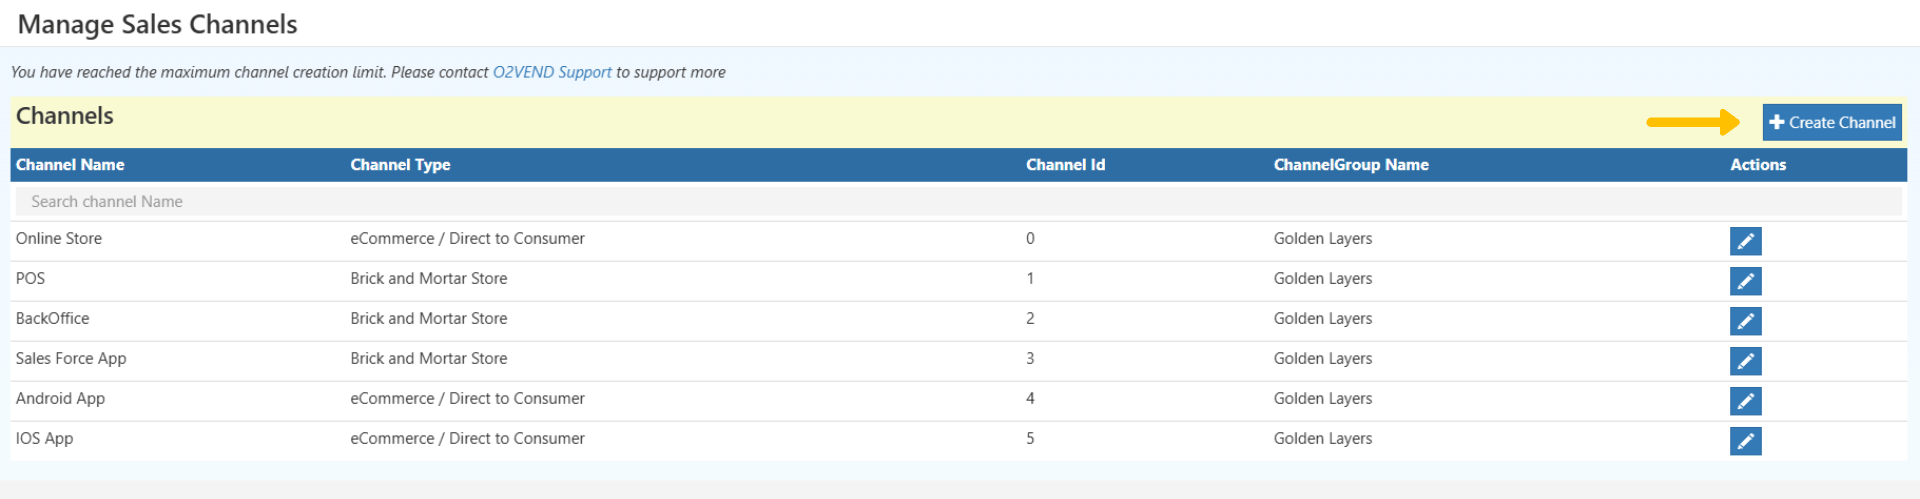
Understanding the Sales Channels Page
The Manage Sales Channels page is divided into two main sections:
| Column | Description |
|---|---|
| Channel Name | Name of the channel (e.g., Online Store, POS, BackOffice, Android App, iOS App). |
| Channel Type | Defines whether it’s eCommerce / Direct to Consumer or Brick and Mortar Store. |
| Channel ID | Unique system-generated ID for internal tracking. |
| Channel Group Name | Groups multiple channels for better organization. |
⚠️ If you see the message “Maximum channel creation limit reached”, contact O2VEND Support to add more channels.
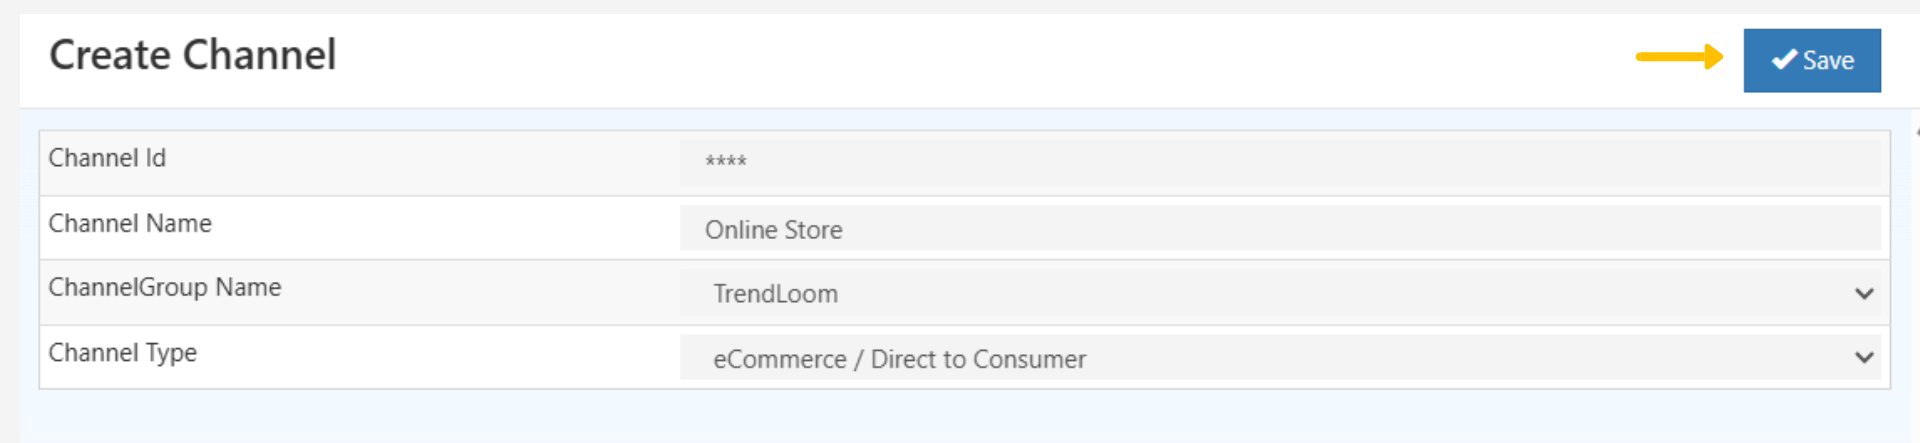
Create a New Sales Channel
Steps:
Click Create Channel at the top-right of the Sales Channels section.
Select the Channel ID (eCommerce, Direct to Consumer, or Brick and Mortar).
Enter a Channel Name such as Amazon Store, WhatsApp Sales, or Facebook Shop.
Assign the Channel to a Channel Group Name.
Choose one of the available channel categories:
- eCommerce / Direct to Consumer – For online web stores or mobile apps.
- Online Marketplaces – For platforms like Amazon, Flipkart, Meesho, etc.
- Social Media Channels – For WhatsApp, Facebook, or Instagram sales.
- Other Channels – For additional or custom sales channels.
After entering all details, click Save to confirm.
Edit or Manage Existing Channels
Steps:
- Select the Edit (pencil) icon beside a channel name.
- Modify details such as ID, Name, or Channel Group Name.
- Click Save to apply changes.
- Updates reflect instantly across connected systems.

Organize with Channel Groups
Channel Groups in O2VEND help organize and manage multiple sales channels under a single group name.
This allows easier tracking, reporting, and consistent configuration across different platforms.
How to Create and Manage Channel Groups
- Go to Settings → Business Settings → Sales Channels.
- On the Manage Sales Channels page, click Create Channel Group.
- Fill out the required fields:
| Field | Description |
|---|---|
| Channel Group Name | Name of the Group. |
| Description | Brief explanation of the group’s purpose or included sales platforms. |
| Product / Category / Brand / Price List / Zone / Currency / Warehouse | Configuration fields to associate specific product ranges, pricing, and operational zones with the group. These ensure consistent business settings across all channels within the group. |
- Click Save to create the Channel Group.
- The new group appears in the list and can be selected during channel creation or modification.
Channel Group–Specific Configuration
When you assign Product, Category, Brand, Price List, Zone, Currency, or Warehouse to a Channel Group,
only those parameters apply to channels linked to that group.
This allows precise control over product visibility, pricing, and warehouse allocation.
Example:
If a Channel Group is linked to a particular warehouse and price list,
only products available in that warehouse and price list will appear for connected channels.
Editing a Channel Group
Steps:
- Open the Channel Groups list.
- Click the Edit icon beside the group.
- Modify the name, description, or linked configurations.
- Click Save to update.
Need Help?
To expand your sales channel limit or resolve configuration issues,
contact O2VEND Support via the Admin Panel or official email support.