How to Create an Online Store in O2VEND
Create your online store, POS billing workflow, GST-ready business setup, and inventory workspace from one O2VEND account. This guide walks through sign-in, store creation, business details, address setup, and the next steps you should complete before going live.
Free Omnichannel Setup Guide
Launch ecommerce, POS, inventory, and back office from a single dashboard.
O2VEND helps retailers run online and in-store selling together, with one login for store creation, business setup, stock visibility, and everyday operations.
Ready to try? Create your free store now – it takes only minutes.
Create your free store and access POS, inventory & ecommerce in minutes.
What you can launch from one O2VEND account
Ecommerce setup
Configure payments, shipping, delivery zones, and storefront experience.
CheckoutPOS billing
Run fast counter billing with connected products, pricing, and payment modes.
Control CenterBack office
Manage users, taxes, billing, and store-level operations from one place.
CatalogProducts and inventory
Maintain products, pricing, stock, and catalog data before you go live.
Watch the store setup walkthrough
Use this short walkthrough to see the sign-in flow, store creation sequence, and the first dashboard view after setup.
Step 1: Sign in or create your free store
Go to the O2VEND sign-in page and verify your email using OTP.
- Click Create Your Free Store (new users) or Login (existing users)
- Enter your business email address
- Check your inbox and enter the OTP
- After verification, access your dashboard to continue setup
O2VEND Platform Modules
Explore all O2VEND modules and resources from one place:
Product Modules
- POS Billing Software – Fast billing & checkout
- Ecommerce Platform – Online store & orders
- Back Office Dashboard – Central business control
- Inventory Management – Stock & location tracking
Learn the Essentials of E-commerce!
This blog explains what e-commerce is, how it works, and how to start selling products online successfully.
Read the Full BlogNeed more detail? See Create Online Store and Store Initial Setup Guide.
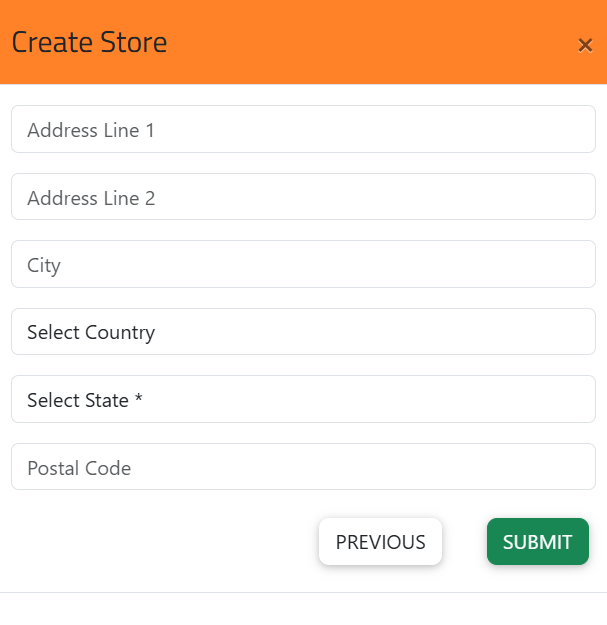
Select Submit to finish the store creation flow.
Step 5: Review store URLs, status, and subscription
After setup, your stores appear inside My Stores, which acts as the control center for multi-store operations.
Each store record can include:
- Back Office URL for configuration and administration
- POS URL for in-store billing
- Ecommerce URL for customer-facing online selling
- Sales Agent App URL for field or assisted sales workflows
- Status such as active, paused, or closed
- Plan information for billing and feature access
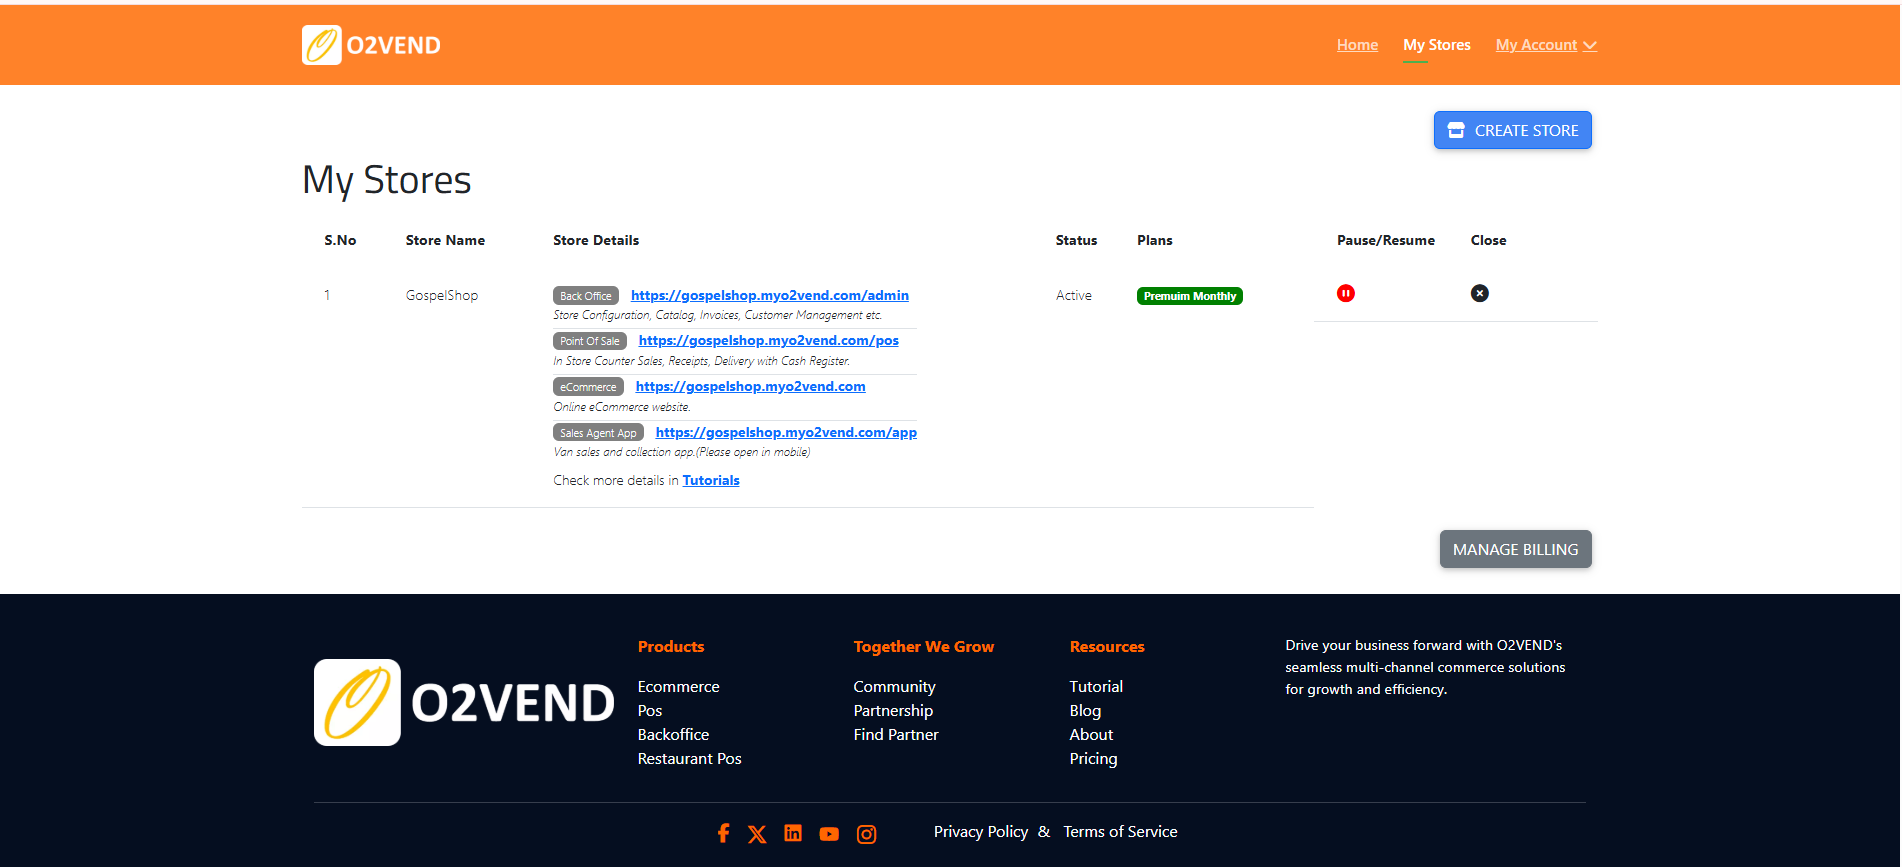
From here you can pause or resume a store, close a branch when required, or continue with Manage Store Settings and Manage Billing & Subscription.
Related Topics
Once your store is created, continue with:
- Configure Products & Inventory
- Set Up POS Billing
- Manage Taxes & GST Settings
- View Sales & Purchase Reports