🗺️ Delivery Area Setup in O2VEND (Beat Creation Guide)
Learn how delivery planning works in O2VEND using Beats, Routes, Beat Runs, and Route Runs.
This guide explains the delivery structure and provides a step-by-step walkthrough to create a Beat (delivery area) in O2VEND Back Office.
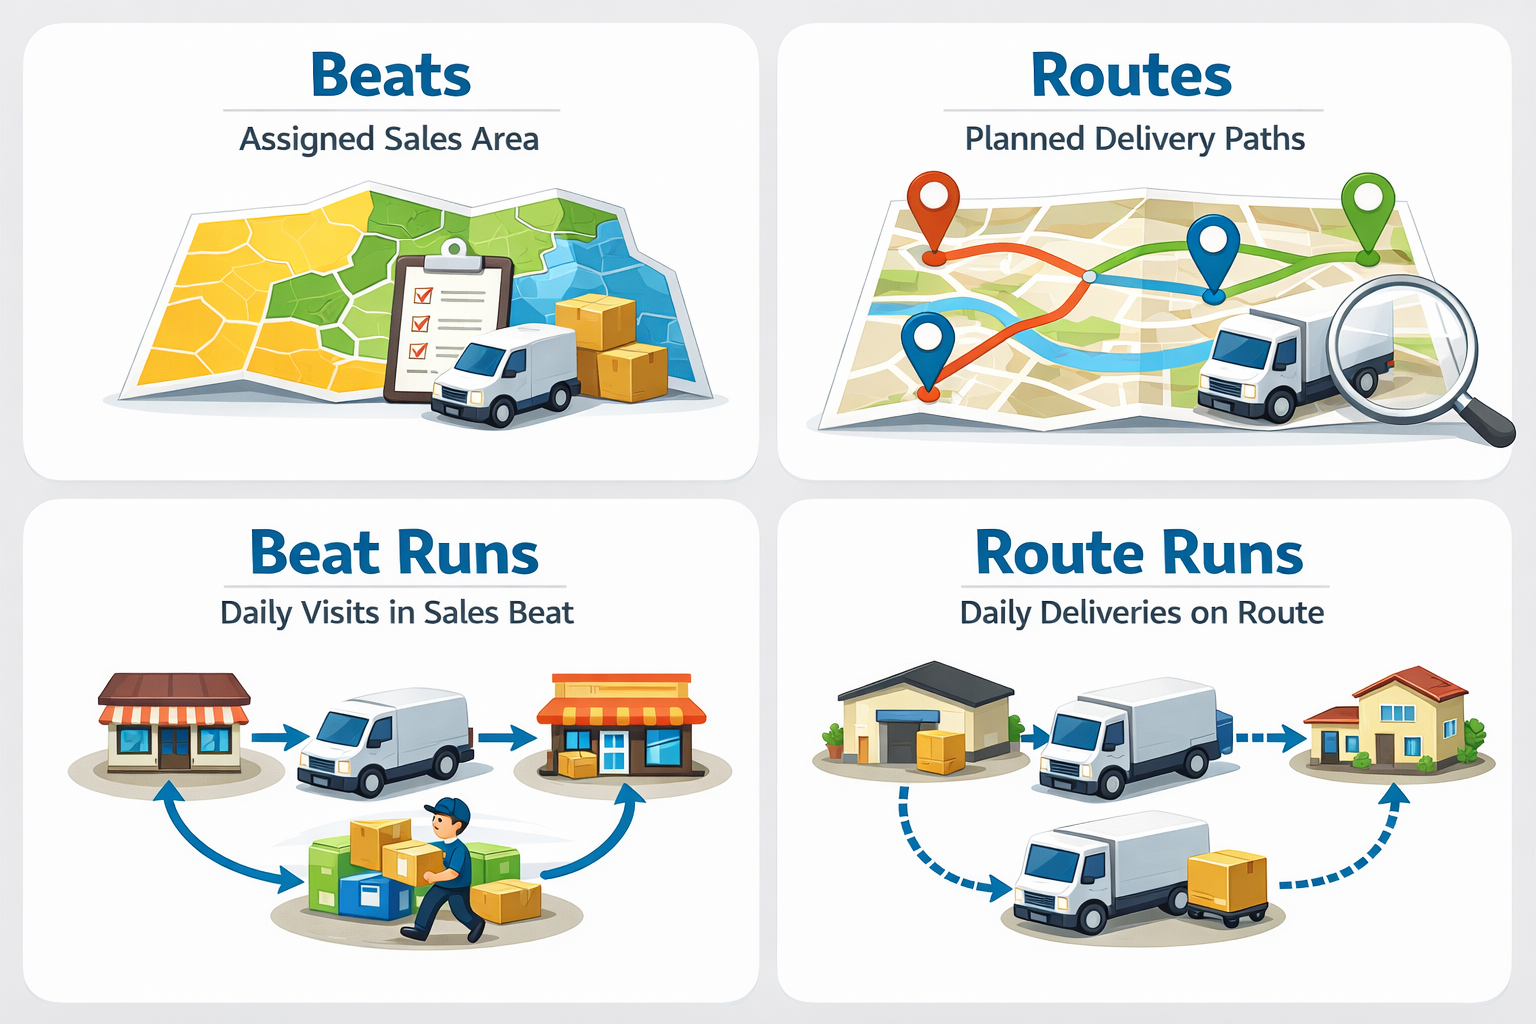
This image shows how delivery areas, routes, and daily delivery runs are connected in O2VEND.
🚚 Delivery Workflow Explained in 4 Steps
- Beat → Delivery area (location-based grouping)
- Route → Delivery path inside the beat
- Beat Run → Planned delivery schedule
- Route Run → Actual delivery execution
This structured workflow improves delivery accuracy and planning.
What This Guide Covers
This page explains:
- Meaning of a Beat (delivery area)
- Location of Beat settings in O2VEND Back Office
- Step-by-step process to create a Beat
Related delivery guides:
Create Beat in O2VEND Back Office – Delivery Area Setup Guide
Learn what a Beat is and how to create a Beat in O2VEND Back Office. Step-by-step guide to assign delivery areas, customers, shipping classes, and riders.
What is a Beat in O2VEND? Create & Manage Delivery Beats Easily
Understand what a Beat means in O2VEND and how to create one in Back Office. Simple steps to assign customers, riders, and delivery areas.
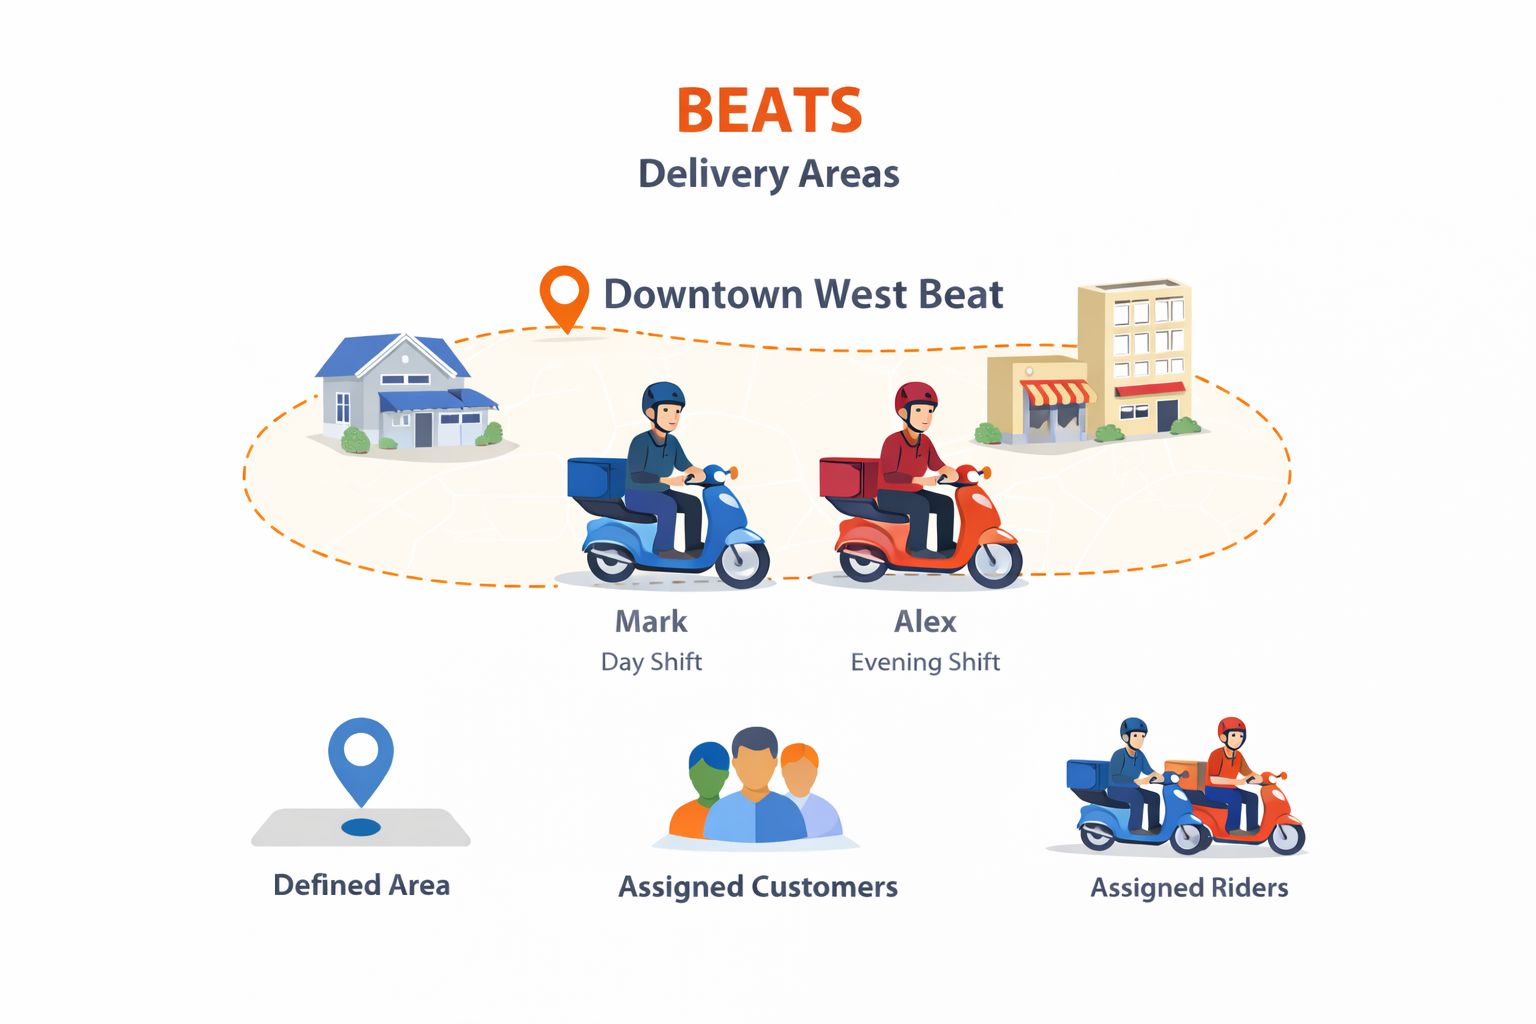
A Beat is a defined delivery area used to organize customers and deliveries.
In simple words:
Beat = Area where deliveries happen
Each beat contains:
- A specific location / area
- Assigned customer groups
- Assigned delivery riders
Using beats helps businesses deliver orders faster and more accurately.
Why Beats Are Important
- Organizes customers by location
- Makes delivery planning easy
- Avoids rider confusion
- Improves on-time deliveries
O2VEND Beat Setup – Back Office Navigation & Beat Creation
Follow the O2VEND Back Office path to create a Beat. Learn beat navigation, field explanations, and delivery area setup in this easy guide.
O2VEND Back Office → Beat & Route → Beat
O2VEND Beat Management – Delivery Area, Riders & Customers
➕ Steps to Create a New Shipment Beat
- Open Beat & Route
- Select Beat
- Click Create Beat
The Create Beat screen appears.
Create Beat – Field-Level Explanation
The Create Beat screen is used to define a delivery area and assign delivery rules, customers, and riders.
Each field on this screen plays a role in accurate delivery planning and execution.
🔹 Name
Specifies the delivery area name.
Example shown:
Anna Nagar East
🔹 Code
A unique short code for identifying the beat internally.
Example shown:
ANE01 (Anna Nagar East)
🔹 Description
Provides additional details about the delivery area.
Example shown:
Covers Anna Nagar East residential area
Helps teams clearly understand area coverage.
Shipping Classes
Defines the delivery type applicable to this beat.
Example shown:
Regular Delivery
Ensures orders are routed correctly based on delivery rules.
Customer Groups
Assigns customers who belong to this delivery area.
Example shown:
Retail Customers – Anna Nagar
Orders from these customers are automatically mapped to this beat.
Riders
Delivery personnel assigned to handle deliveries in this beat.
Example shown:
Ravi – Morning Shift
Only assigned riders can deliver orders within this area.
Save Action
Click Save (top-right corner) to complete beat creation.
Once saved, the beat becomes available for:
- Route creation
- Beat Run planning
- Daily delivery assignment
- Delivery tracking and reports
What Happens After Beat Creation?
Once a beat is created, it can be used to:
- Create Routes
- Plan Beat Runs
- Assign daily deliveries
- Track delivery execution