Integrate Shopify with O2VEND | Orders, Inventory & Webhooks Setup
Shopify users can connect their store with O2VEND to use POS, Back Office, apps, inventory, eCommerce, and accounting, and manage online and in-store sales from one platform.
Integrate Shopify with O2VEND to automatically sync orders in real time and manage inventory and fulfillment from one platform. This step-by-step guide explains API access, webhooks, and configuration to reduce manual work and improve operational accuracy.
Why Integrate Shopify with O2VEND?
Integrating Shopify with O2VEND streamlines Ecommerce operations and supports scalable business growth.
- Automatic synchronization of Shopify orders into O2VEND
- Centralized management of orders and inventory
- Real time order creation using Shopify webhooks
- Reduced manual data entry and processing errors
- Improved order fulfillment speed and efficiency
Common Shopify Integration Use Cases
The Shopify�O2VEND integration supports multiple real-world business scenarios:
- Retailers managing both physical POS stores and Shopify online stores from one system
- Brands syncing Shopify online orders directly into O2VEND Sales Orders
- Businesses maintaining real-time inventory accuracy across POS and Shopify
- Operations teams automating order creation, payment updates, and cancellations
- Growing businesses integrating Shopify with accounting, logistics, and automation apps
Supercharge Shopify Operations with O2VEND
Explore how O2VEND Back Office enhances Shopify operations through seamless integration flows, centralized order management, and efficient inventory and fulfillment control.
Step 1: Create or Access a Shopify Account
Step 1: Register for a Shopify account at: https://accounts.shopify.com
Step 2: If an account already exists, log in to the Shopify Admin Panel.
Step 2: Create a Custom App in Shopify
A Shopify custom app is required to generate the Admin API access token used for integration with O2VEND.
Step 1: Log in to the Shopify account.
Step 2: From the Shopify admin panel, navigate to Apps.
Step 3: Click Apps and sales channel settings.
Step 4: Select Develop apps.
Step 5: Click Allow custom app development.
Step 6: Click Create app.
Step 7: Enter an App Name and click Create app.
Step 3: Configure Admin API Access
Step 1: Open Admin API integration within the created app.
Step 2: Select the required Admin API access scopes based on integration requirements.
Step 3: Click Save.
Step 4: Click Install app.
Step 5: After installation, an Admin API Access Token is generated.
Important: The Admin API access token is displayed only once. Ensure the token is copied and stored securely.
Step 6: Copy the API Access Token and retain it in a secure location.
Step 4: Configure Shopify Sales Channel in O2VEND
To continue with the integration, the Shopify sales channel must be enabled in O2VEND.
Important: Contact O2VEND Support to enable the Shopify sales channel for the account.
Shopify Integration with O2VEND
Connect Shopify with O2VEND to enable real-time order synchronization, centralized inventory management, and streamlined fulfillment through a single platform.
Step 1: Navigate to Back Office – Settings – Sales Channel – Shopify.
- Click the Create Channel button on the top-right side of the screen.
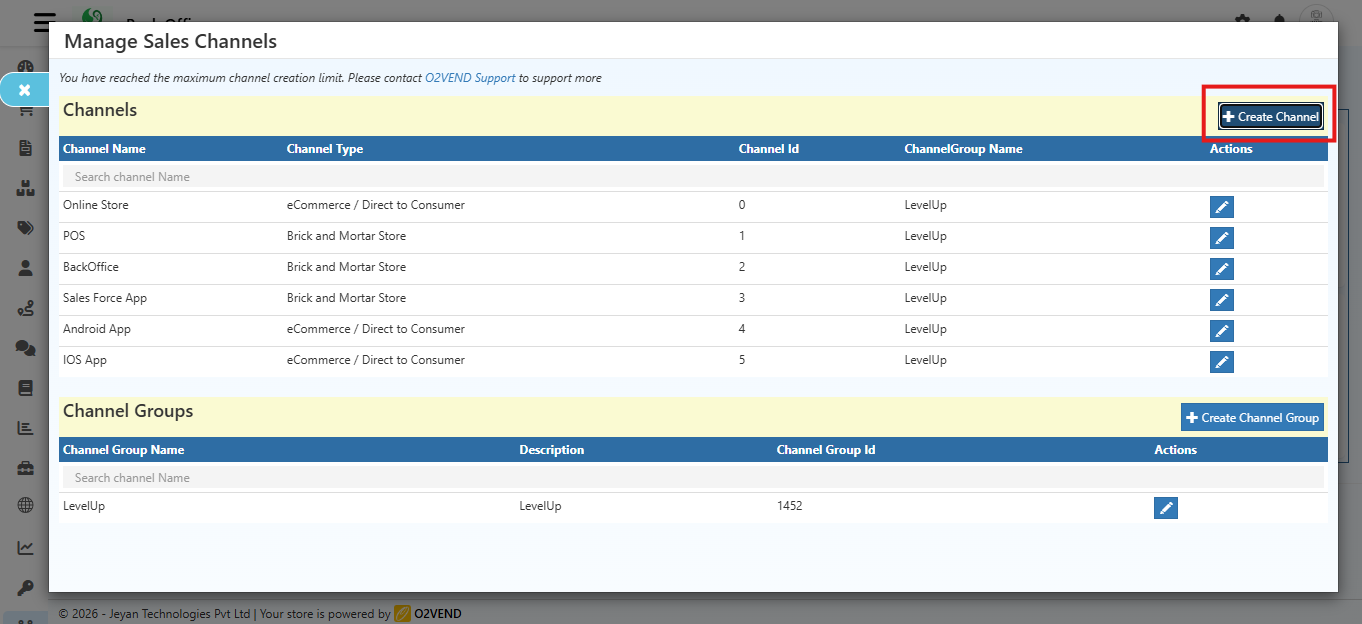
Initial Screen
The Create Channel form will display the following fields:
- Channel Id
- Channel Name
- ChannelGroup Name
- Channel Type
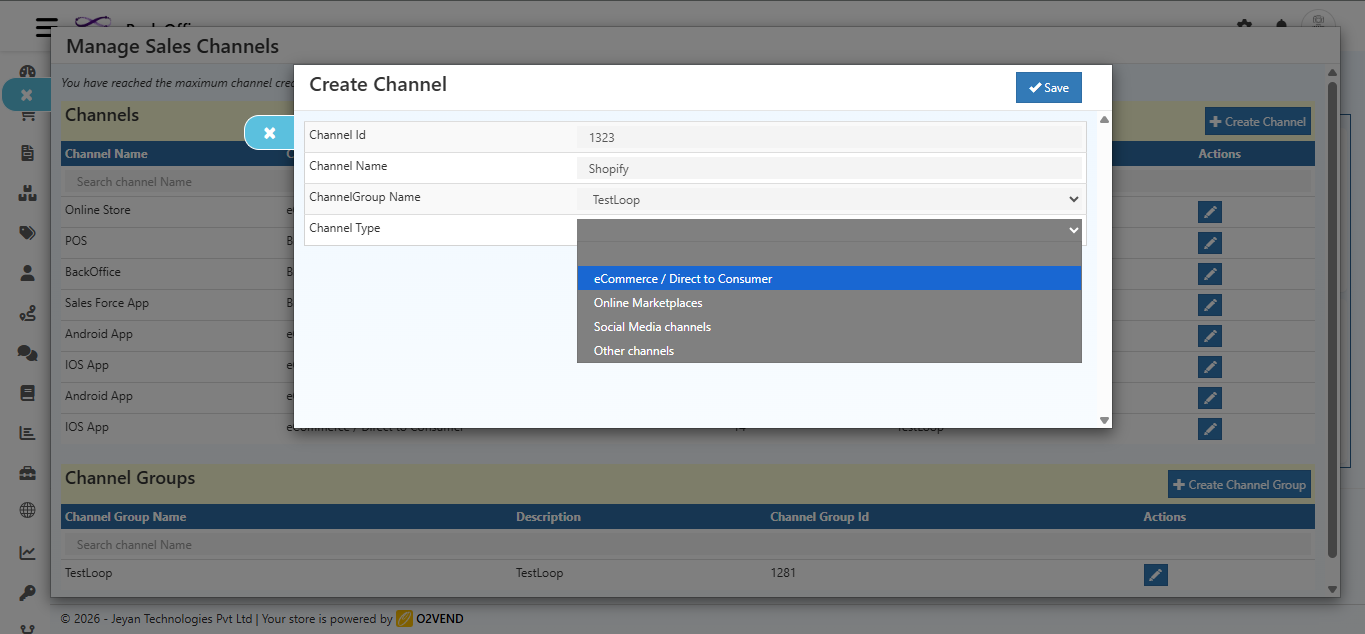
Select Channel Type
- Click the Channel Type dropdown.
- Choose eCommerce / Direct to Consumer.
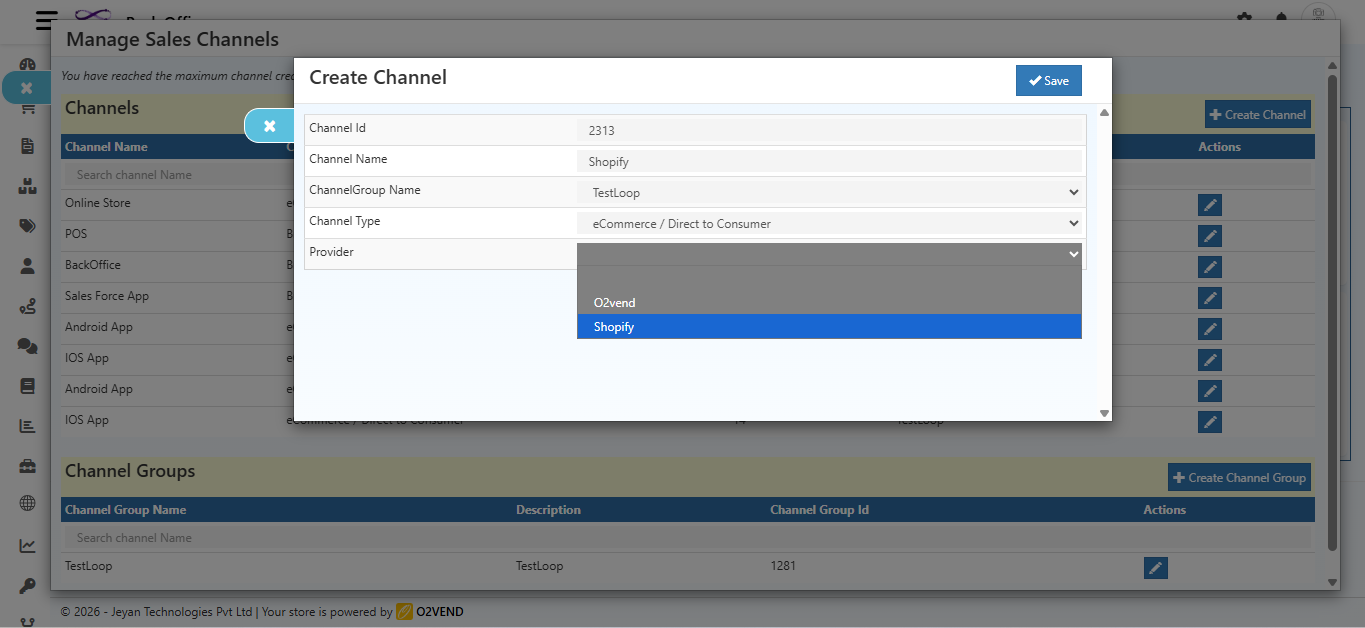
Select Provider
- After selecting eCommerce / Direct to Consumer, a new field Provider will appear.
- Click the Provider dropdown.
- Select Shopify.
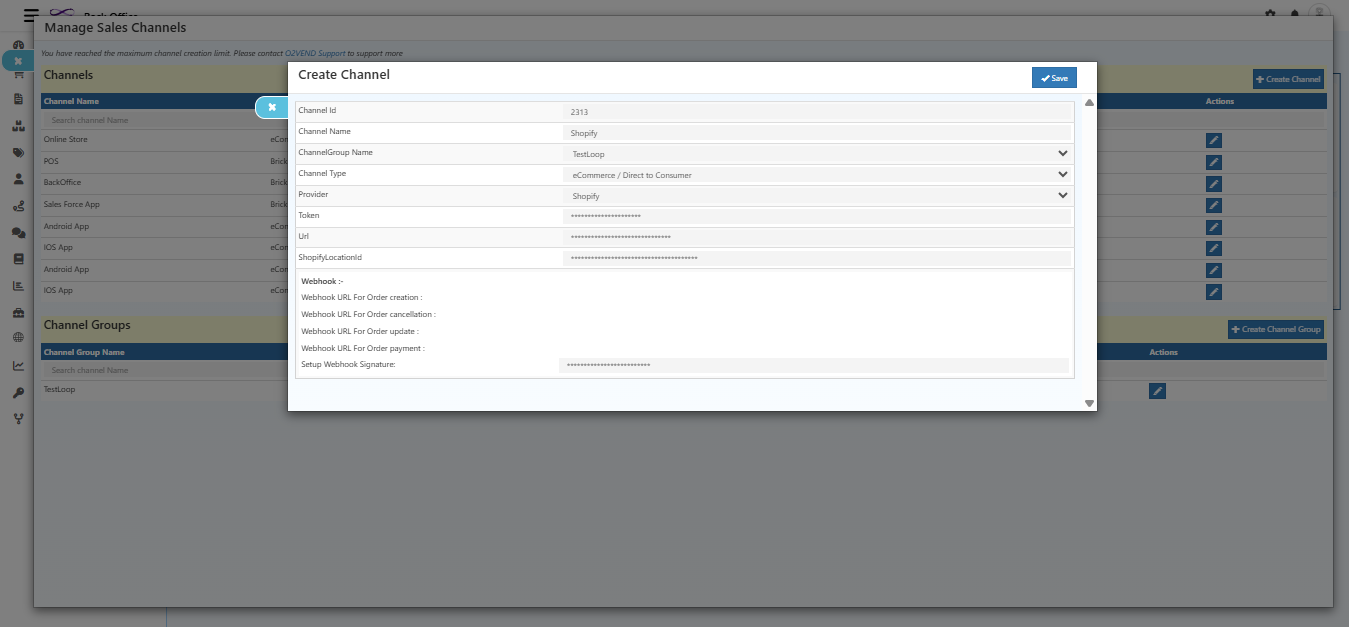
Additional Fields Appear
Once Shopify is selected, the following fields will appear on the same screen:
- Token
- URL
- ShopifyLocationId
- Webhook URL for Order Creation
- Webhook URL for Order Cancellation
- Webhook URL for Order Update
- Webhook URL for Order Payment
- Setup Webhook Signature
Field Details
| Field | Description |
|---|---|
| Channel Id | Unique identifier for the Shopify sales channel. |
| Channel Name | Friendly name for the Shopify store integration. |
| ChannelGroup Name | Used to group Shopify with related sales channels. |
| Channel Type | Select eCommerce / Direct to Consumer. |
| Provider | Select Shopify from the dropdown. |
| Token | Admin API Access Token generated from Shopify Custom App. |
| URL | Shopify store URL (example: https://store-name.myshopify.com). |
| ShopifyLocationId | Location ID configured in Shopify for inventory syncing. |
| Webhook URL – Order Creation | URL used to receive new order notifications from Shopify. |
| Webhook URL – Order Cancellation | URL to capture cancelled orders. |
| Webhook URL – Order Update | URL to capture order status updates. |
| Webhook URL – Order Payment | URL to receive payment updates. |
| Setup Webhook Signature | Secret signature generated by Shopify for webhook validation. |
Step 2: Paste the Admin API Access Token into the configuration field.
Step 3: Save the configuration.
Notes
- Always select Channel Type – eCommerce / Direct to Consumer before choosing Provider ? Shopify.
- Generate the Admin API Access Token from a Shopify Custom App.
- Configure Shopify webhooks using the URLs shown in this screen.
- Keep API tokens and webhook signatures secure.
- Click Save after completing all required fields.
Enable Shopify Integration
Go to: Back Office – Integrations – Order
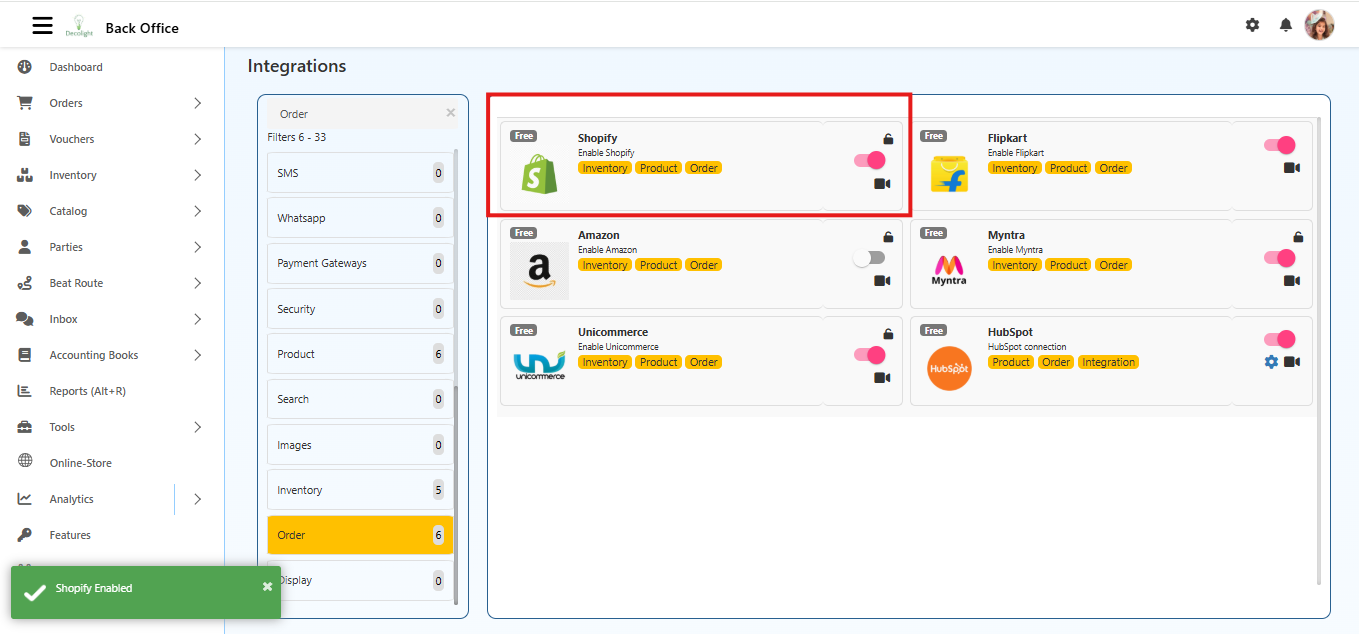
Process
Select Shopify from the integrations list.
Click the toggle switch for Shopify to enable the integration.
Once enabled, Shopify supports:
- Order Synchronization
- Inventory Sync
- Product Management
- Payment & Order Status Updates
Step 5: Create Shopify Webhook for Order Creation
Shopify webhooks notify O2VEND automatically when a new order is created.
Step 1: Open the Shopify Admin Panel.
Step 2: Click Settings.
Step 3: Navigate to Notifications.
Step 4: Scroll to the bottom and click Create webhook.
Step 5: In the Event field, select Order creation and choose JSON as the format.
Step 6: Copy the Webhook URL for Order Creation from:
Back Office – Settings –Sales Channel – Shopify.
Step 7: Paste the copied Webhook URL into the Shopify webhook URL field.
Step 8: Select the Webhook API version as 2023–07.
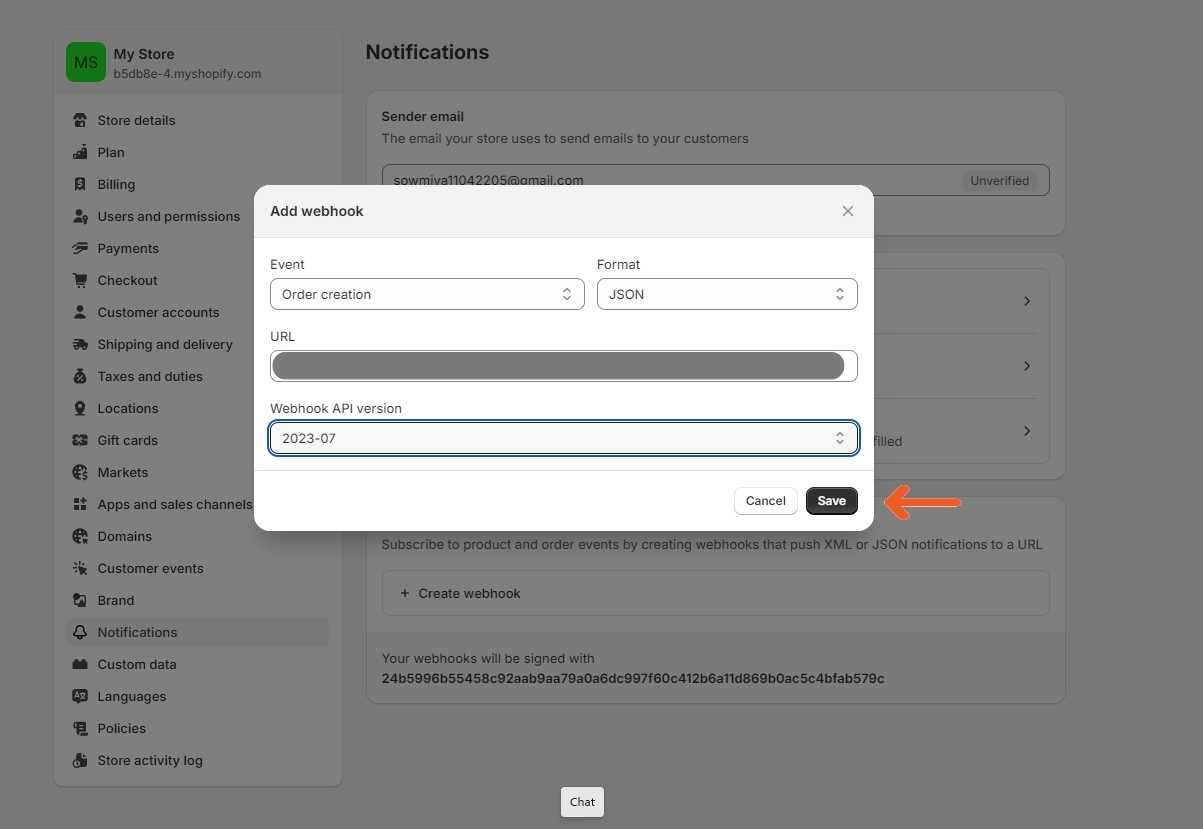
Step 9: Click Save.
Step 6: Generate and Configure Webhook Signature
Step 1: After saving the webhook, Shopify automatically generates a Webhook Signature.

Step 2: Copy the generated Webhook Signature.
Step 3: Navigate to Back Office – Settings – Sales Channel – Shopify in O2VEND.
Step 4: Paste the Webhook Signature into the designated field.
Step 5: Click Save.
Integration Status
Once both the Admin API access token and webhook signature are configured successfully, the Shopify integration with O2VEND becomes active.
All newly created Shopify orders will be automatically recorded in O2VEND, ensuring consistent order synchronization and streamlined processing.
Related Integration Tutorials
Below are additional tutorials and integration guides that complement the Shopify integration workflow. These resources help extend Shopify automation with payment, webhook, shipment, and compliance setups.
O2VEND Webhook Integration
Learn how webhooks deliver real-time events (orders, products, inventory, shipment) from Shopify to O2VEND.Razorpay Payment Gateway Integration
Configure Razorpay for handling online payments for Shopify orders synced into O2VEND.XpressBees Shipment Gateway Integration
Automate shipping and tracking updates for Shopify orders using XpressBees within O2VEND.Myntra Order Integration
Understand how marketplace order sync works � useful for Shopify + marketplace hybrid setups.E-Way Bill Integration
Learn how E-Way Bill automation works for Shopify orders that require tax compliance and transport documentation.
Related Blog Reading
Shopify, Square & O2VEND POS Compared � Which Multichannel Platform Powers Your US Store in 2025 A detailed comparison of Shopify, Square, and O2VEND POS, highlighting key differences in multichannel selling, integrations, and scalability for US retailers.
Shopify vs Zoho Inventory vs GoFrugal � A Practical Migration Checklist for Indian Retailers Moving to O2VEND A step-by-step migration guide comparing Shopify, Zoho Inventory, and GoFrugal, helping Indian retailers plan a smooth transition to O2VEND.
Explore O2VEND Integrations
Connect Shopify and other platforms with O2VEND to manage orders, inventory, and fulfillment from a single back office.