IP Whitelisting Features in O2VEND
The IP Whitelisting configuration screen is used to restrict backend access based on approved IP addresses. When this feature is enabled, the selected user will be allowed to log in only from the configured IP addresses. This helps prevent unauthorized access and improves overall system security.
This is an action-based configuration screen where administrators can add, edit, or remove IP addresses and apply the changes using the Save option.
Navigation Path
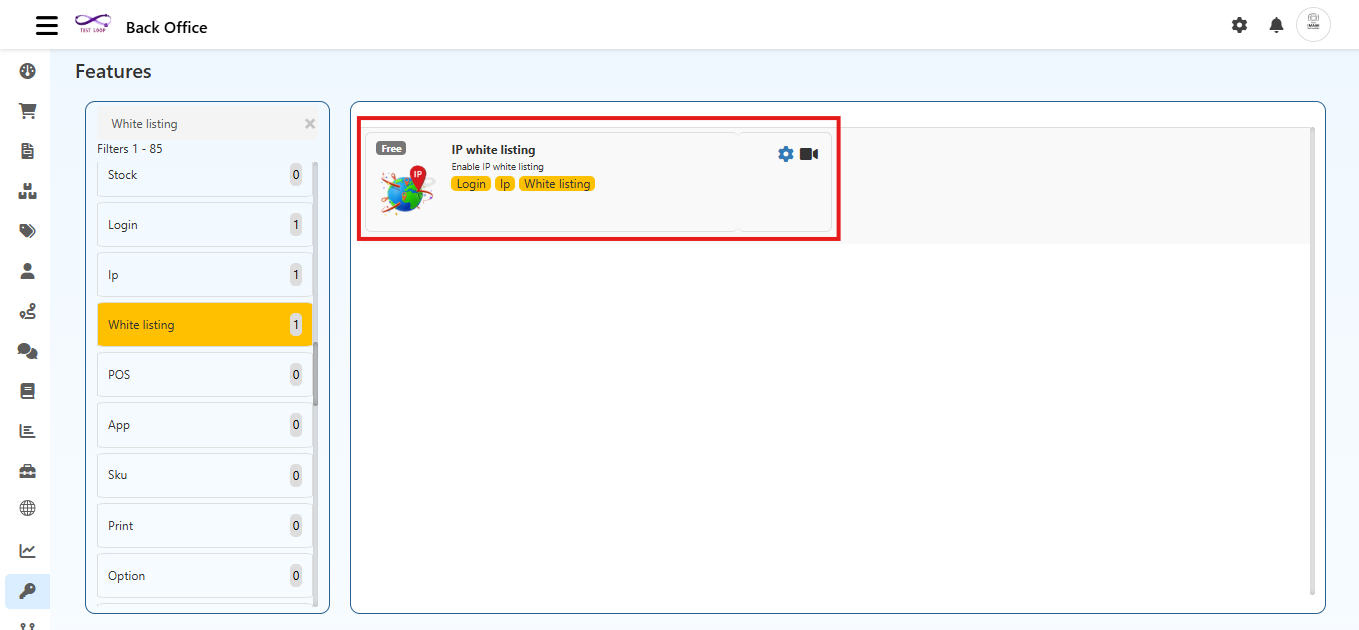
Back Office → Features → Whitelisting → IP Whitelisting
Purpose
IP Whitelisting ensures that system access is allowed only from trusted network locations. It is mainly used to:
- Protect sensitive backend data
- Prevent unauthorized logins
- Control access for selected backend user accounts
- Enforce organization security policies
Configuration Options
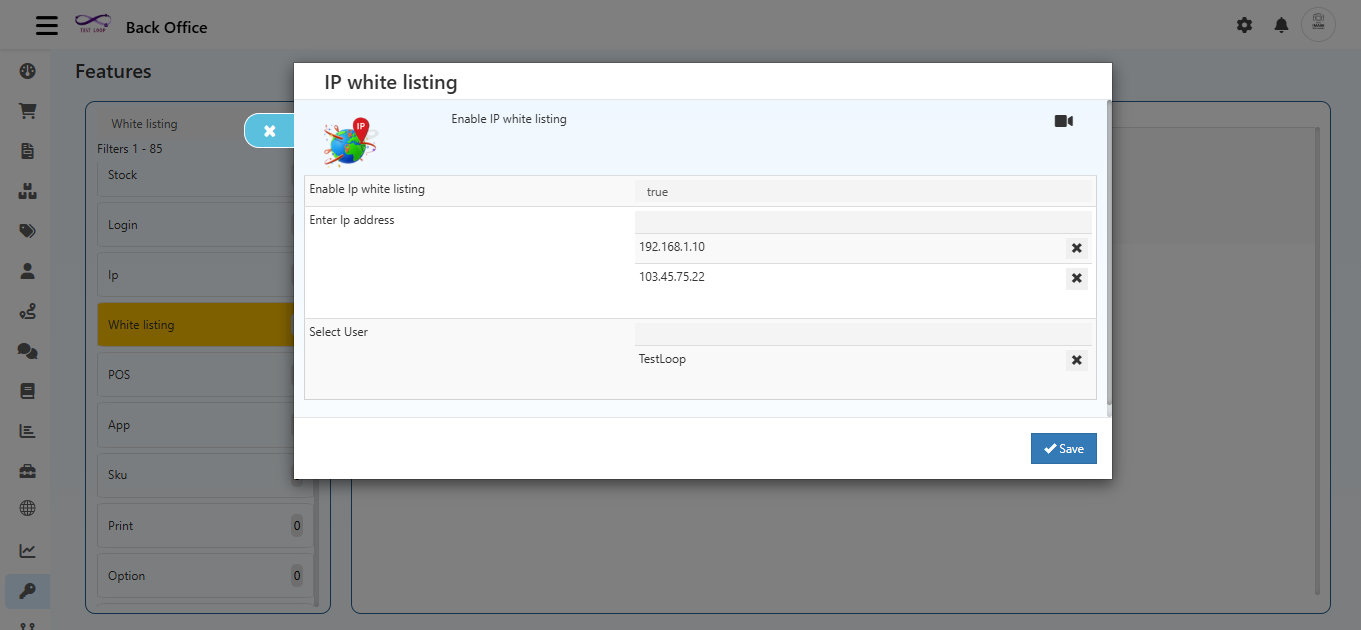
Enable IP White Listing
- Set this option to True to activate IP Whitelisting
- Set this option to False to disable IP restrictions
- When enabled, only the listed IP addresses can access the system
- When disabled, the user can log in from any network
Enter IP Address
One or more IP addresses can be added
Each IP can be edited or removed individually
Examples:
- 192.168.1.10 for internal network
- 103.45.75.22 for public network
Select User
- Choose the backend user to apply IP restrictions
- The rule will be enforced only for the selected user account
Save
- Applies and stores all configuration changes
- Settings become effective only after clicking Save
What Happens When Logging in From a Non Whitelisted IP
When IP Whitelisting is enabled and a login attempt is made from an IP address that is not listed in the allowed IP list, the system automatically blocks access and displays an error page.
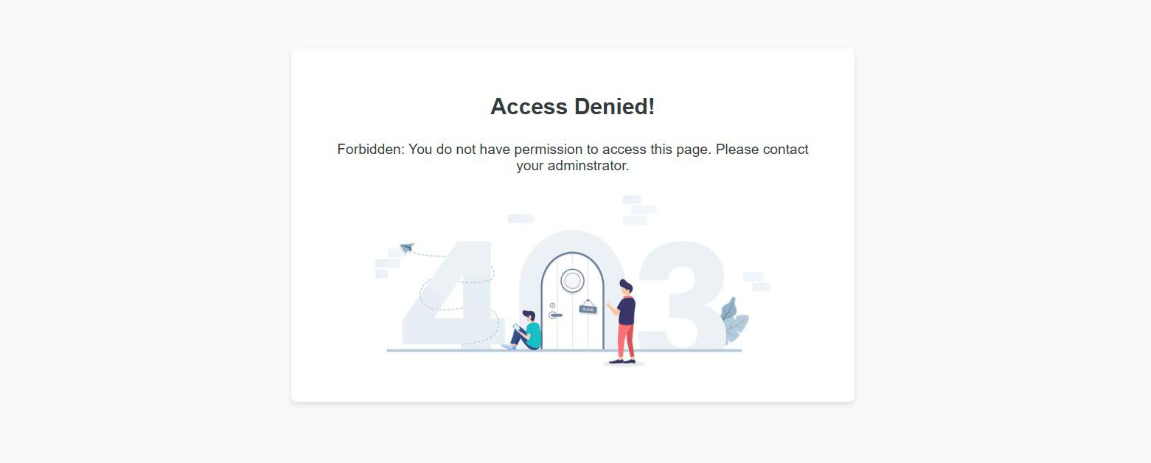
Displayed Message
Access Denied!
Forbidden: You do not have permission to access this page. Please contact your administrator.
This page appears whenever the login request comes from a non-whitelisted IP. The user will not be able to proceed until one of the following actions is taken:
- The current IP address is added to the whitelist by an administrator
- The user connects from an already approved IP
- IP Whitelisting is temporarily disabled by the administrator
How to Identify Your Current IP
To find your public IP address, open any browser and search for:
what is my IP
Use that address while configuring the whitelist to avoid access issues.
Outcome
Once saved, the selected user will be able to access the system only from the configured IP addresses. Any login attempt from an unlisted IP will display the Access Denied page with a 403 Forbidden message, ensuring secure and controlled access.