Flipkart Integration in O2VEND
This guide explains how to integrate Flipkart with the back-office system for seamless order, inventory, and product synchronization. Follow these steps to configure the channel and easily enable the integration.
Step 1: Navigate to Sales Channels
Go to: Back Office → Settings → Sales Channels
- Click the Create Channel button on the top-right side of the screen.
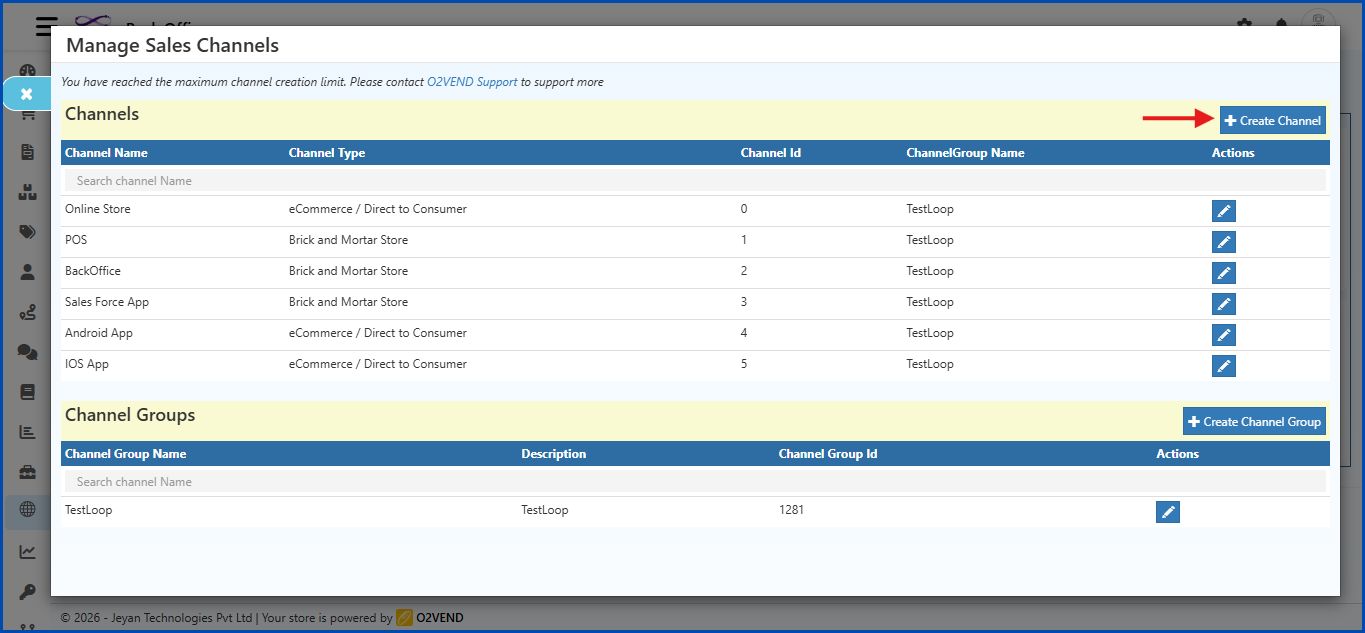
Initial Screen
The Create Channel form displays these fields:
- Channel Id
- Channel Name
- Channel Group Name
- Channel Type
Step 2: Select Channel Type
- Click the Channel Type dropdown.
- Choose Online Marketplaces.
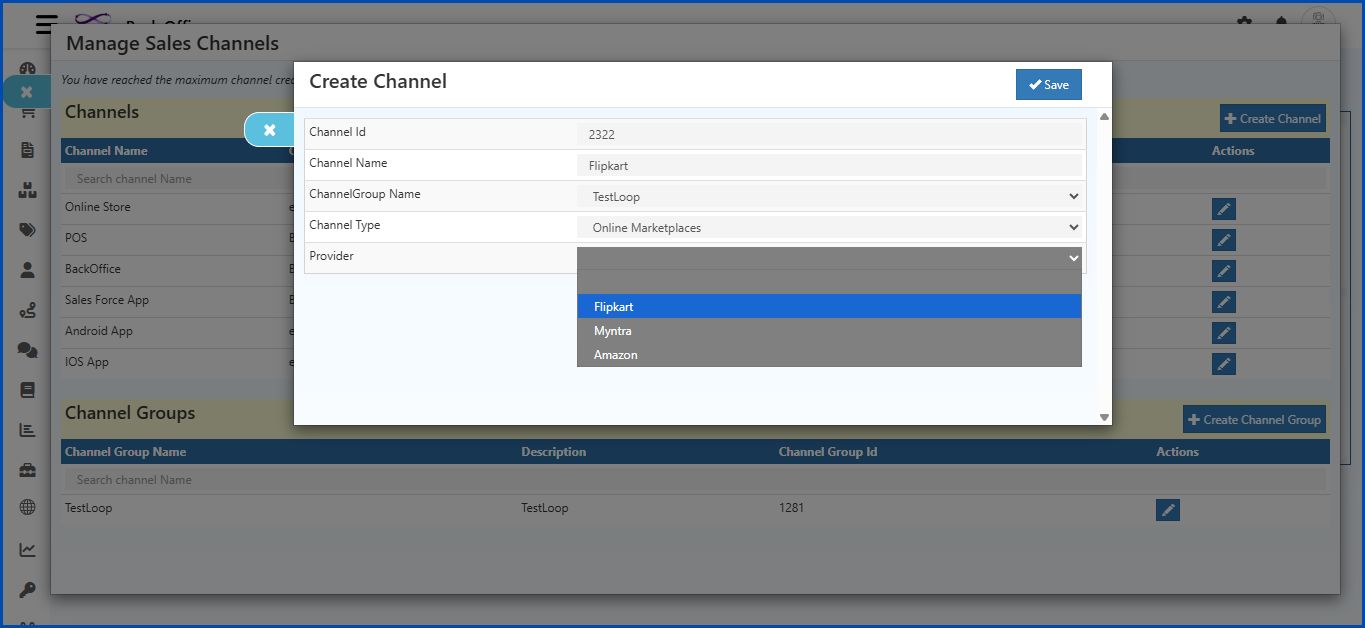
Step 3: Select Provider
- After selecting Online Marketplaces, a new field Provider will appear.
- Click the Provider dropdown.
- Select Flipkart.
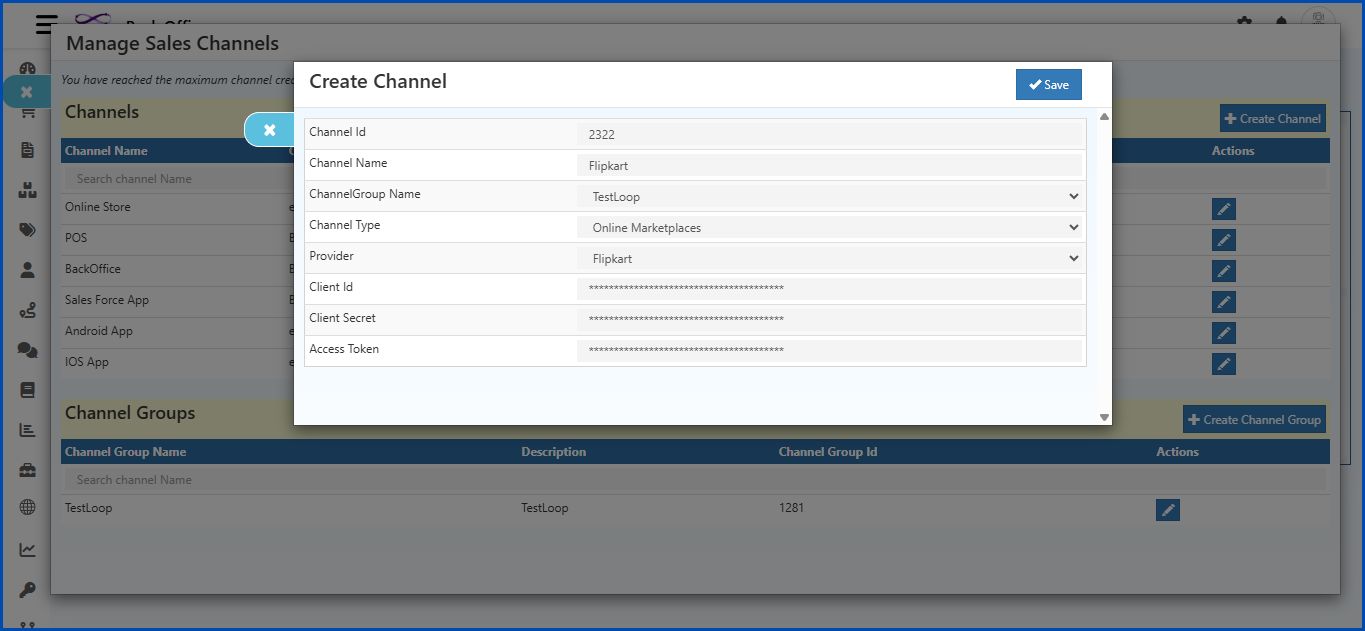
Step 4: Additional Fields Appear
Once Flipkart is selected, the following fields appear:
- Client Id
- Client Secret
- Access Token
Field Details
| Field | Description |
|---|---|
| Channel Id | A unique number for this channel. Enter a Channel ID. |
| Channel Name | A name for the channel, for example Flipkart. |
| ChannelGroup Name | A common name to group similar channels together. |
| Provider | Select Flipkart from the dropdown list. |
| Client Id | Enter the Client ID provided by Flipkart Seller Hub API credentials. |
| Client Secret | Enter the Client Secret provided by Flipkart Seller Hub API credentials. |
| Access Token | Token used for API authentication. Generated from Flipkart Seller Hub after authorization. |
- Click Save after completing all fields.
Step 5: Enable Flipkart Integration
Go to: Back Office → Integrations → Order
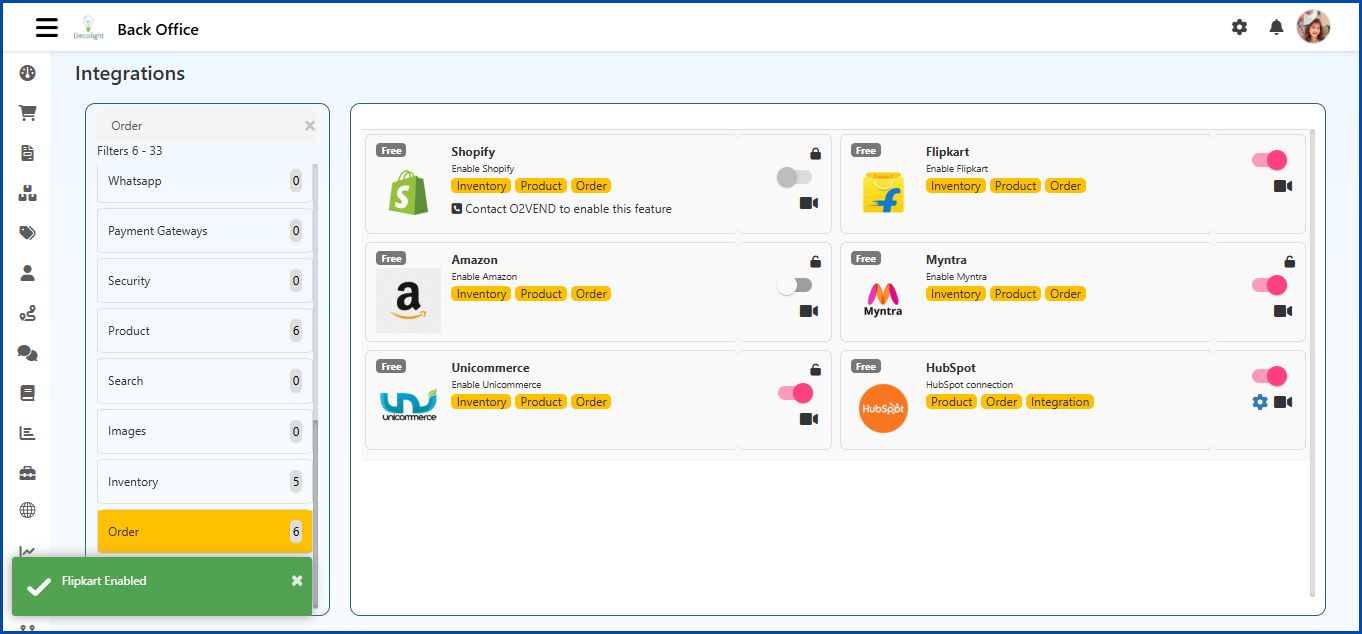
Process
- Select Flipkart in the list.
- Click the toggle switch to enable the integration.
- Once enabled, Flipkart supports Order Sync, Inventory, and Product management.