O2VEND POS Features
O2VEND POS system provides advanced retail billing features designed for inventory control, order management, credit sales, restaurant billing, and real-time store operations.
This page explains every POS feature toggle available in the system.
Location in Back Office
Navigation Path:
Back Office → Features → Order & Sales → Point of Sale (POS)
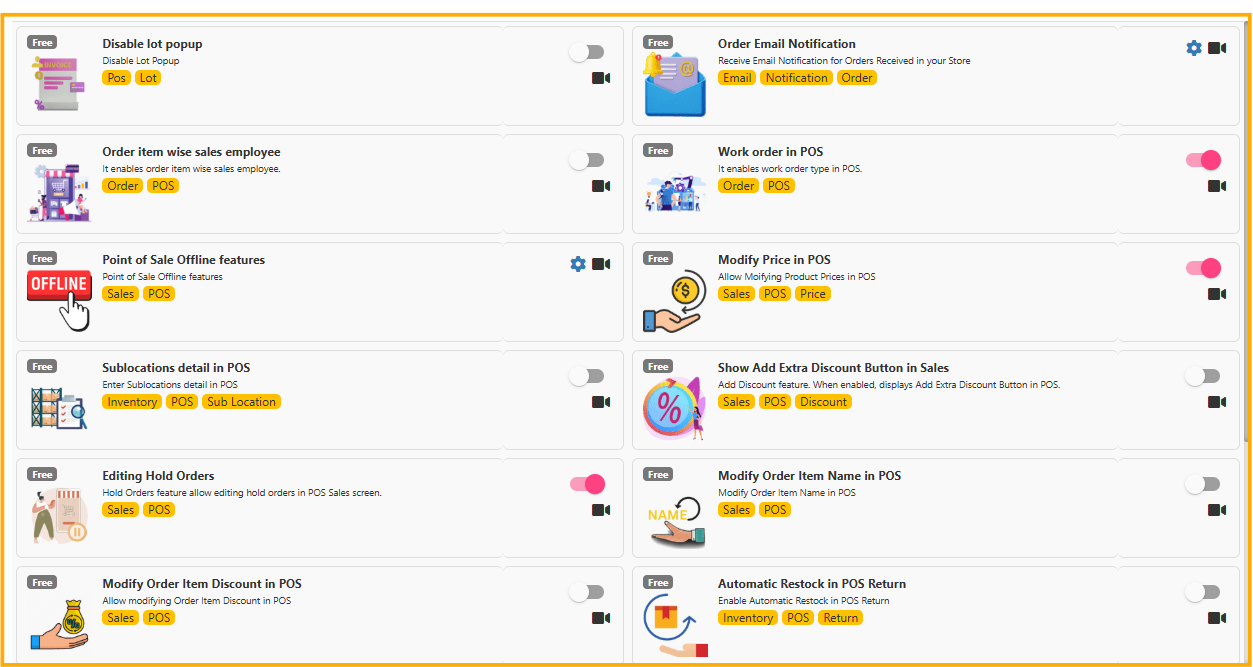
Disable Lot Popup in POS
Feature Purpose:
Disables lot selection popup during billing.
When to Use:
- If lot tracking is not mandatory
- Faster checkout process required
- Small retail stores without batch management
Impact: Improves billing speed by skipping lot selection step.
Order Email Notification
Automatically sends email notification when orders are received in the store.
Best For:
- Multi-branch retail stores
- Store managers monitoring orders
- Franchise operations
Benefit: Improves communication and order tracking.
Order Item Wise Sales Employee
Allows assigning a sales employee to each order item.
Use Case:
- Commission tracking
- Sales performance reporting
- Multi-staff billing counters
Benefit: Accurate employee-wise sales analytics.
Work Order in POS
Enables work order type billing in POS.
Best For:
- Tailoring shops
- Service centers
- Custom product businesses
Benefit: Tracks service-based or custom orders efficiently.
Point of Sale Offline Features
Allows POS billing even without internet connection.
How It Works:
- Transactions stored locally
- Syncs automatically once internet is restored
Benefit: No sales interruption during network issues.
Modify Price in POS
Allows modifying product price during billing.
Use Case:
- Negotiated pricing
- Clearance sales
- Manager approval billing
Control Tip: Restrict access to authorized users only.
Sublocations Detail in POS
Enables selecting sub-location within warehouse during billing.
Best For:
- Large warehouses
- Multi-rack inventory system
- Inventory precision tracking
Show Add Extra Discount Button in Sales
Displays an extra discount button in sales screen.
Use Case:
- Special customer discounts
- Festival promotions
- Staff-approved price reductions
Editing Hold Orders
Allows editing previously saved hold orders.
Best For:
- Customers returning to complete purchase
- Busy billing counters
- Large cart management
Modify Order Item Name in POS
Allows editing item name during billing.
Use Case:
- Custom product naming
- Manual entry corrections
- Restaurant special instructions
Modify Order Item Discount in POS
Enables manual discount modification per product.
Benefit: Flexible pricing control during checkout.
Automatic Restock in POS Return
Automatically restocks inventory when return is processed.
Best For:
- Retail stores with frequent returns
- Accurate stock reconciliation
Show Product Image in POS Sales
Displays product image in sales screen.
Benefit:
- Faster product identification
- Reduces billing mistakes
- Improves cashier confidence
POS Credit Sale
Enables credit sale option in POS.
Use Case:
- Trusted customers
- B2B retail clients
- Account-based billing
Important: Monitor credit limits carefully.
Credit Sales Invoice Return Items
Allows processing returns for credit sales invoices.
Benefit:
- Accurate credit adjustment
- Transparent accounting
Show No Stock Message
Displays alert when product stock is unavailable.
Benefit: Prevents negative inventory and overselling.
Change POS Search to Restaurant Mode
Switches POS to restaurant-style search.
Best For:
- Cafes
- Restaurants
- Quick-service outlets
Z Report
Generates daily Z Report including:
- Total sales
- Cash collection
- Payment breakdown
- Notes and coin adjustments
Best Practice: Generate Z Report at end of every business day.
Why These POS Features Matter
O2VEND POS configuration allows:
- Retail billing automation
- Inventory control
- Employee performance tracking
- Offline billing capability
- Credit management
- Restaurant billing mode
- Automated stock return handling
Proper configuration improves:
- Billing speed
- Inventory accuracy
- Financial reporting
- Customer satisfaction