Stripe Integration in O2VEND
When O2VEND integrates Stripe, it's easy for users to pay for products on the platform. Stripe simplifies online buying and payments for businesses and individuals, making transactions smooth. Many customers prefer Stripe for its user-friendly payment process. Stripe enables international payments as well.
These easy-to-follow steps will guide you through the Stripe payment gateway process seamlessly.
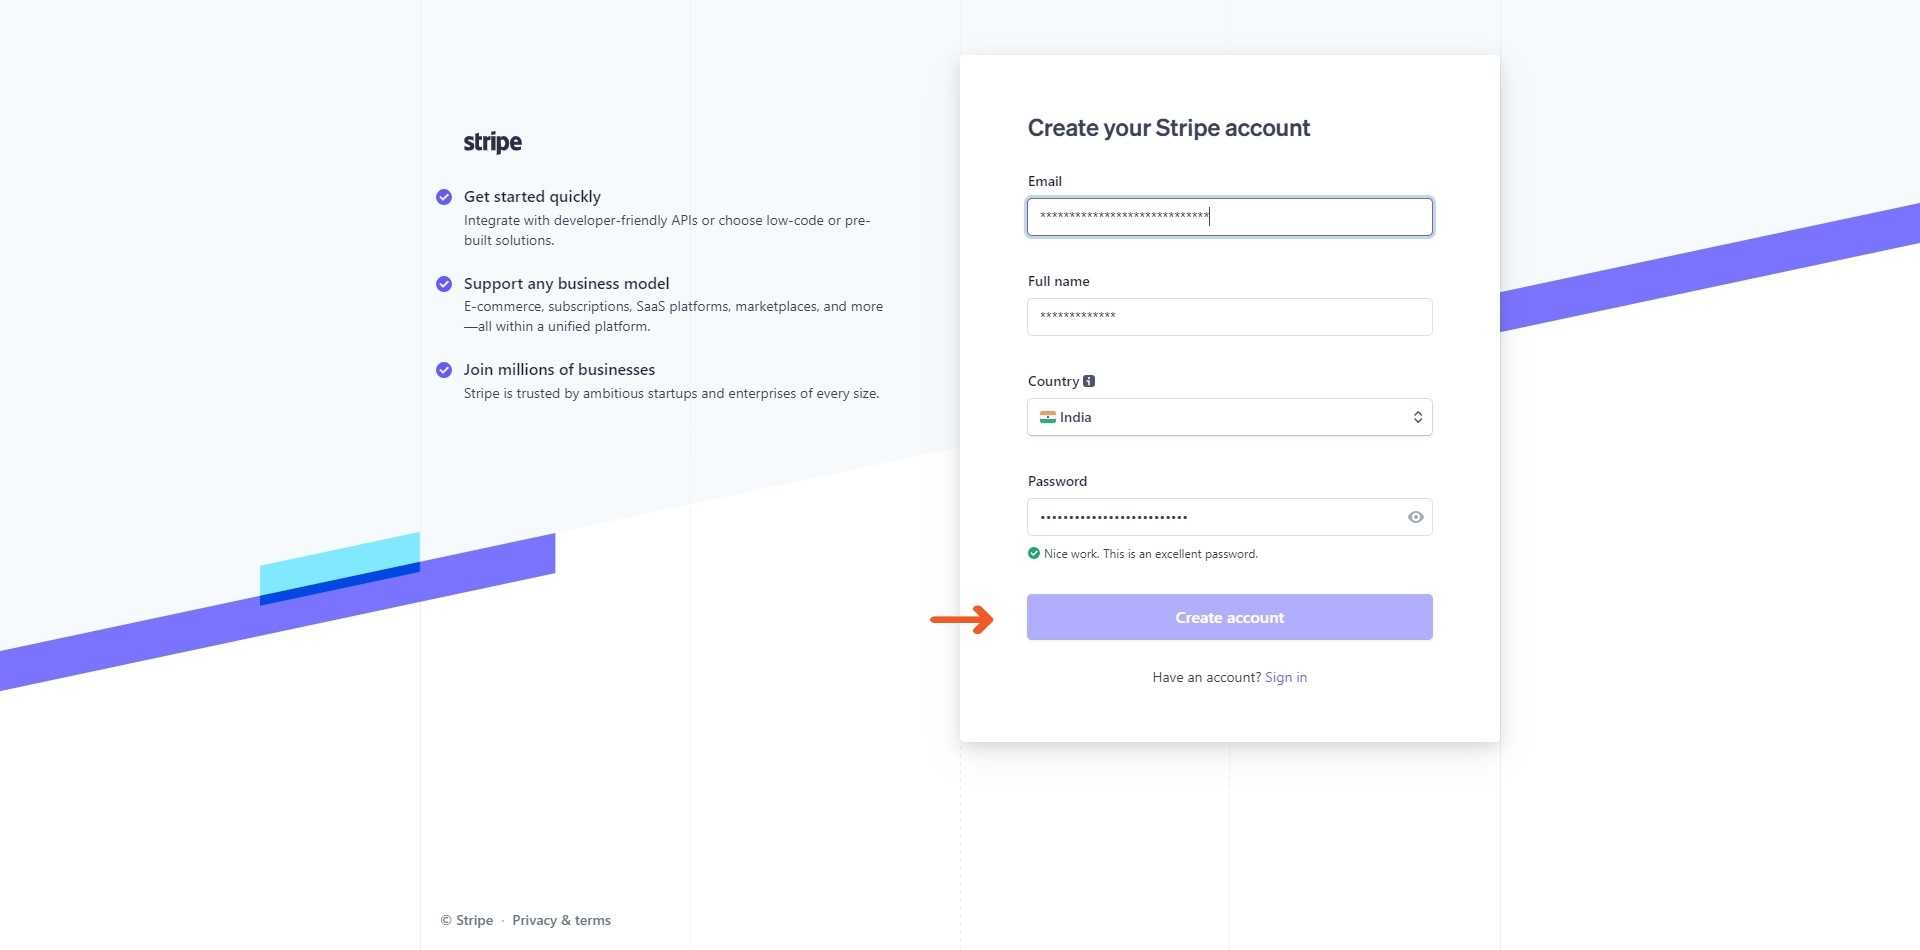
STEP-1: Click Here for Registration
STEP-2: To sign up, provide your email, full name, country, and password. After finishing, Click the "Create Account" button.
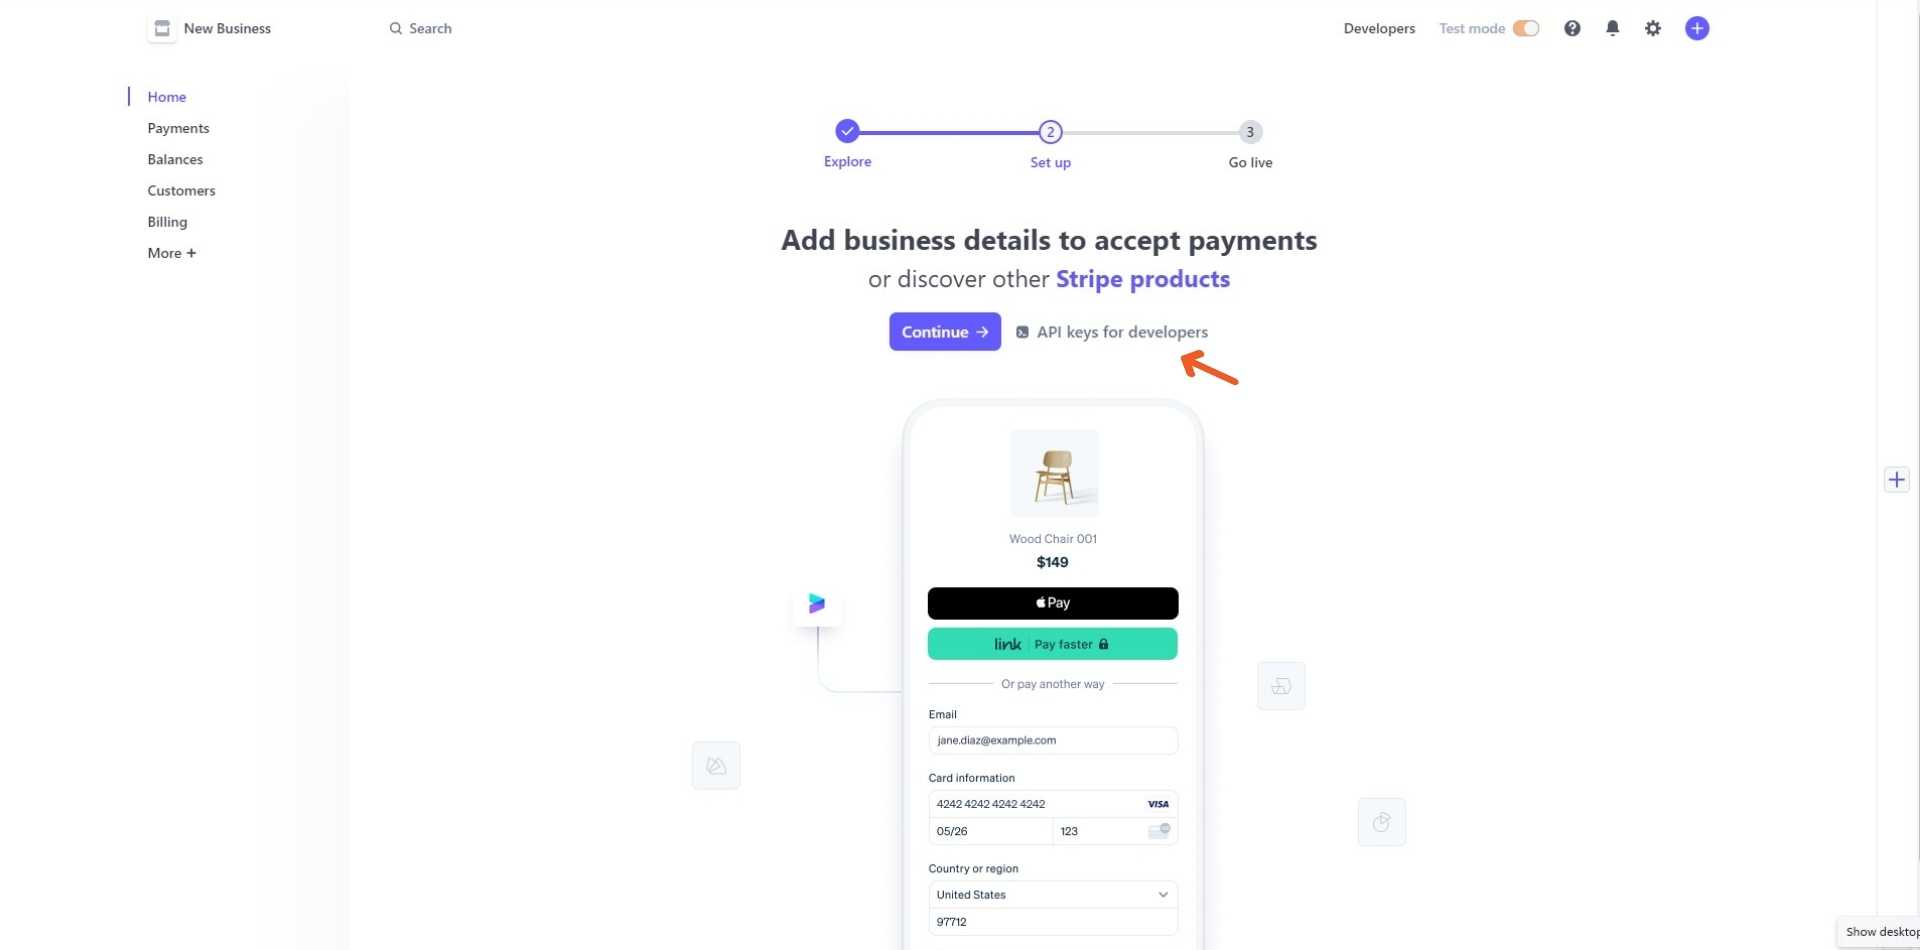
STEP-3: After that, Go to the dashboard page. Then, click on "API keys for developers".
STEP-4: In Production API Details, you'll find the Public Key and Secret Key.
STEP-5: Once you have received the production credentials, follow the below steps to integrate Stripe into O2VEND.
Steps to integrate Stripe with O2VEND
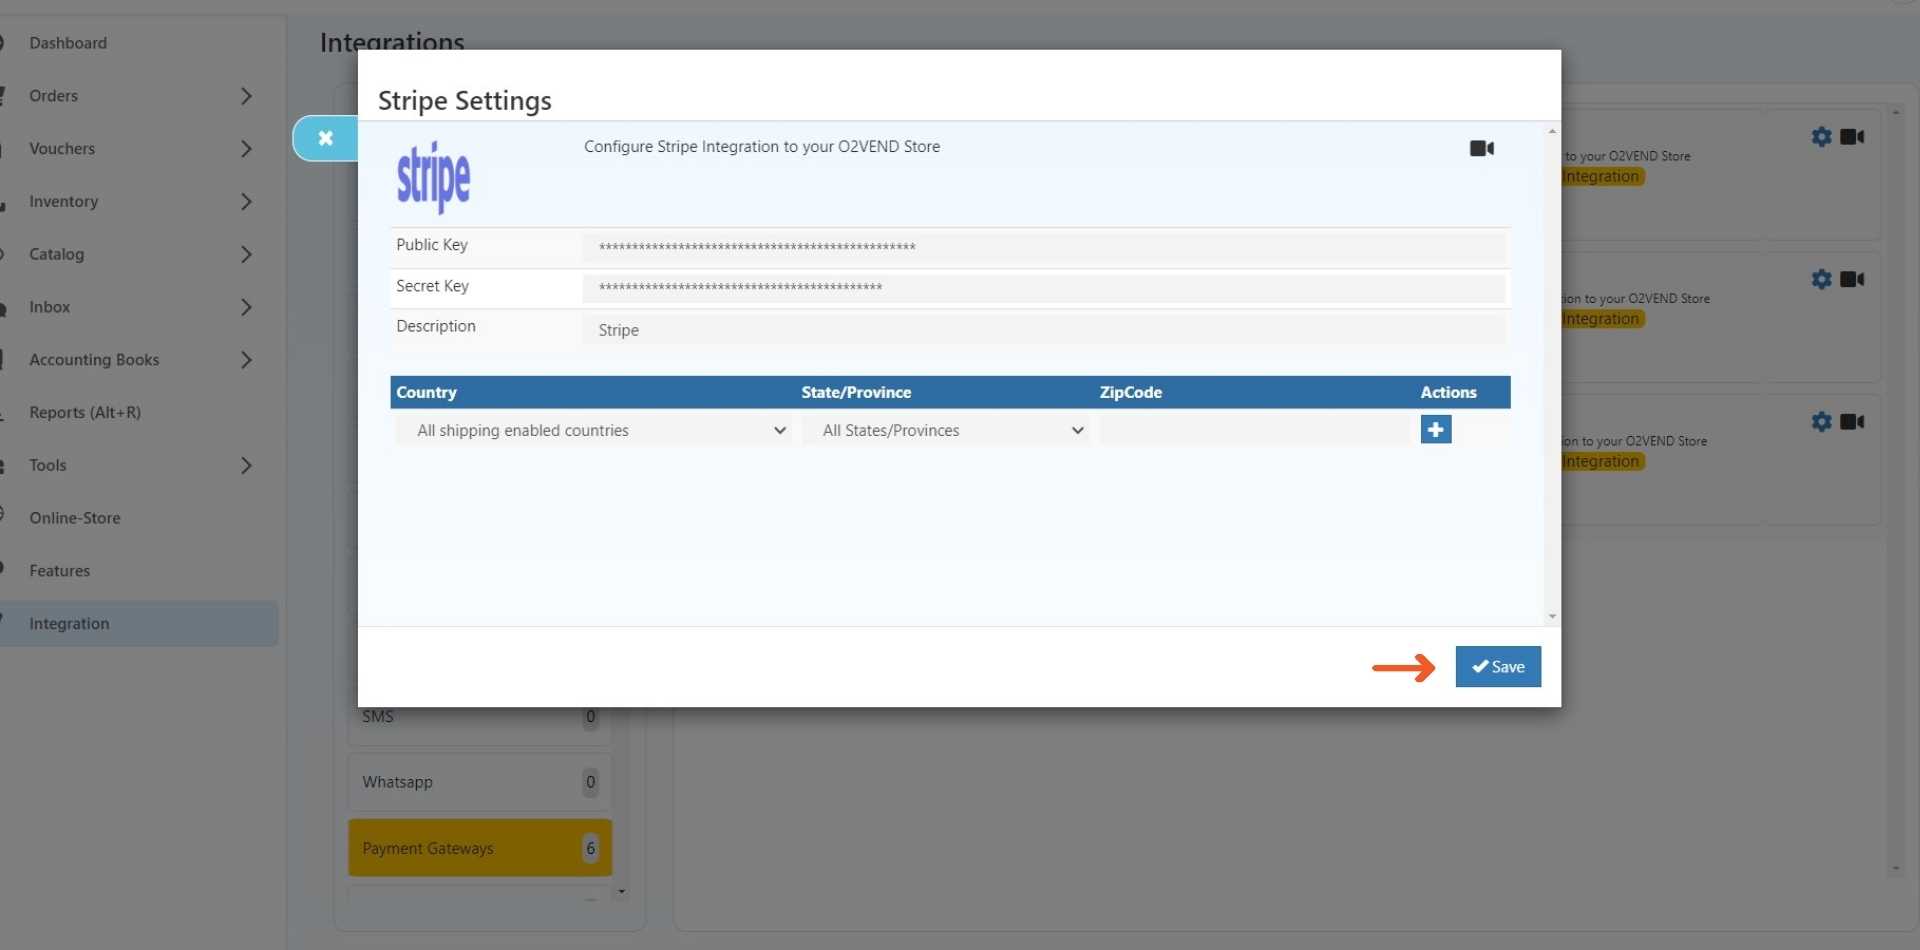
STEP-1: Log in to your Back Office
STEP-2: Click The Integration option.
STEP-3: Enter the necessary details, Public Key, And Secret Key as received from Stripe.
STEP-4: The description field denotes the selected payment method, and this choice is subsequently reflected on the Order Payment page.
STEP-5: Select your country and state, Input your zip code, And then proceed by clicking the save button.
For Example:
If you select India as the country and Tamil Nadu as the state and enter a zip code like (623153), then Stripe Integration becomes a payment option. However, it's only available if your transaction meets these conditions and won't Show up for transactions in other countries or states.
If you don't specify the country, state, and zip code. The system will automatically be made available for all countries.
STEP-6: Then Click Save Button.
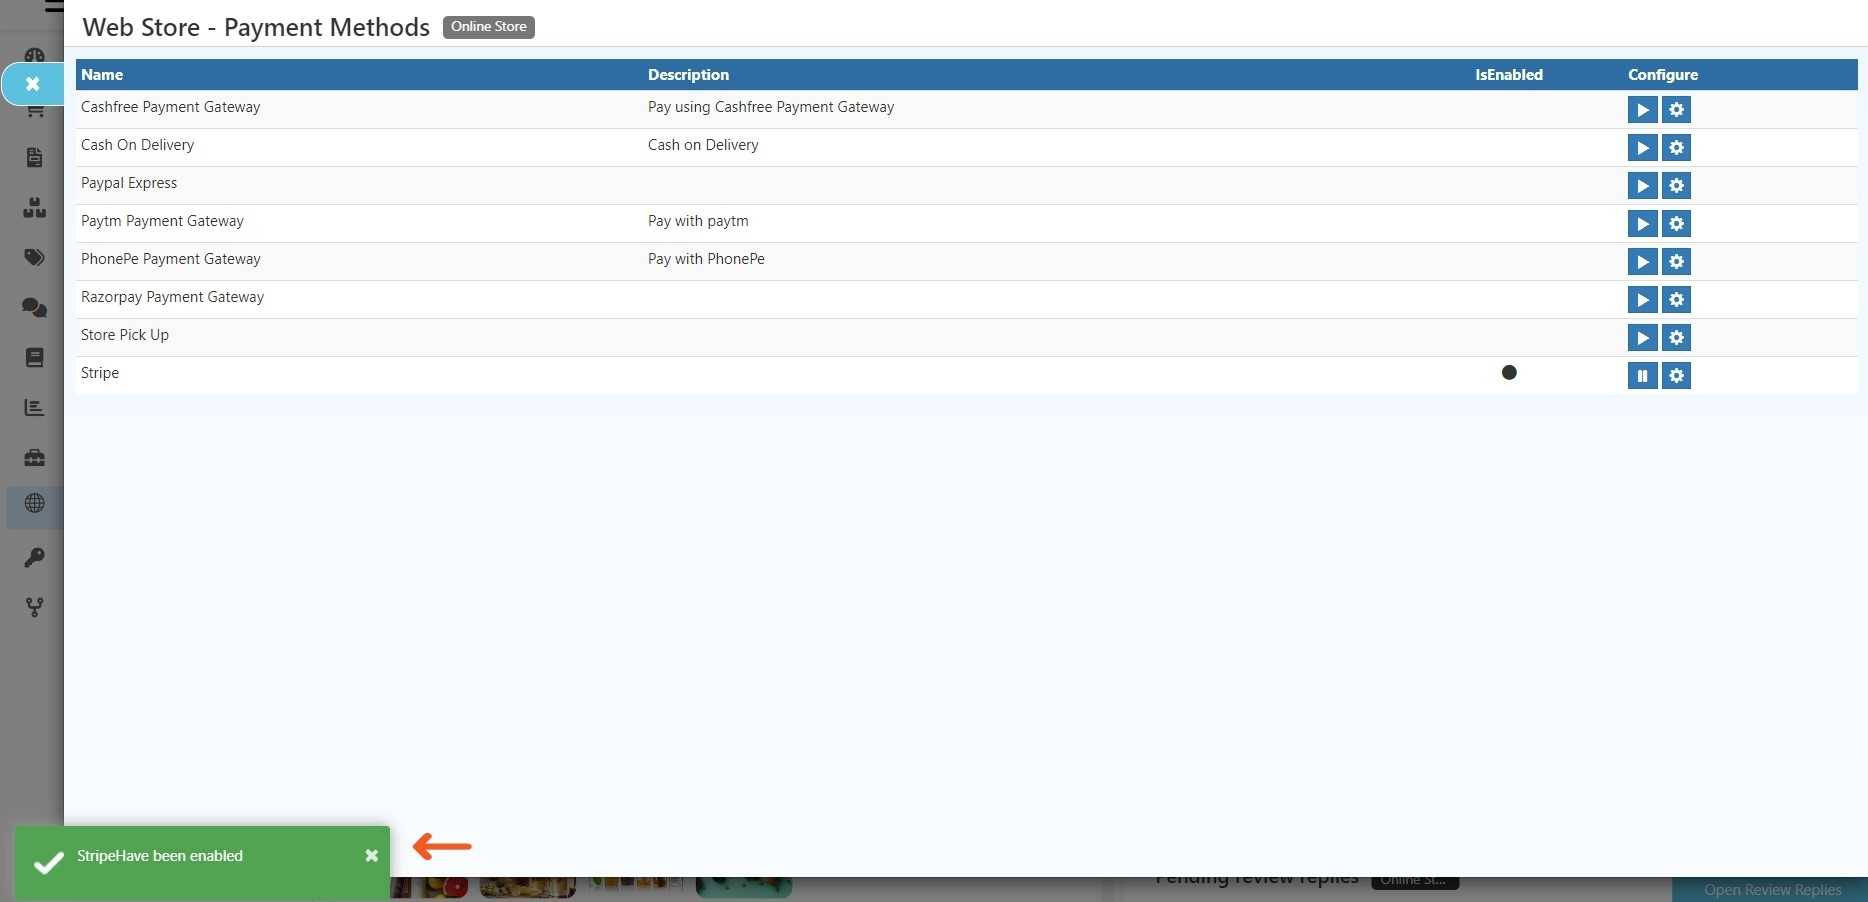
STEP 2: Enable Stripe Integration:
2.1 - Go To Backoffice
2.2 - Go to the online store -> select Setup Payment Method.
2.3 - To turn on the Stripe payment gateway, Click OK When the pop-up appears.

2.4 - Stripe Payments Gateway has been Enabled.