Product Features
Advanced URL Schema
If enabled advanced URL schema,
Product page URL format that contains the (/product). Category page URL format that contains the (/category). Brand page URL format that contains the (/brand).
Location in Back Office
Navigation Path:
Back Office → Features → Product Management → Product Management
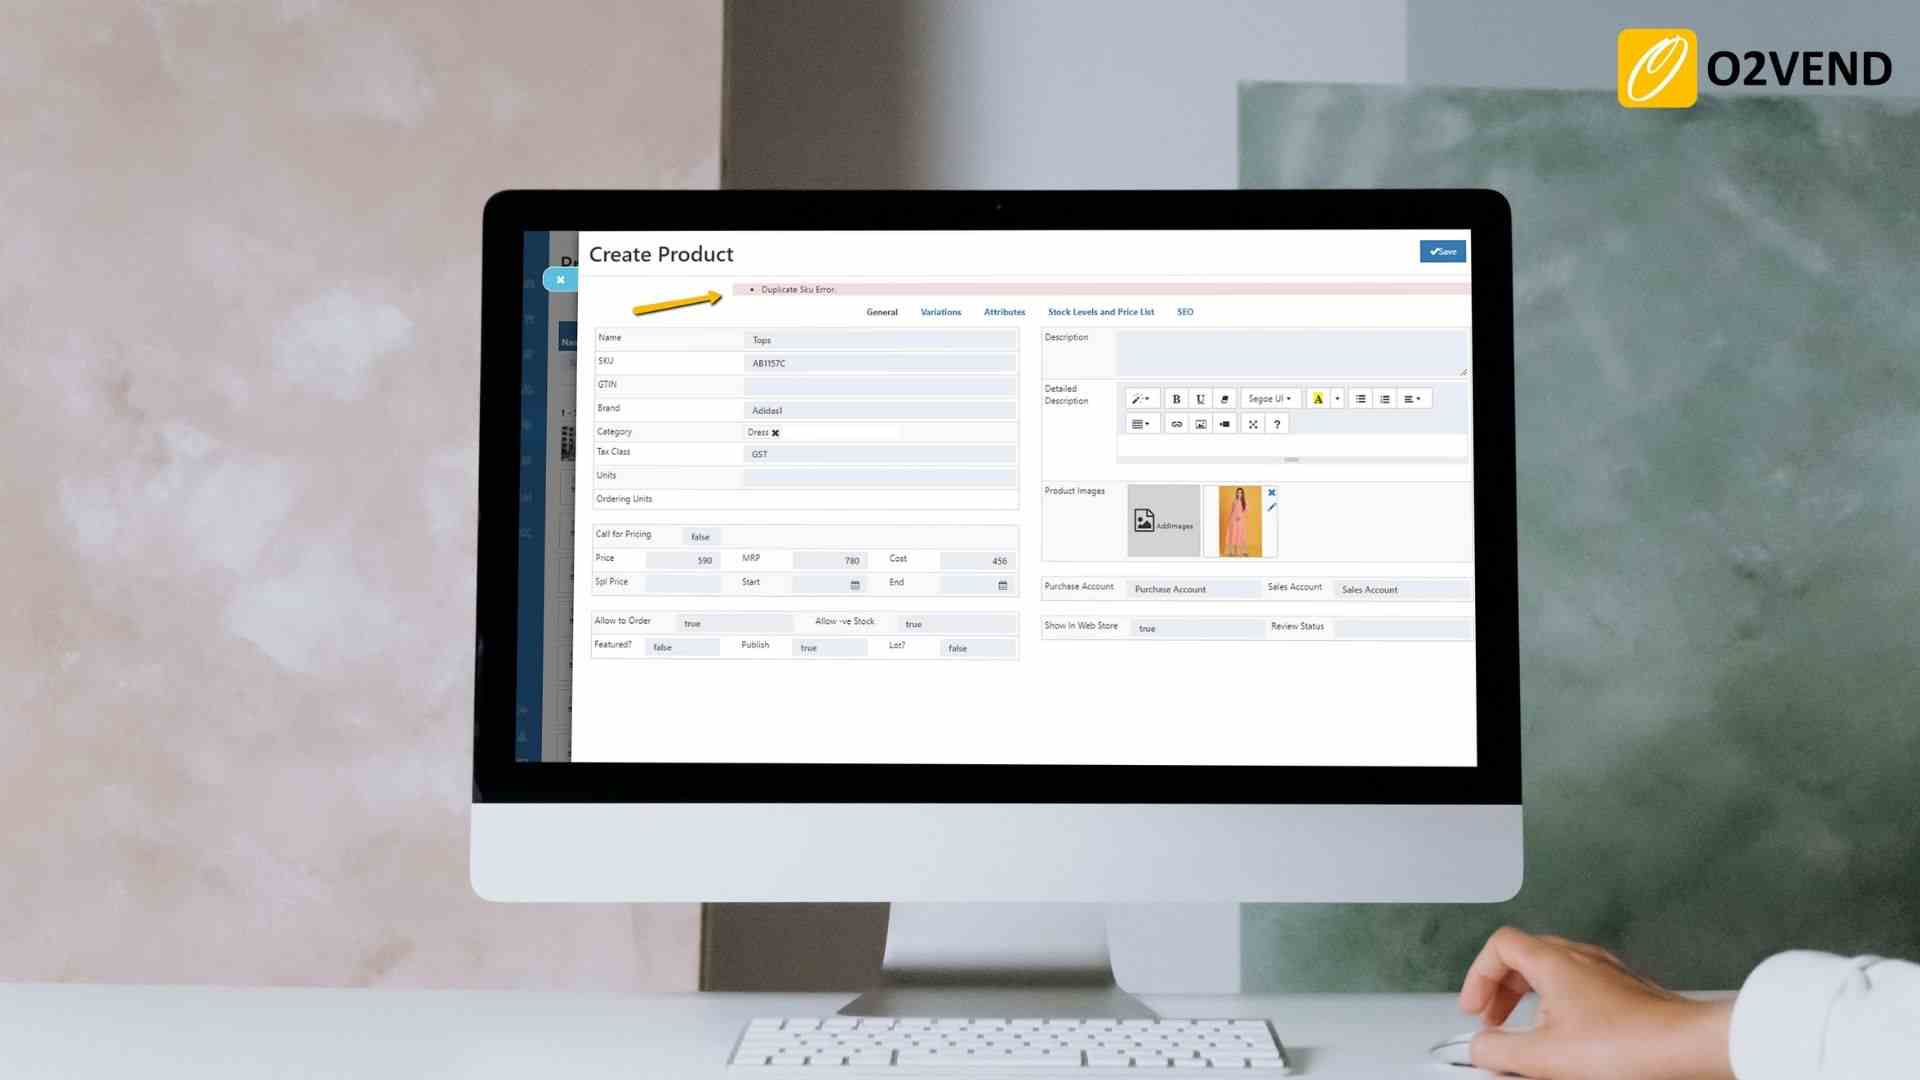
Enable Duplicate Sku Detection
If enabled, whenever a new product is created with a SKU which is already taken by another product, this feature will through an error.
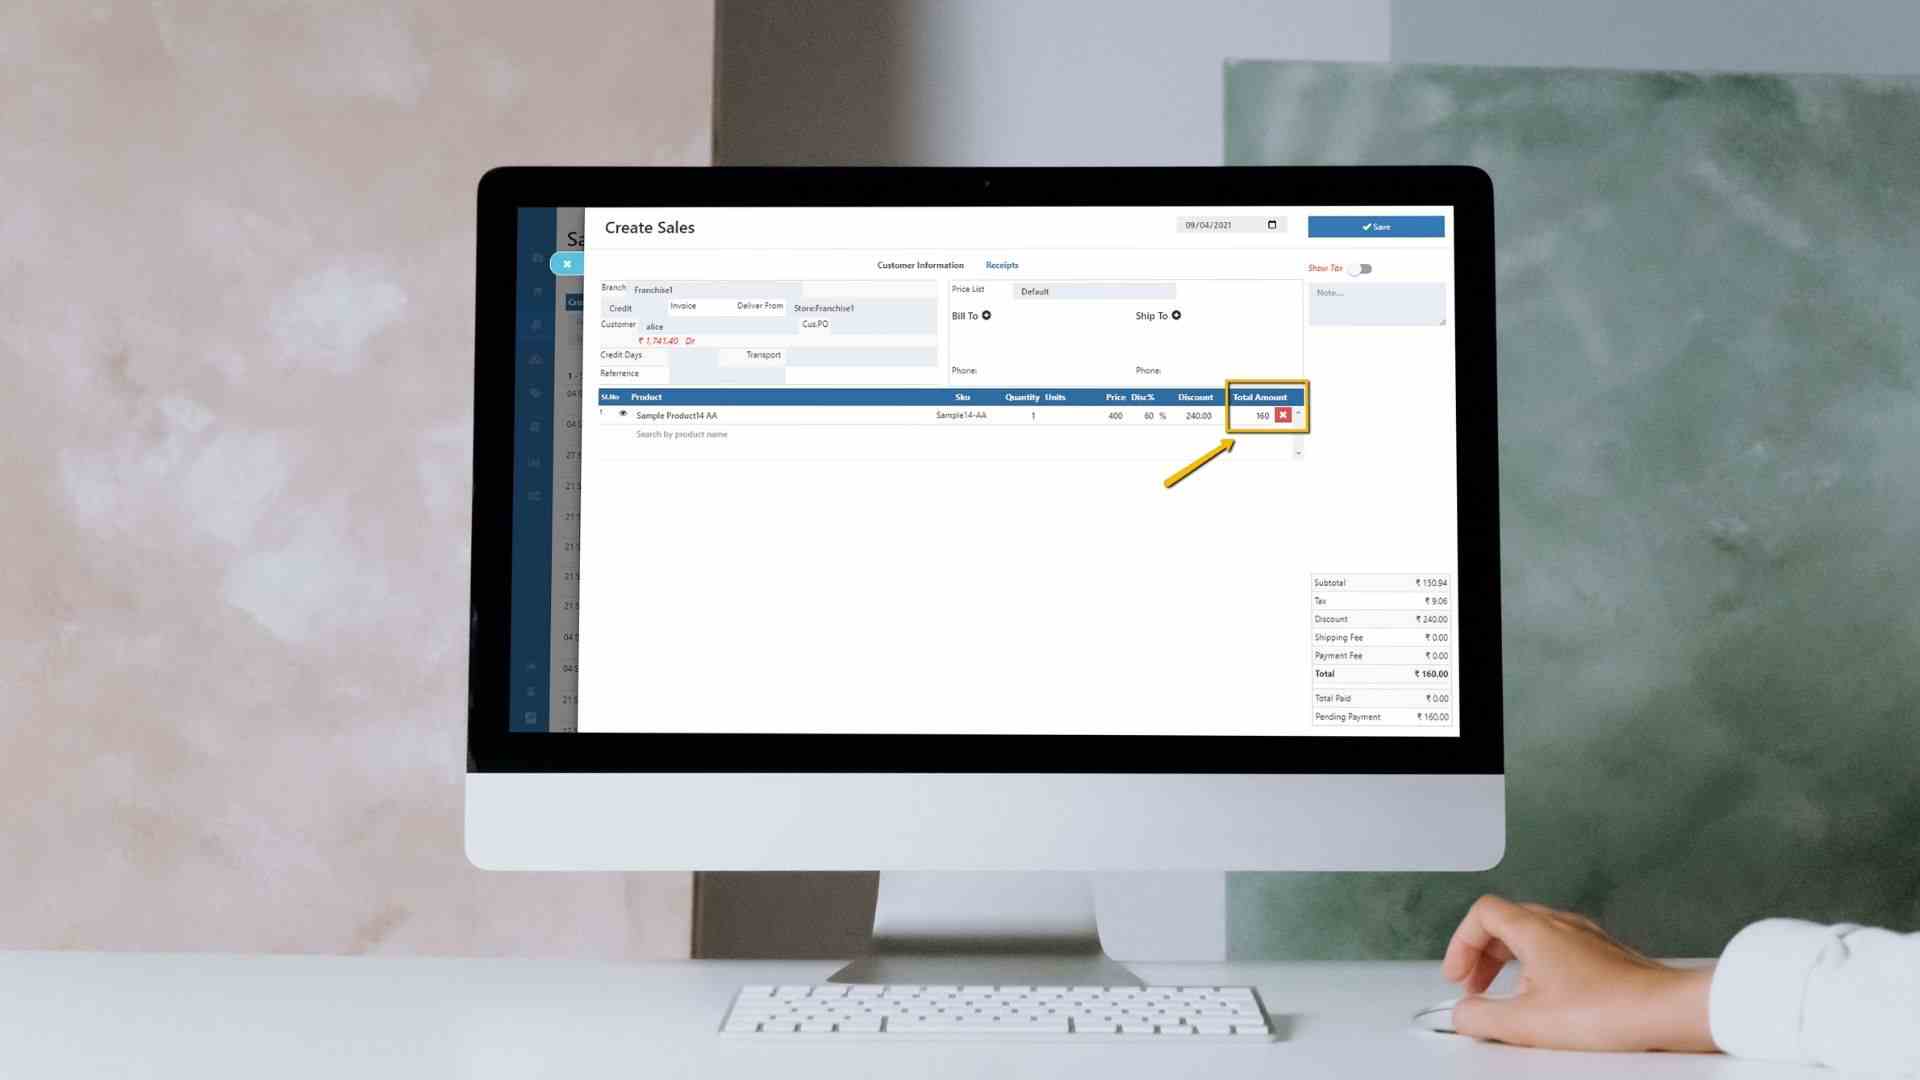
Update Product Price/Cost
Update Product Price/Cost From Invoice Entries
If enabled, Product price/cost will be updated when a purchase invoice (Product Cost will be updated as purchased price) or sale invoice (Product selling price will be updated as Sales price) is made.

Remove Discount From Product Price/Cost
If enabled, product cost / price will be updated removing the product discount.
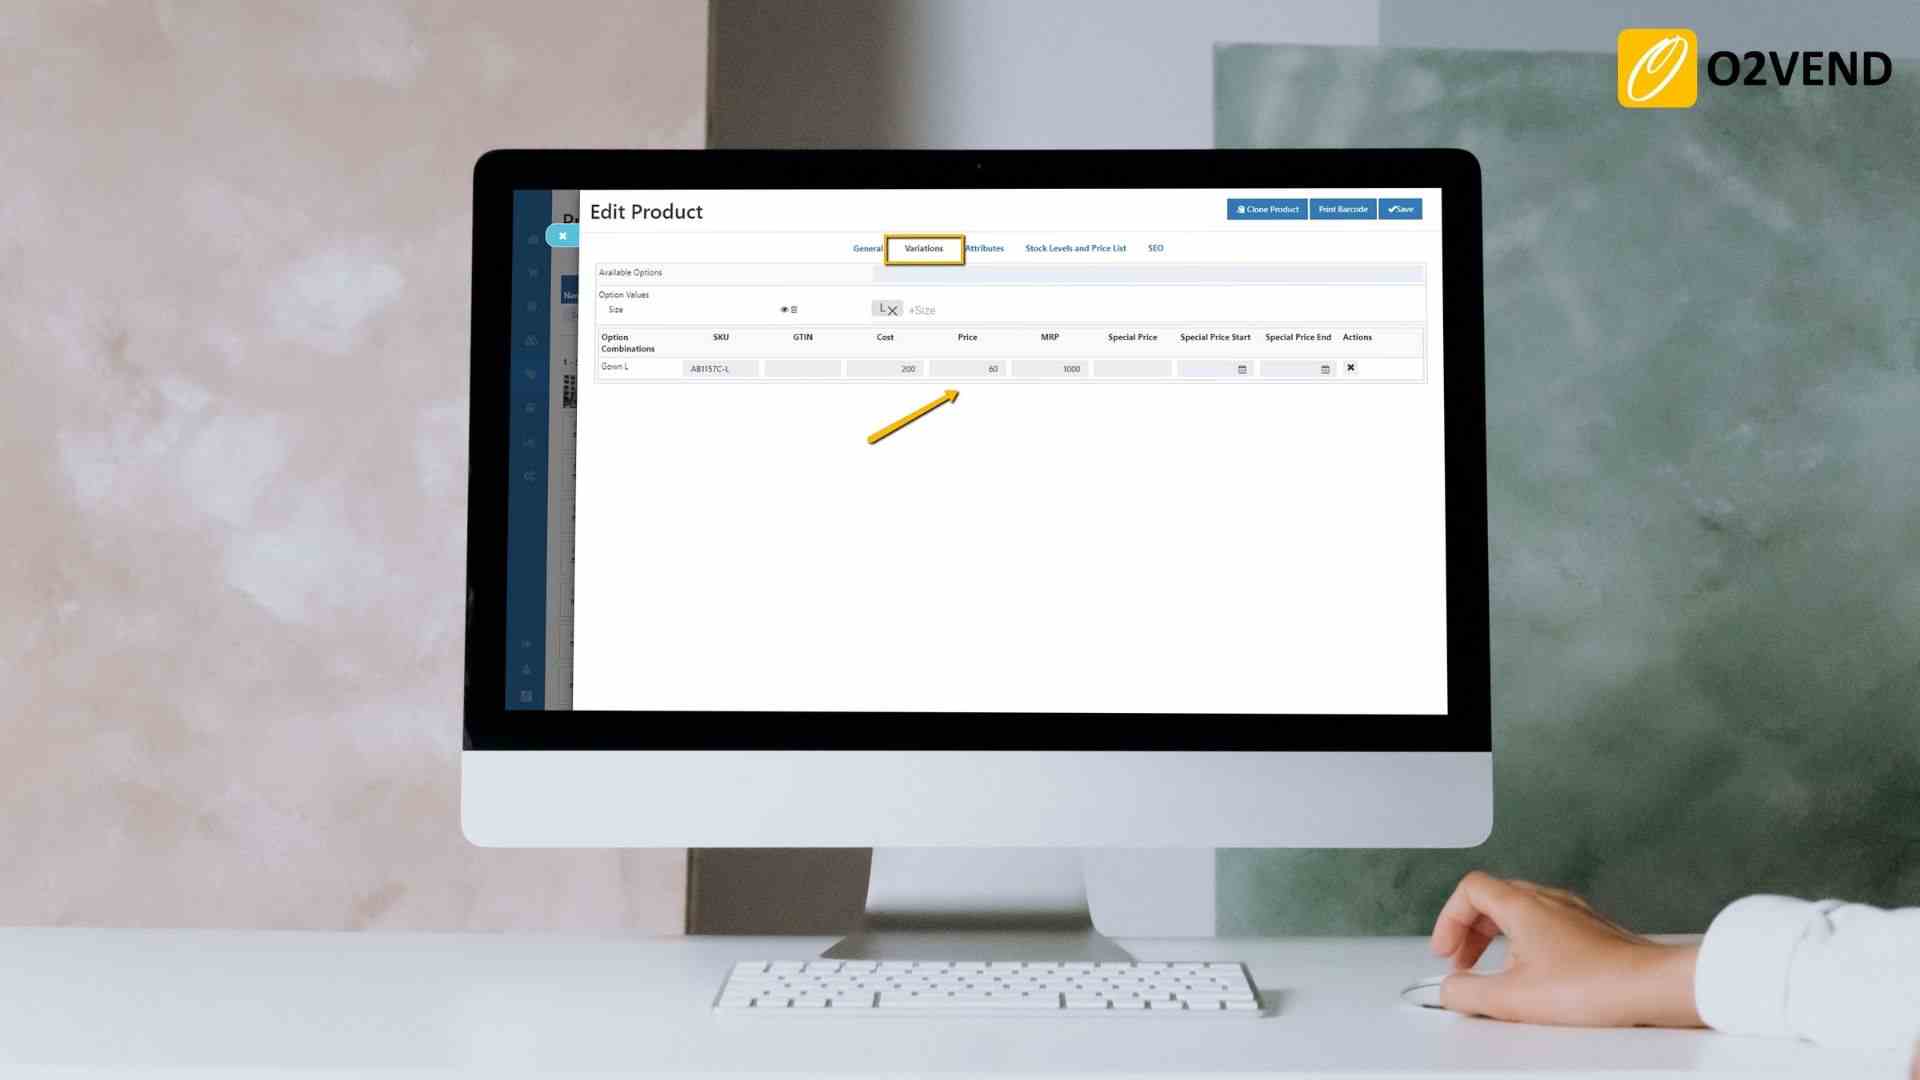
Update Parent Product Prices as Variant Product Price
If enabled, whenever parent product's price is modified, it automatically updates varient product prices.
Volume Pricing
This feature enables you to apply a product for volume pricing in the back office.
Product Margin
O2VEND allows you to set up your margin and choose your selling price. This way, you can set up your pricing system quickly and easily. Click the configure icon and update the base price and values.
Product Price Code Setting
Configure a pricing code and save it. This will apply to the product detail page in the back office.
Show Grid View in Product Thumbnail(RetailFashion Theme)
When enablin, the product thumbnail show in grid view on the mobile view.
Show Video in Product Thumbnail
It allows to show product video, when the video icon is clicked in the product thumbnail. See Product Attribute
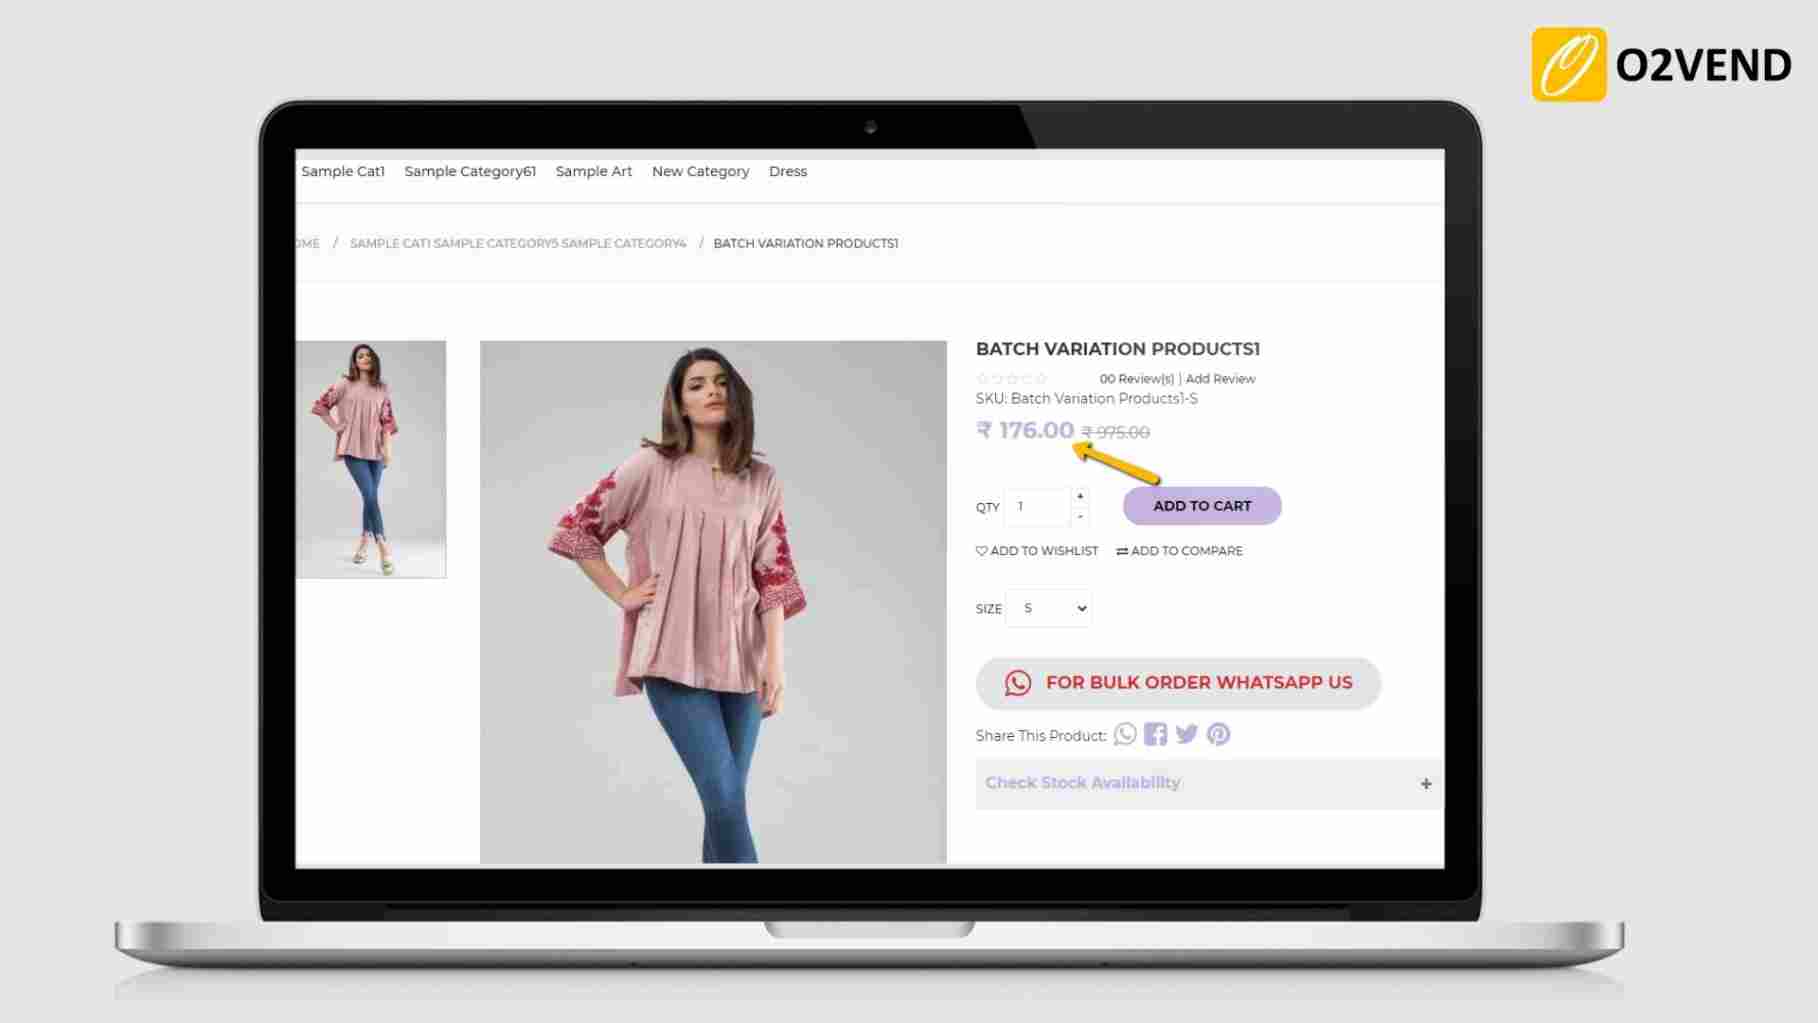
Show Sku in Product Detail Page
Allows the product and variants item number (SKU) to display on the product detail page in the eCommerce store.

Automatic Popup of Promotion Coupon
When enabled, automatic coupons shows, and customers can select their coupon.
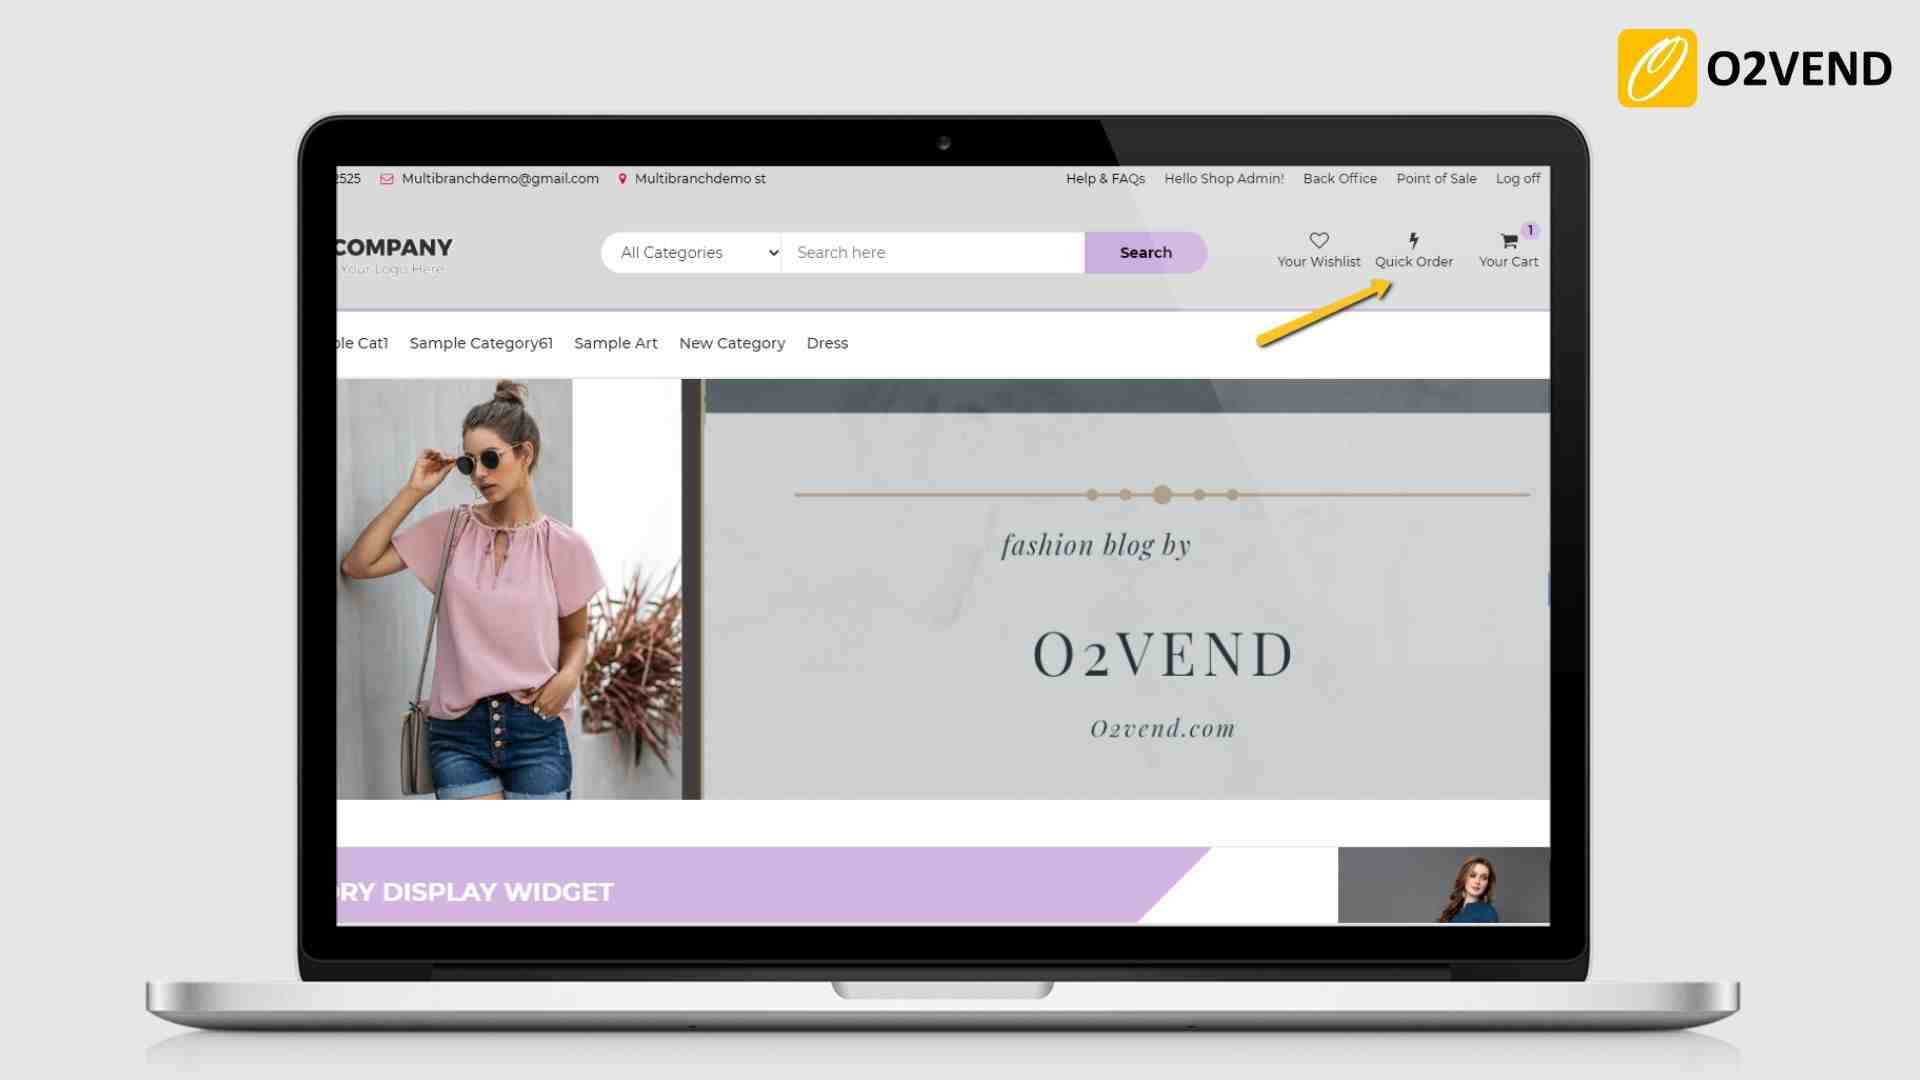
Show QuickOrder
Quick ordering icon will be displayed in the Home page menu bar.
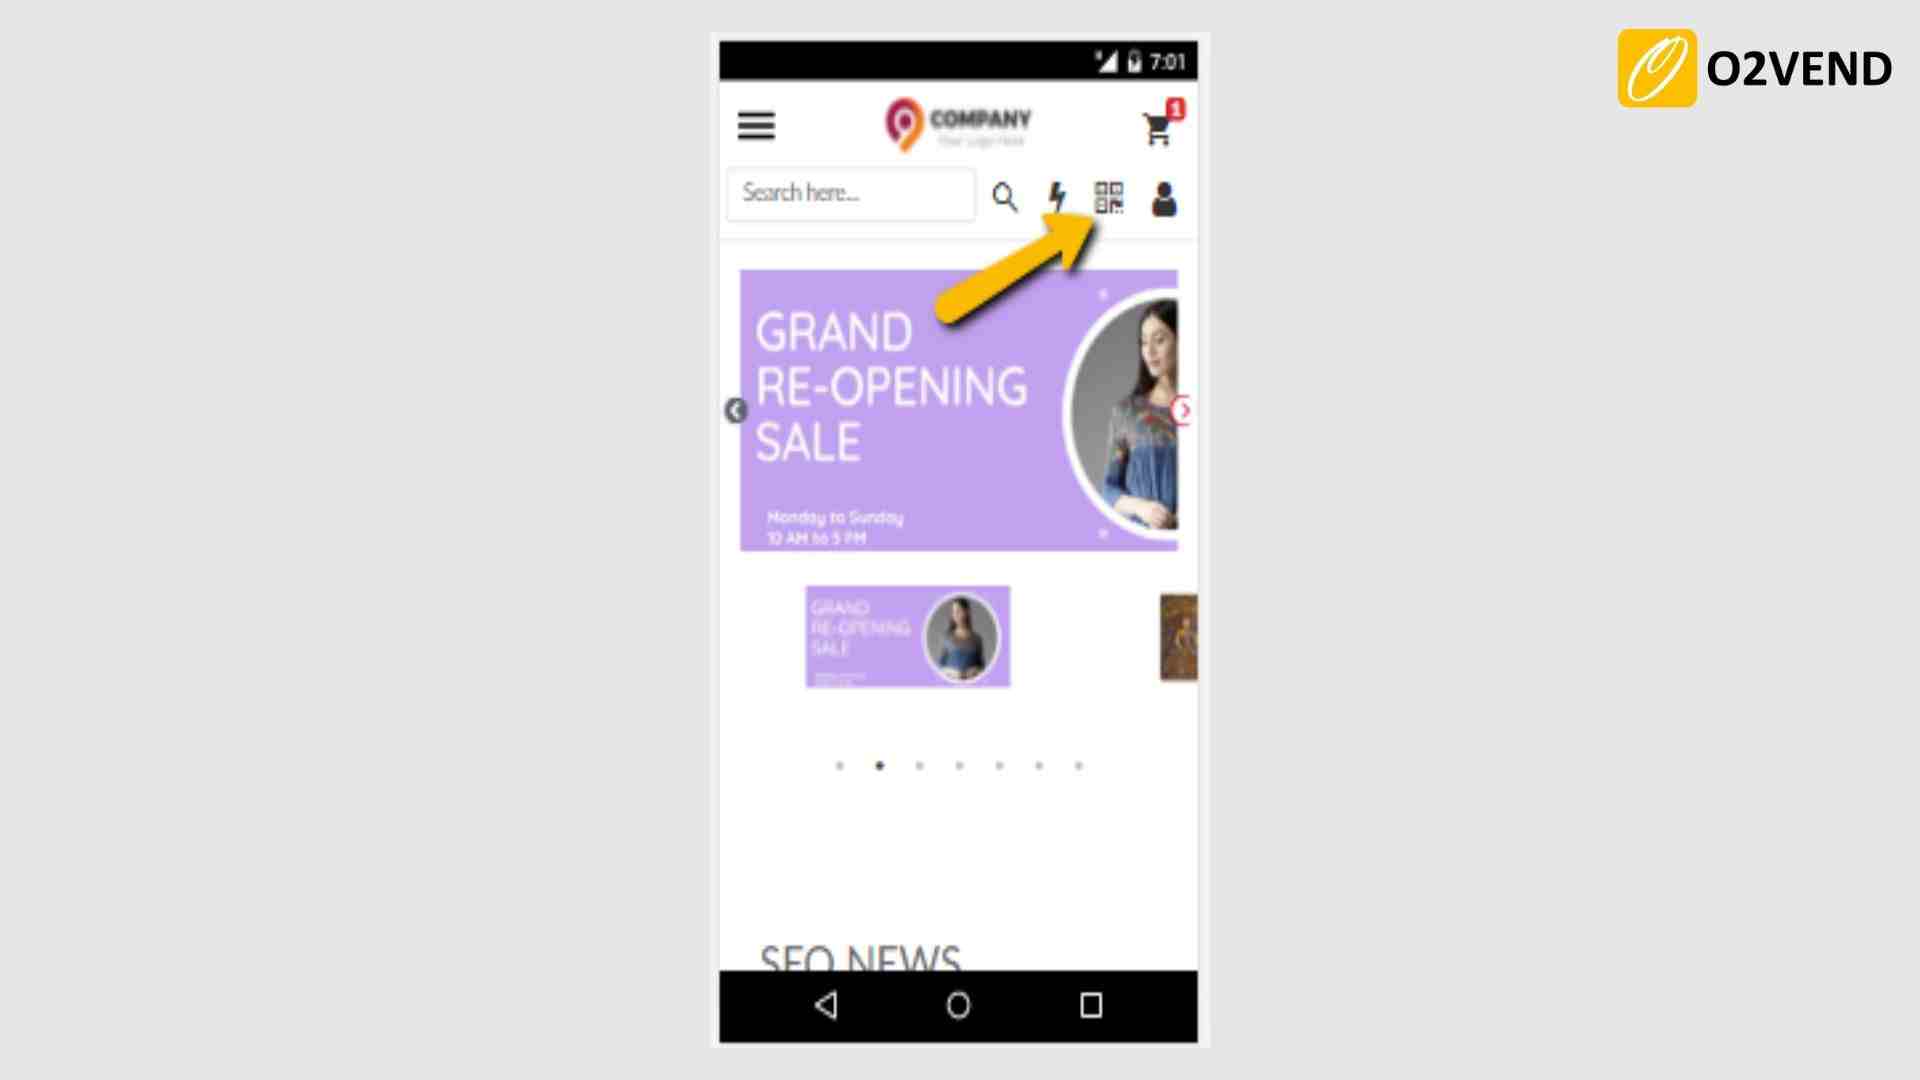
Show Scan And Go
It enabled, it shows a 'scan and go'' icon in the eCommerce store. Customers can scan store items with their phone using the link in QR code, add scanned products to the cart, and pay in the same link.
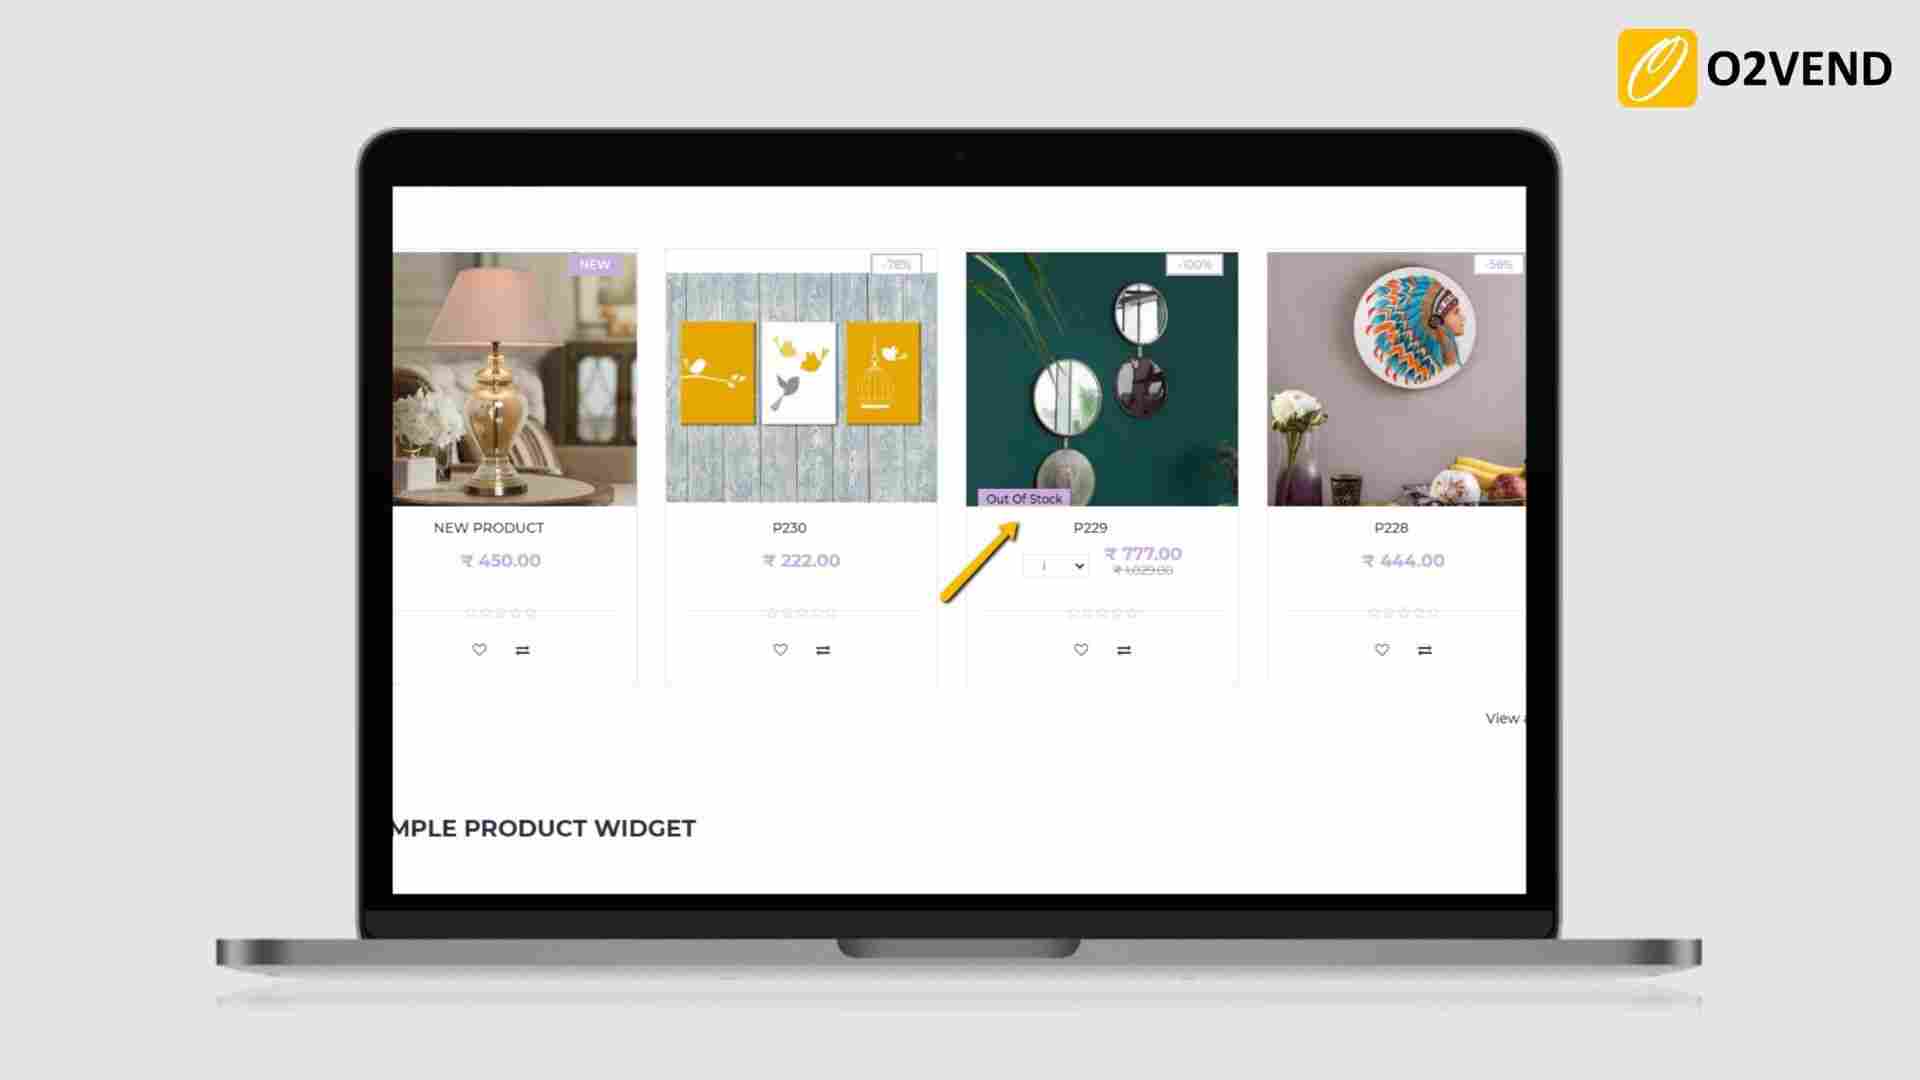
Show Out Of Stock Product
When enabled, Out of stock products are displayed with out of stock labels.
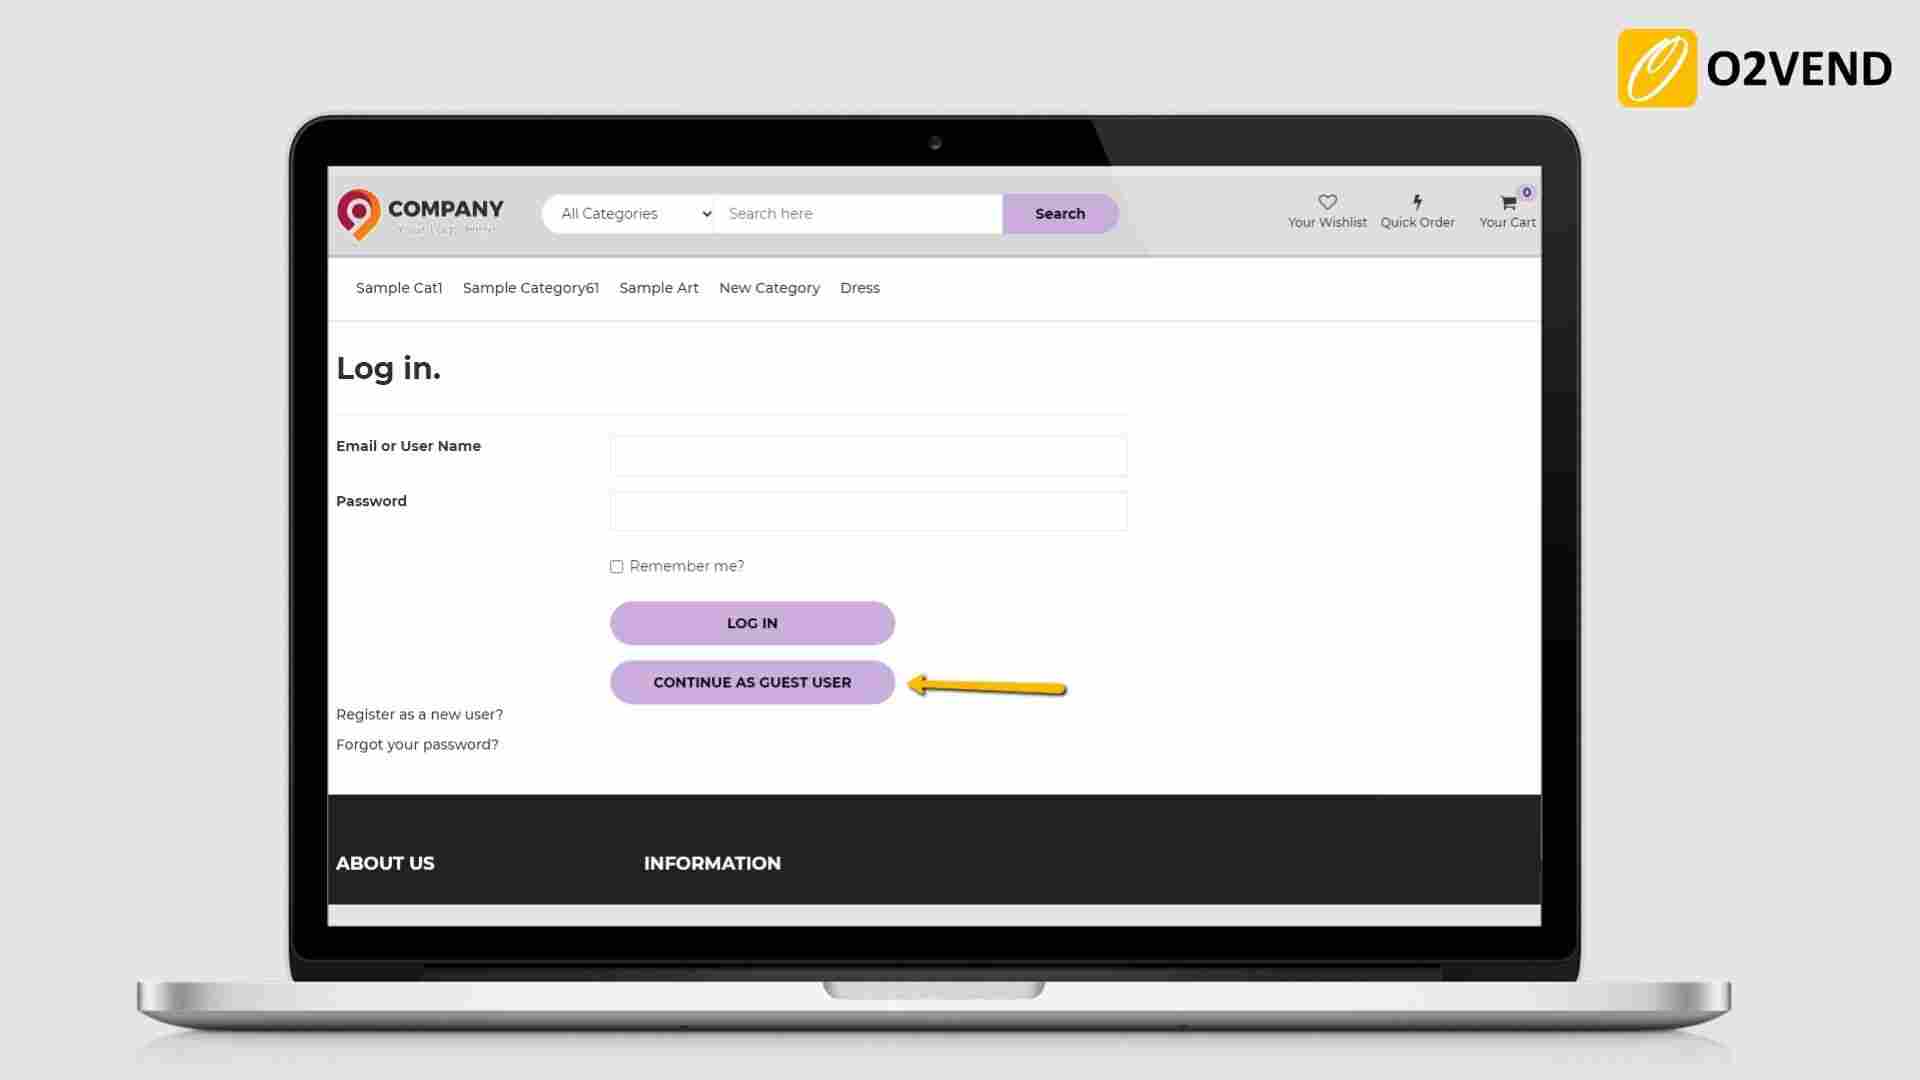
Allow Guest as a User
It allows a customer to purchase without logging into or creating a registered account. When enabling this feature to continue as a guest user button will show on the eCommerce login page. Store customers want to log in as a guest clicks a guest user button to continue their shopping.
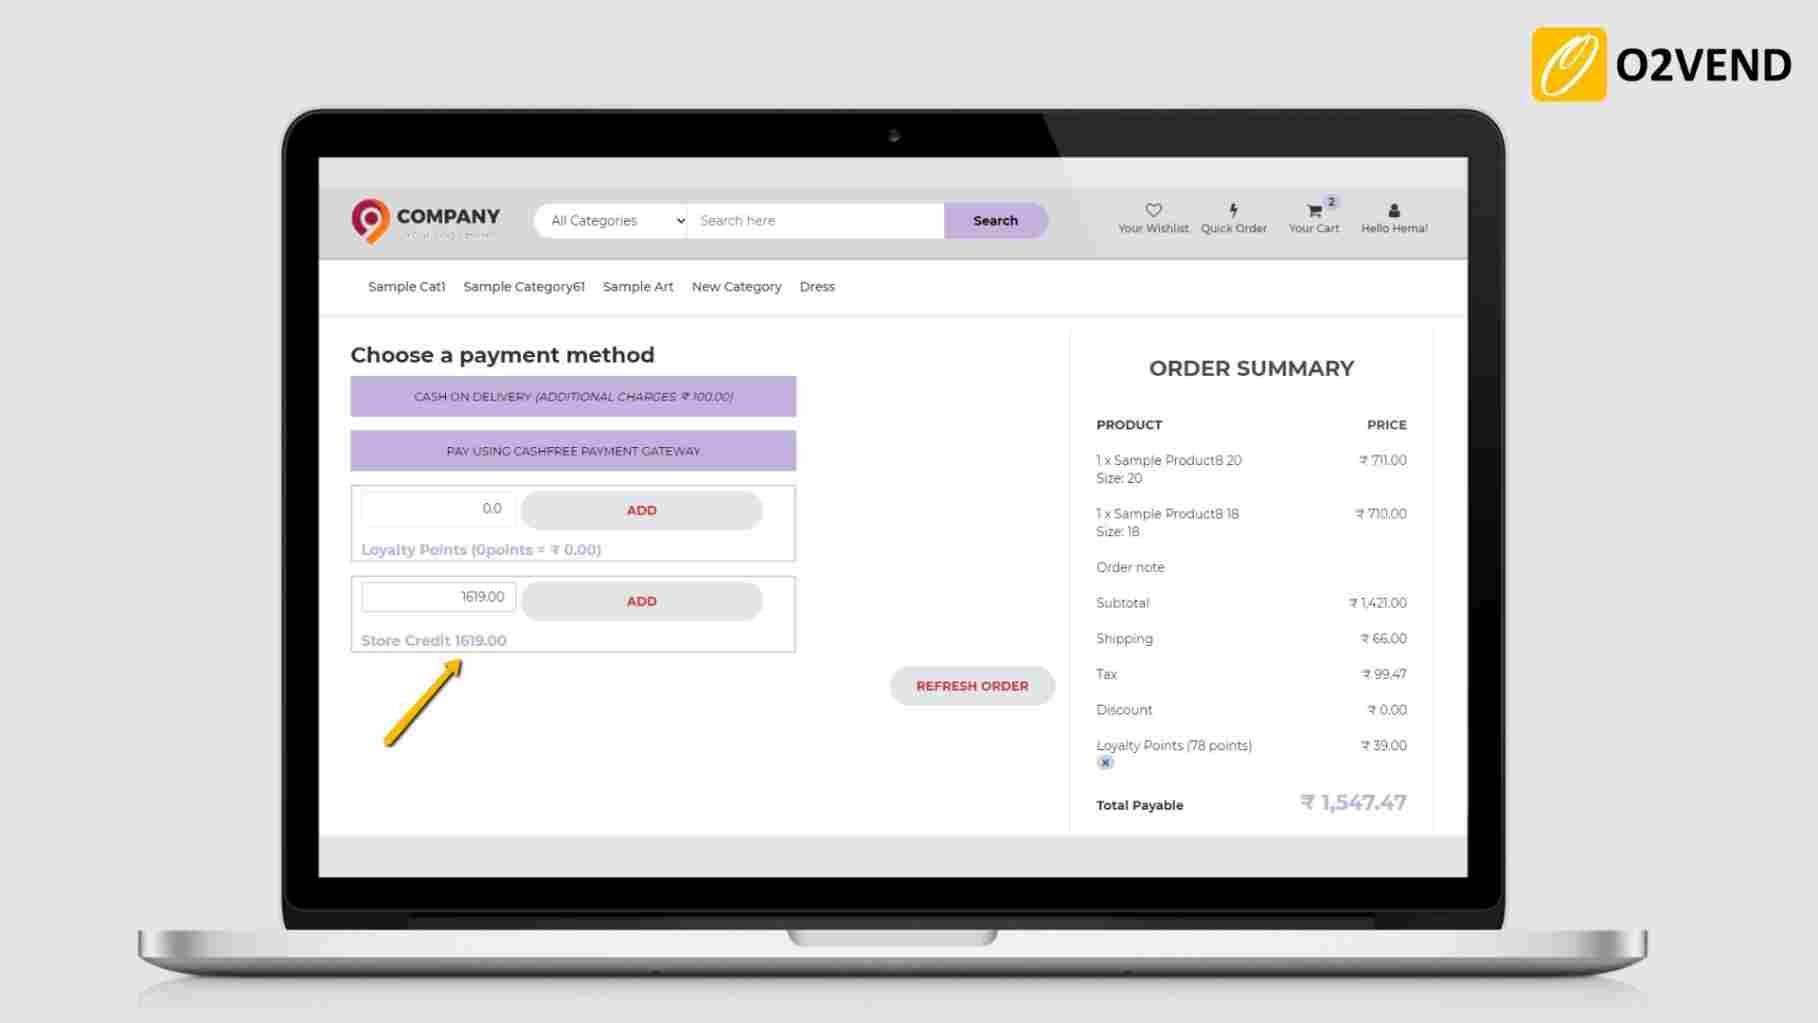
Allow Any one - CreditNote/Loyalty
When enabled, it allows customers when paying for eCommerce orders to pay using either Loyalty points or using Store credits.
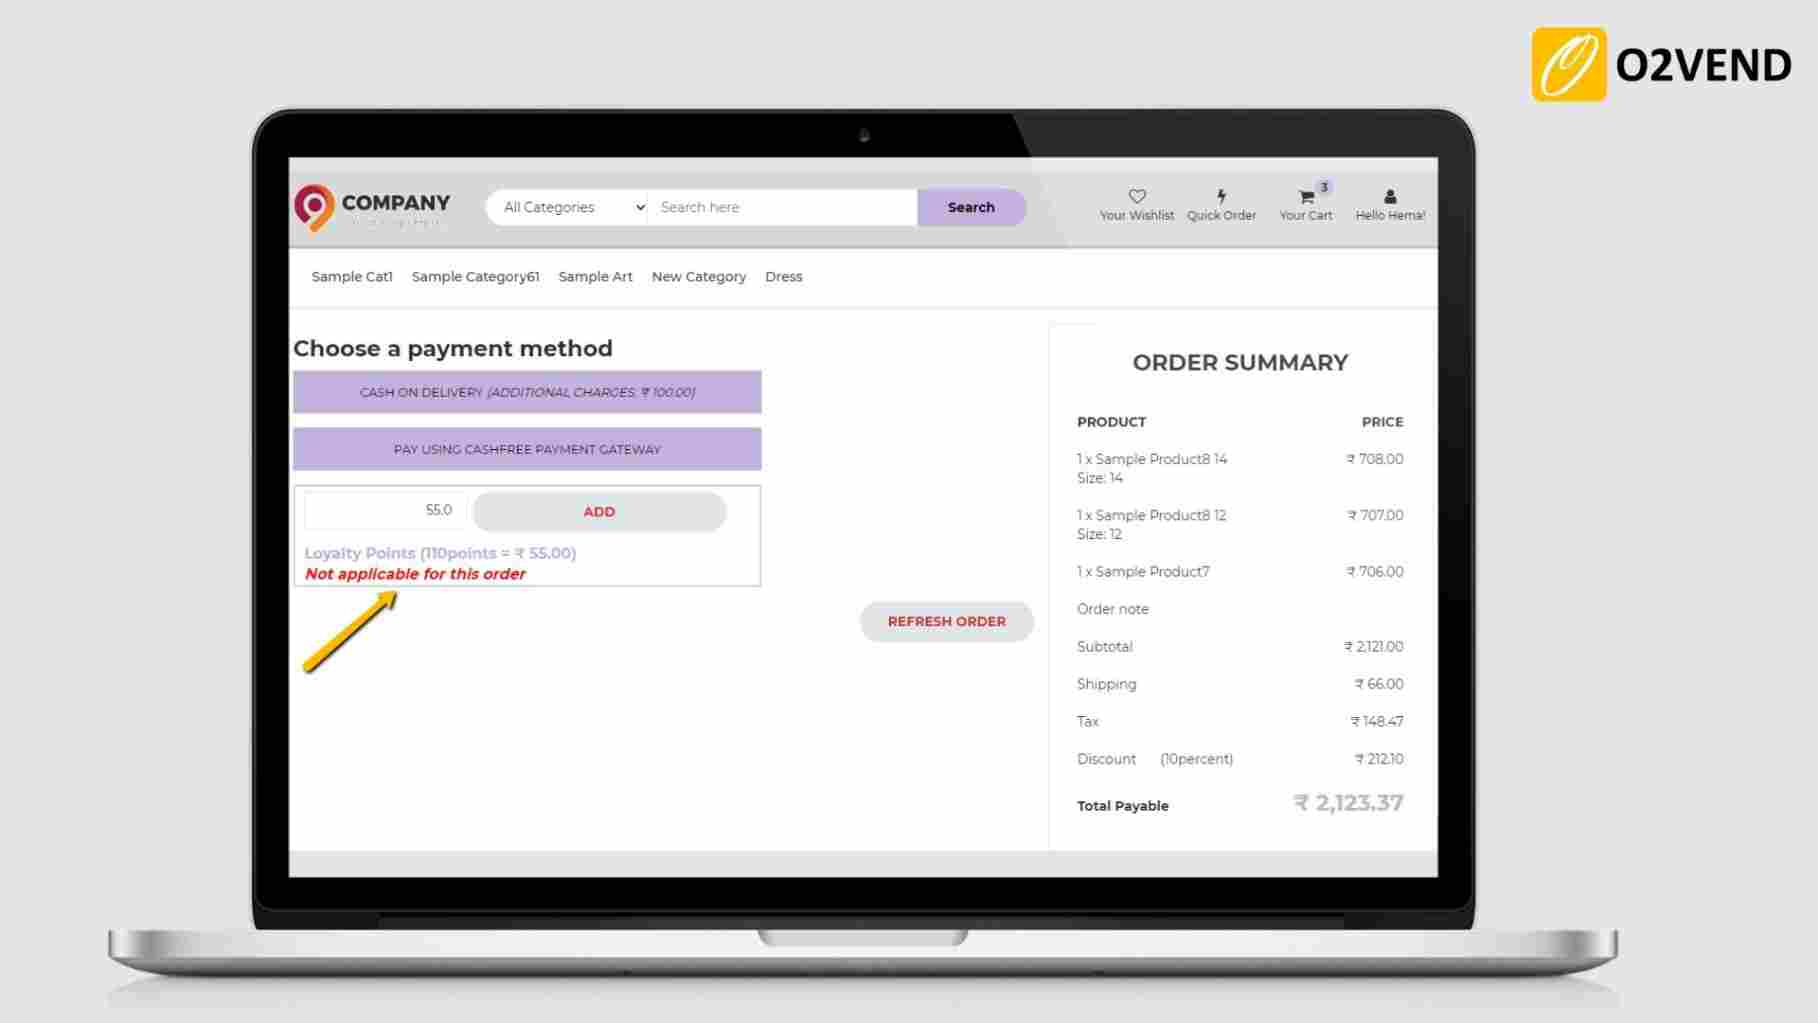
Disable Loyalty Point When Coupon Applied
When enabled, if Customers applied a coupon for the items they will not be allowed to apply loyalty point on eCommerce.
Disable Loyalty Point When All Order Item is discounted
When enabled, When all order items are applied with a special price, the customer will not be able to apply loyalty point in eCommerce store.
Review Comment Require Approval
When enabled, customer reviewed comments are displayed only when the admin approves it.

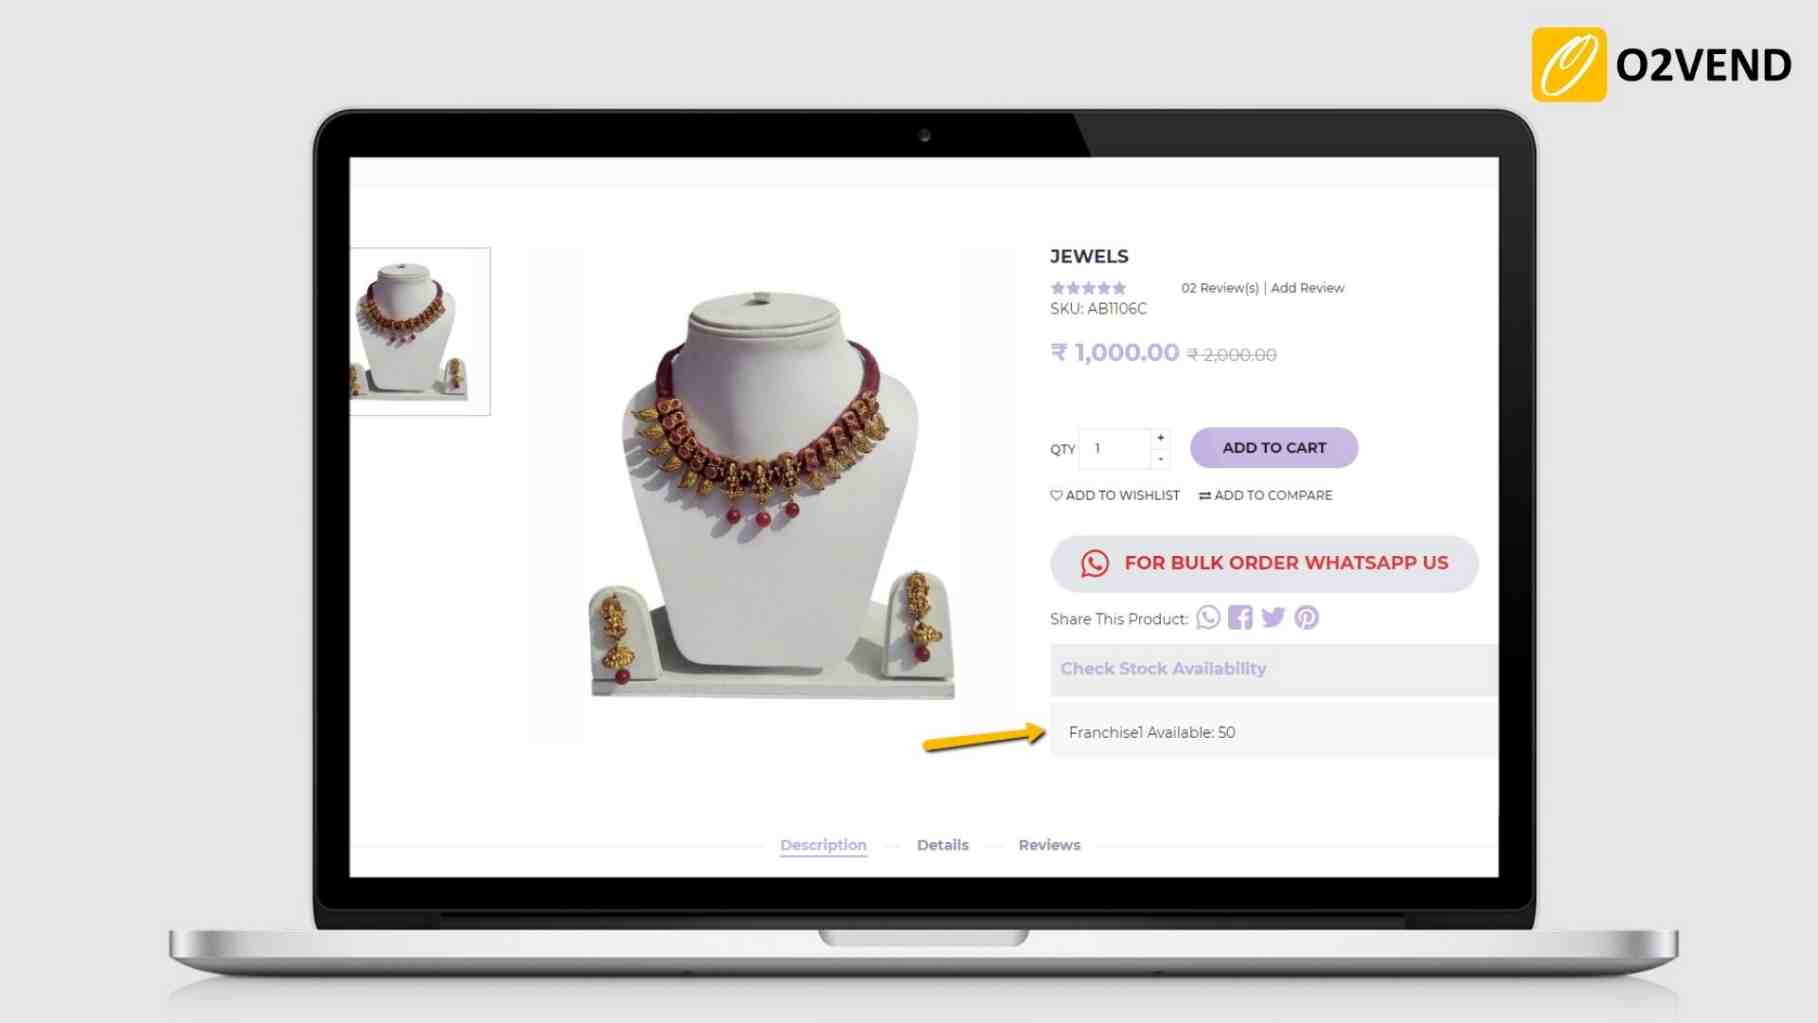
Show Stock In Product Details
Allows displaying available product stock is in eCommerce product detail page.
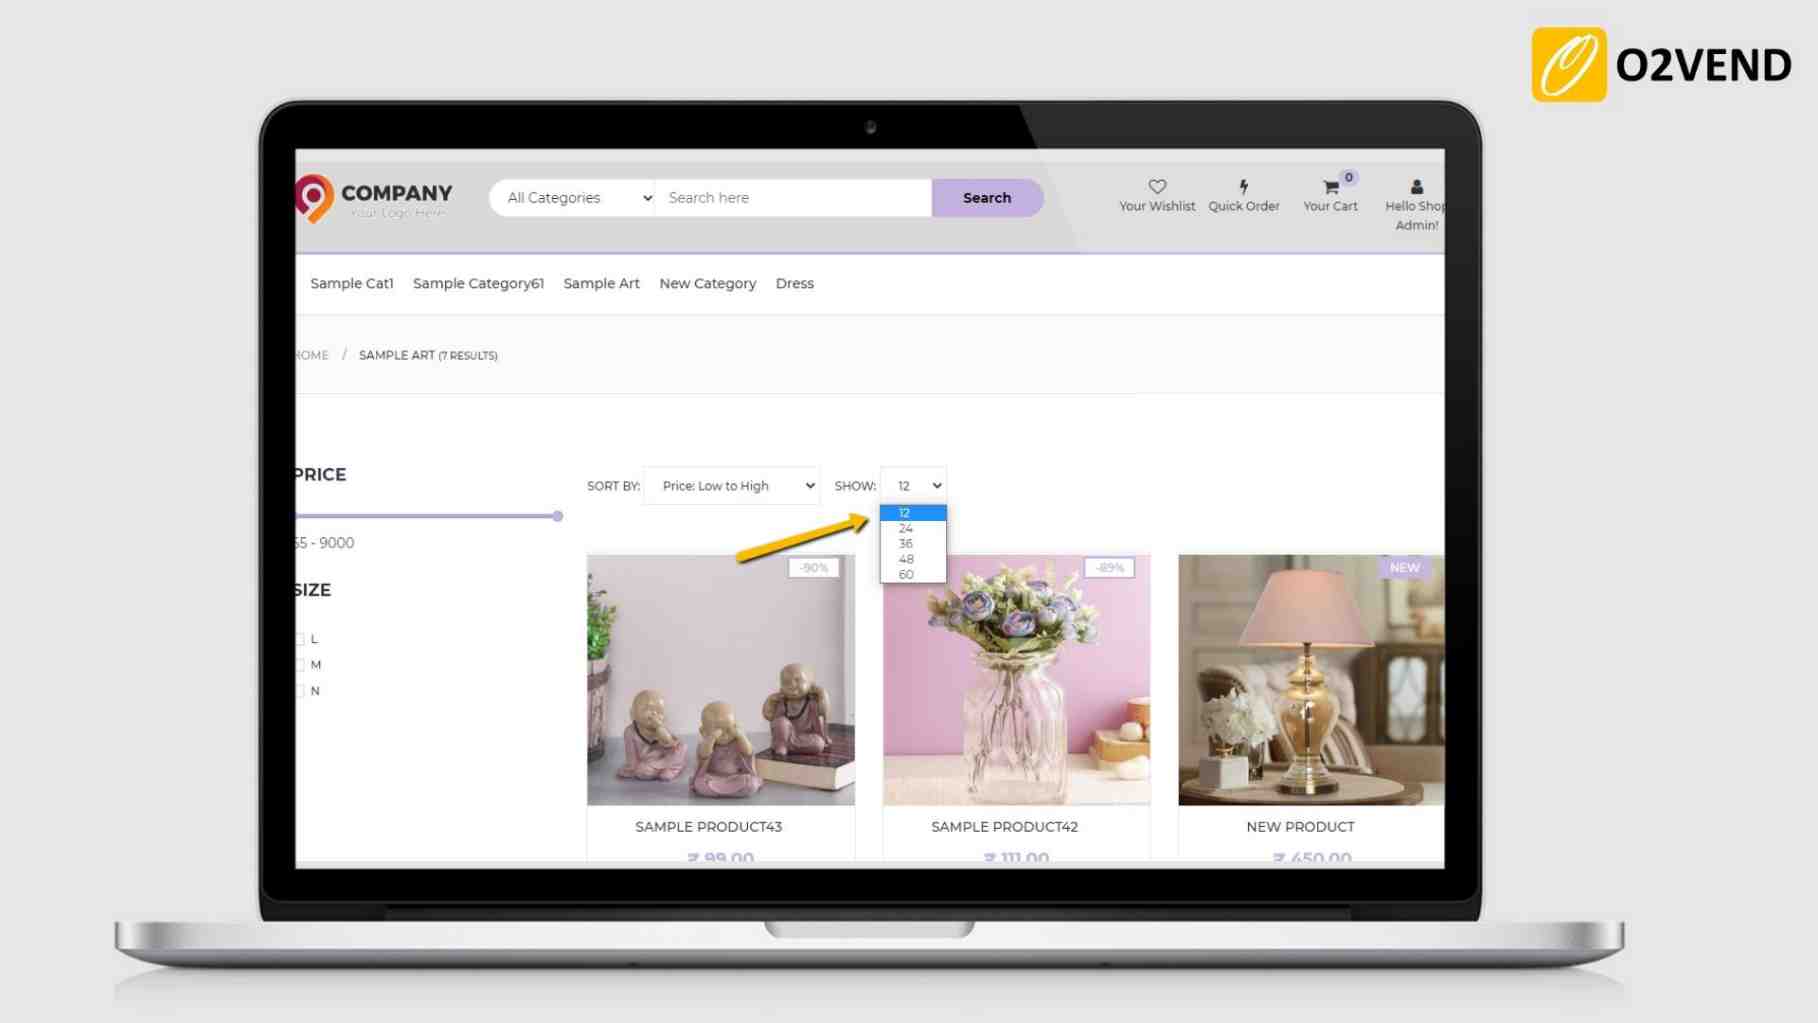
Products Displayed Per Page
Set number of products displayed per page.
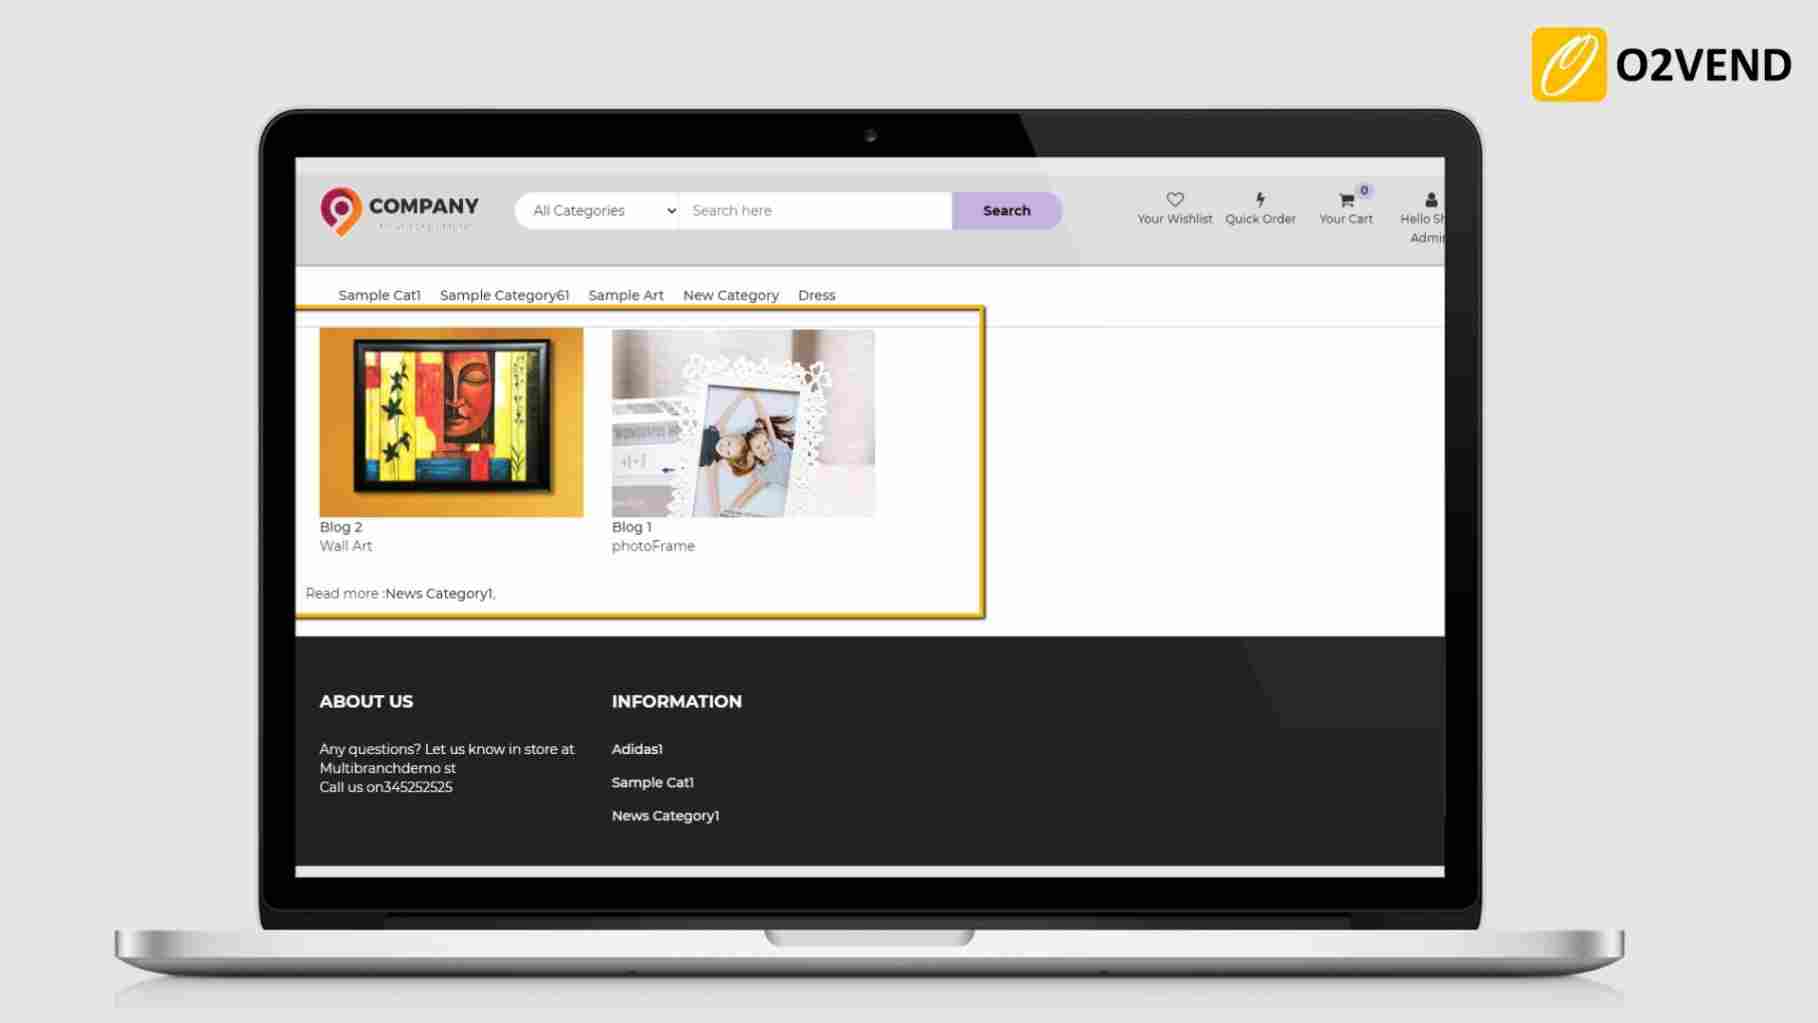
News Items Displayed Per Page
Set number of news (blog) items should show per page.
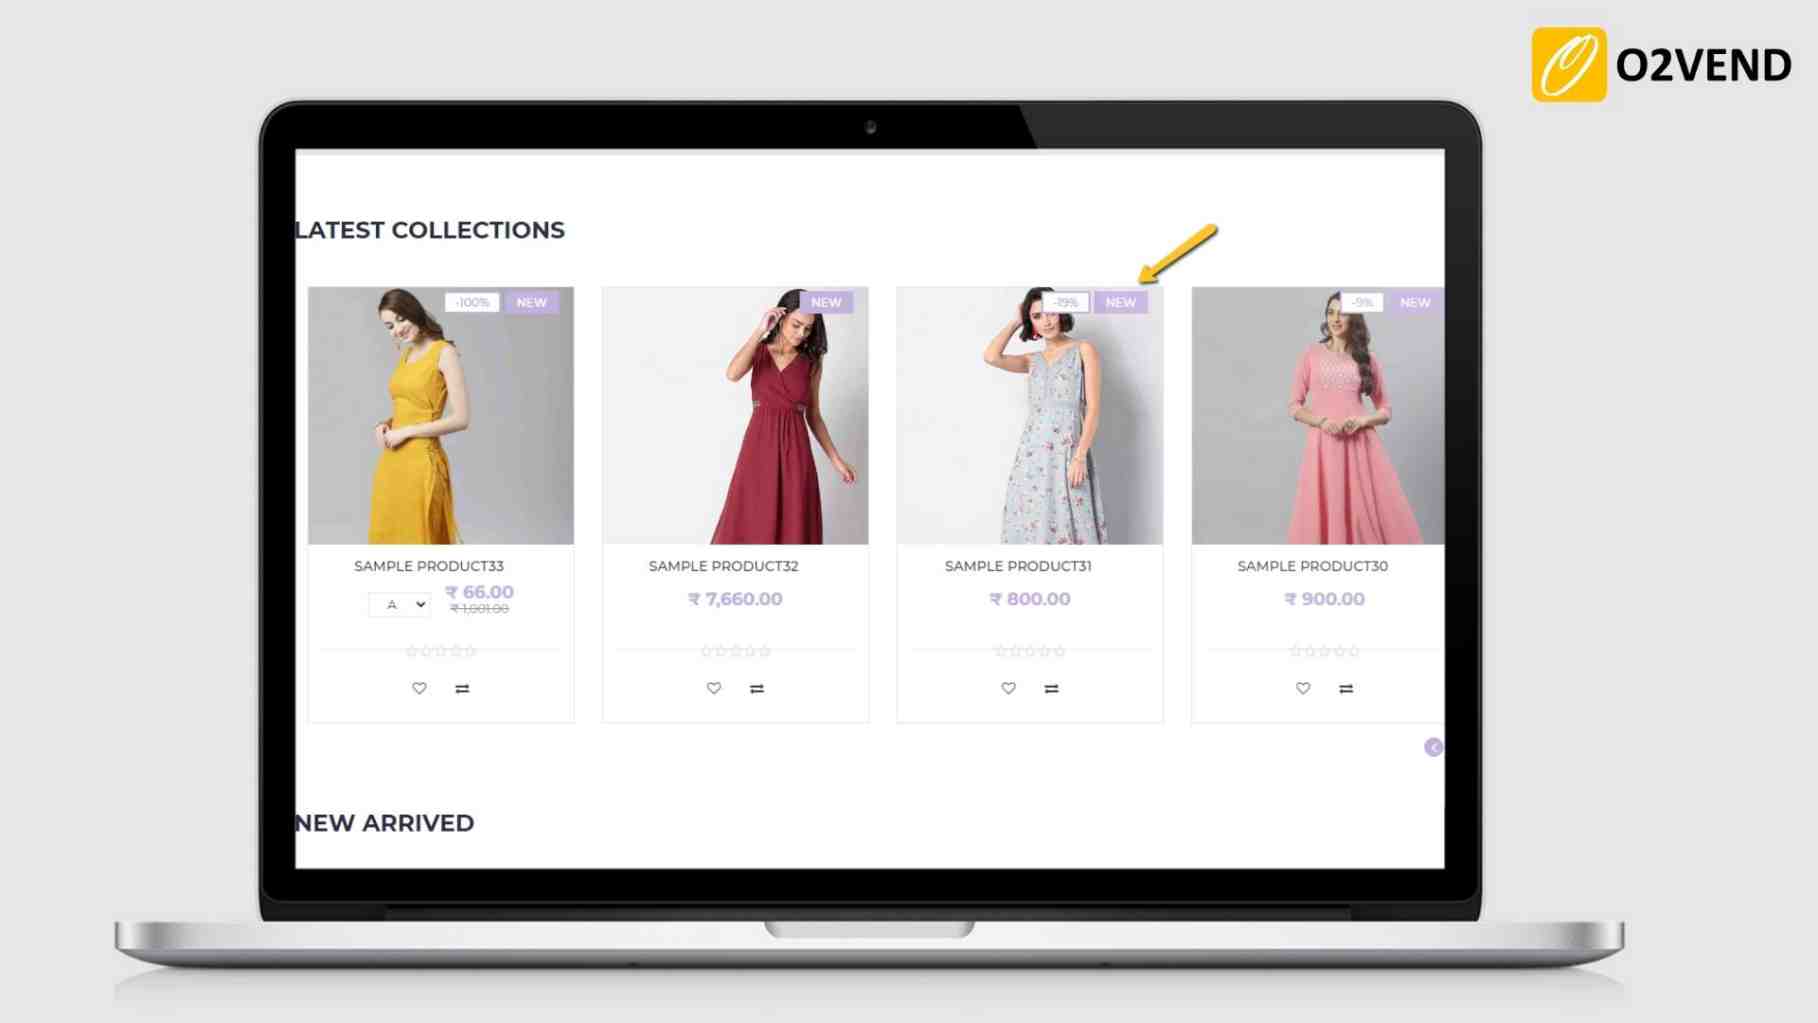
No of Days Products Shown as New
It allows setting the number of days for which the created product is considered as 'new'" in the eCommerce store (eg. 40 days)
Total No of Category Menus Shown in Header
It allows displaying the selected number of categories menu in the eCommerce header.

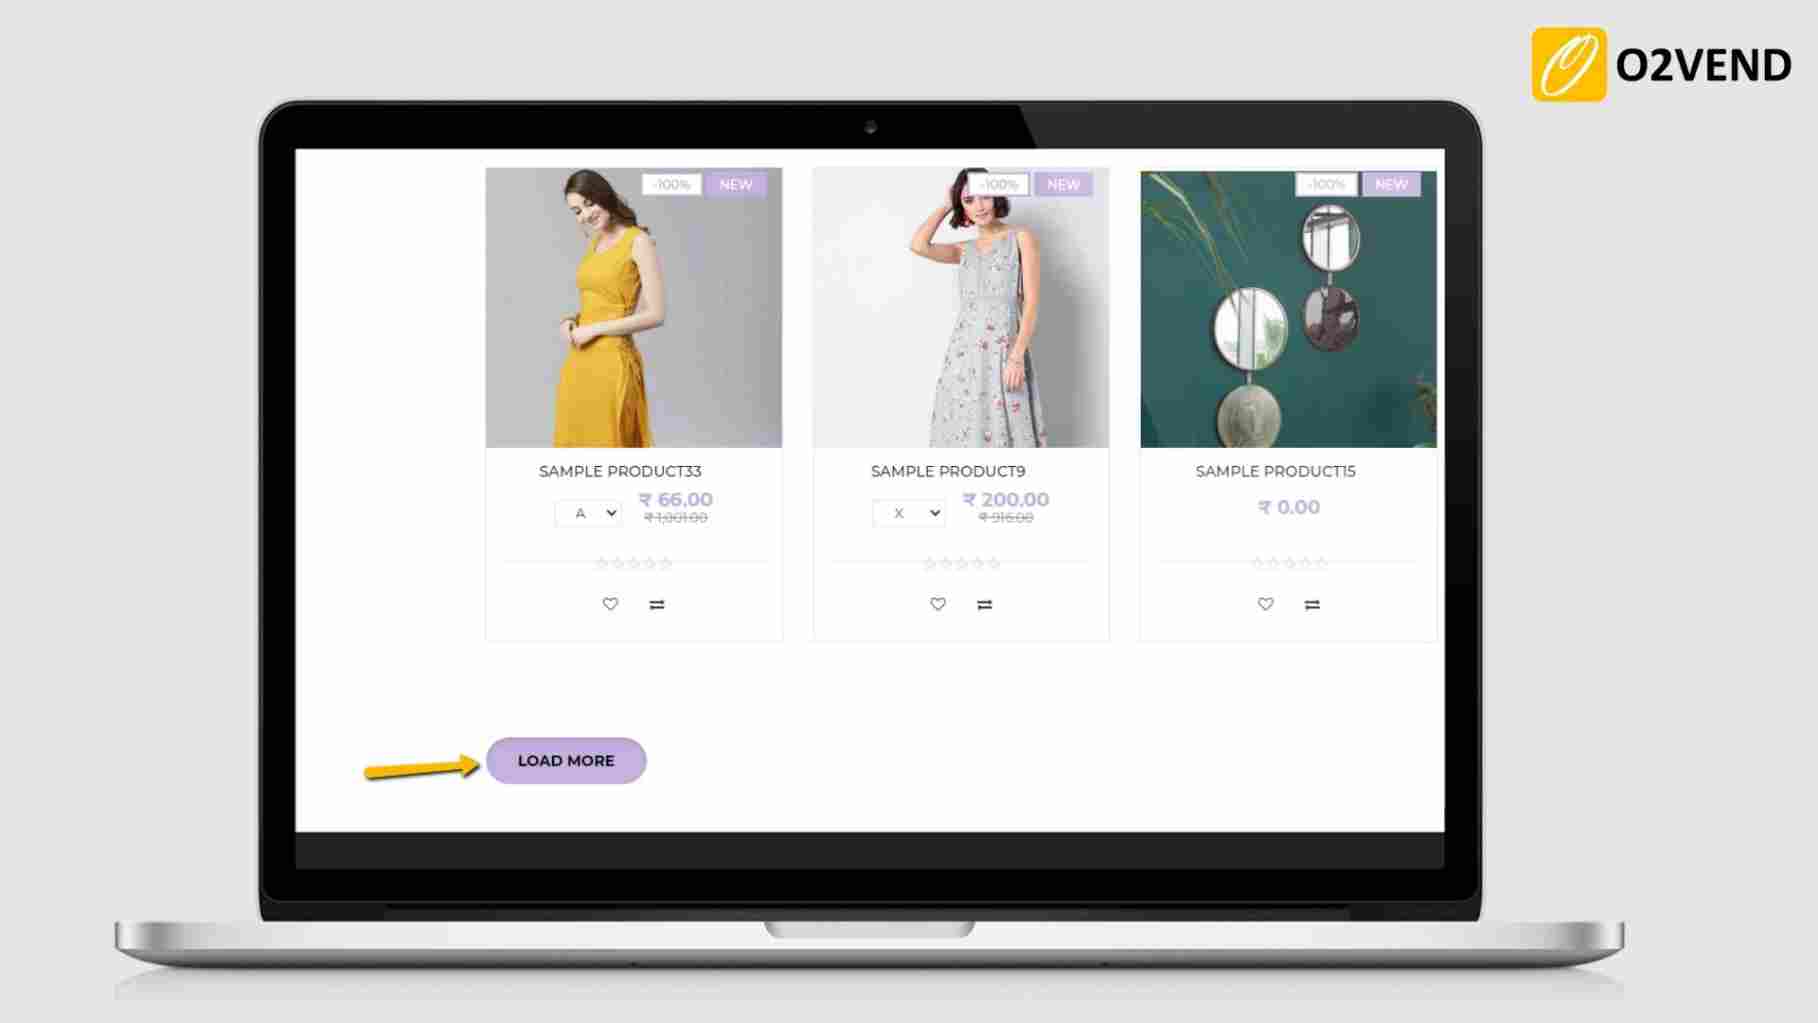
Pagination
Set pagination as default or Load more button.
If Set default -Shown a pagination to click on the Next and previous buttons from multiple pages. Set load more - Click the load more button to load the more items on the same page.
Prices for products with batch
Prices for Products with Batch - set as default or maximum batch price.
Default product price will display in eCommerce when set default.
When setting a maximum batch price, batch products' maximum price will be displayed in eCommerce.
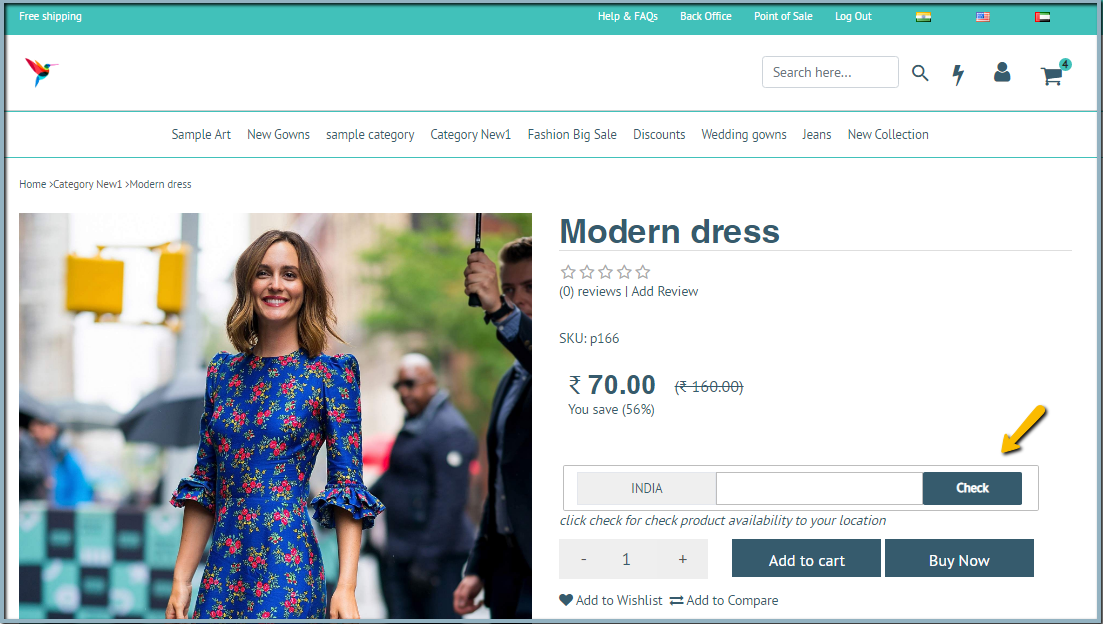
Allow Pincode check
This feature is useful when the customer can check the product availability on the product detail page when entering the zip code for his location. Enter the PIN code for check product availability to your location. If the product is available for the entered zipcode, the message will show that This item can be shipped to your location.
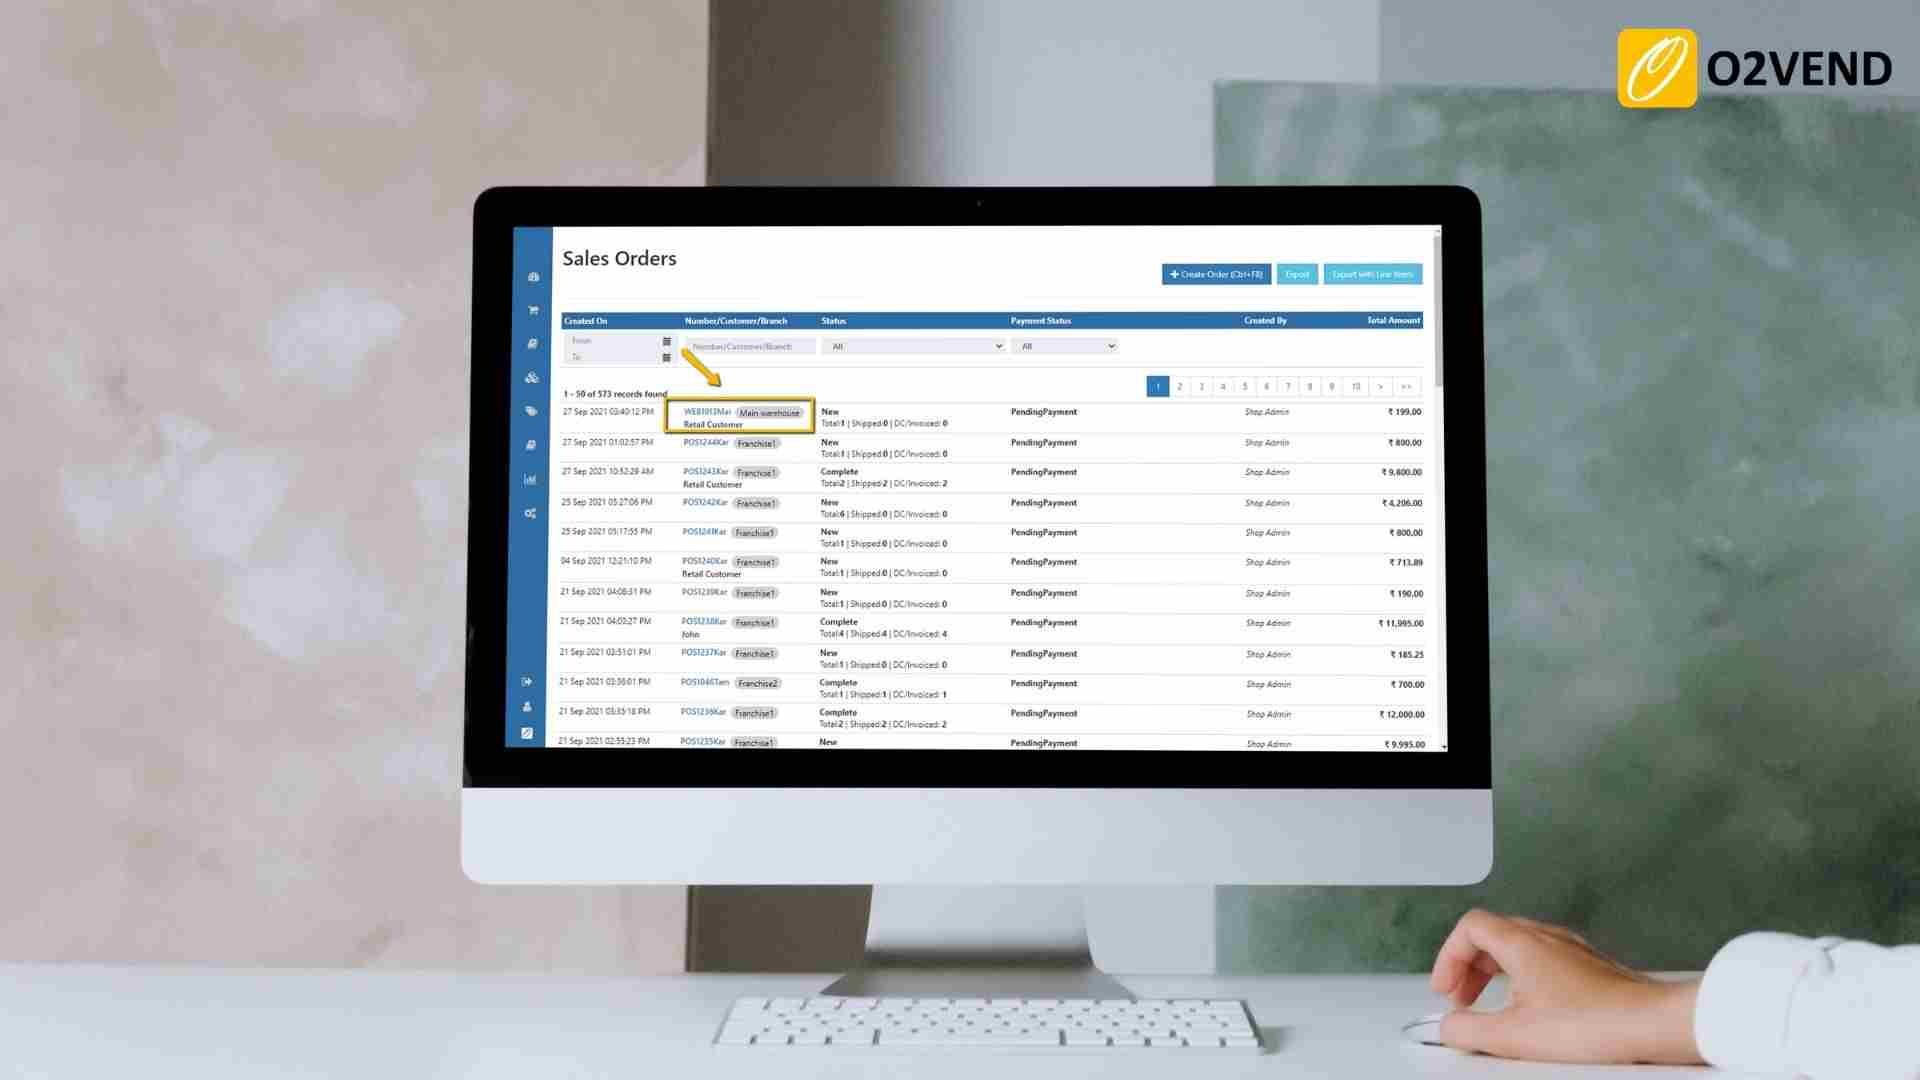
Web Order Branch
Whenever a customer buys a product in eCommerce, O2VEND places the order in to the main branch of the store by default. If this feature is enabled, the orders's shipping address pincode is matched with the available branch Pincode, and a branch is automatically selected to place the order.
Show Add To Cart Popup
The pop-up appears and displays to show the added products in cart when Show Add To Cart is enabled.
Quantity -/+ Button
This feature enables the plus and minus signs to be displayed for quantity adjustments in the product thumbnail and product detail pages.
Show Pincode Check in Product Details
This feature enables product availability for that specific pincode.
Offer Flow Chart (Coupon flow)
This feature makes it possible to display the available coupons chart in the configured list.
Volume Pricing for Products
This feature enables the display of volume pricing in the product detail page.