PhonePe Integration in O2VEND
PhonePe integration in O2VEND will provide diverse payment options by improving the overall customer experience, ensuring secure transactions, and aligning with mobile-centric trends in e-commerce. Businesses can leverage these benefits to enhance their payment processes and drive growth.
To create an account on PhonePe, you can proceed by following these steps:
Click here for Registration
You'll taken to the sign-up form on the PhonePe website.
In the required details in the registration form. The form may include fields such as:
- Business name
- Integration Platform
- Business website
- Contact person's name
- Contact person's email address and phone number
- Type of business
- Expected monthly transaction
Make sure to check the details you gave to make sure they're correct.
Then PhonePe will send a code to your phone for registration.
Enter the code, and you will get a popup confirming your form submission.
Once you submit the registration form, PhonePe will review your application and may reach out for additional documents or information to complete the verification process.
Submit the required documents and any extra information to PhonePe following their instructions, like proof of business registration, identity, address, and bank account details.
PhonePe will assess your documents, confirm your application, and keep you informed about the status of your application, along with any additional steps required.
Once verified, PhonePe will email you the production credentials and essential details, including the integration-required production quotations.
After getting the production credentials, Follow these steps to connect PhonePe with O2VEND.
Steps to integrate PhonePe with O2VEND:
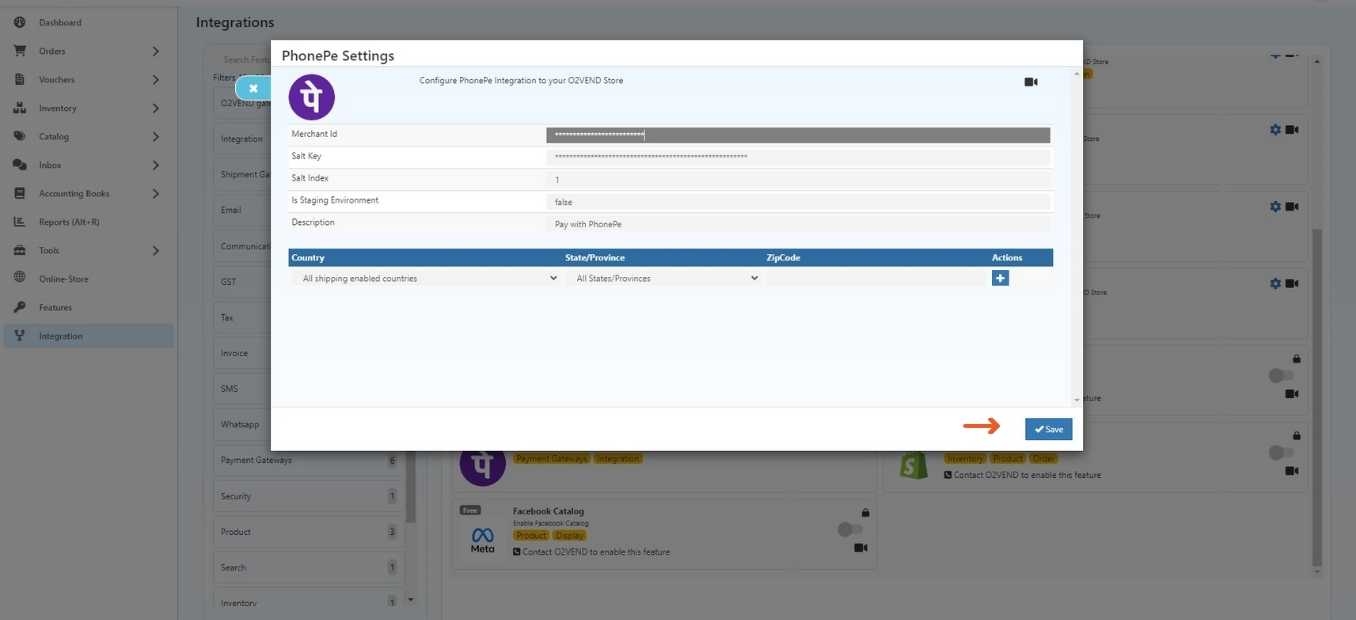
STEP 1: Configure PhonePe Settings:
1.1 - Go To BackOffice.
1.2 - Open Integration -> Click PhonePe.
1.3 - Enter the necessary details, MerchantID, Salt Key, and SaltIndex as received from PhonePe.
1.4 - Enter the value for IsStagingEnvironment as True Or False. Enter the value as 'True' if you connect to PhonePe Production. Enter the value as 'False' if you connect to the PhonePe UAT / Sandbox environment.
1.5 - The description field denotes the selected payment method, and this choice is subsequently reflected on the Order Payment page.
1.6 - Choose your country and state and enter your zip code. Afterward, click the "save" button.
For Example:
1.7 - If you select India as the country and Tamil Nadu as the state and enter a zip code like (623153), then PhonePe Integration becomes a payment option. However, it's only available if your transaction meets these conditions and won't show up for transactions in other countries or states.
1.8 - If the country, state, and zip code are left unspecified, the system will default to making the item or service available for all countries.
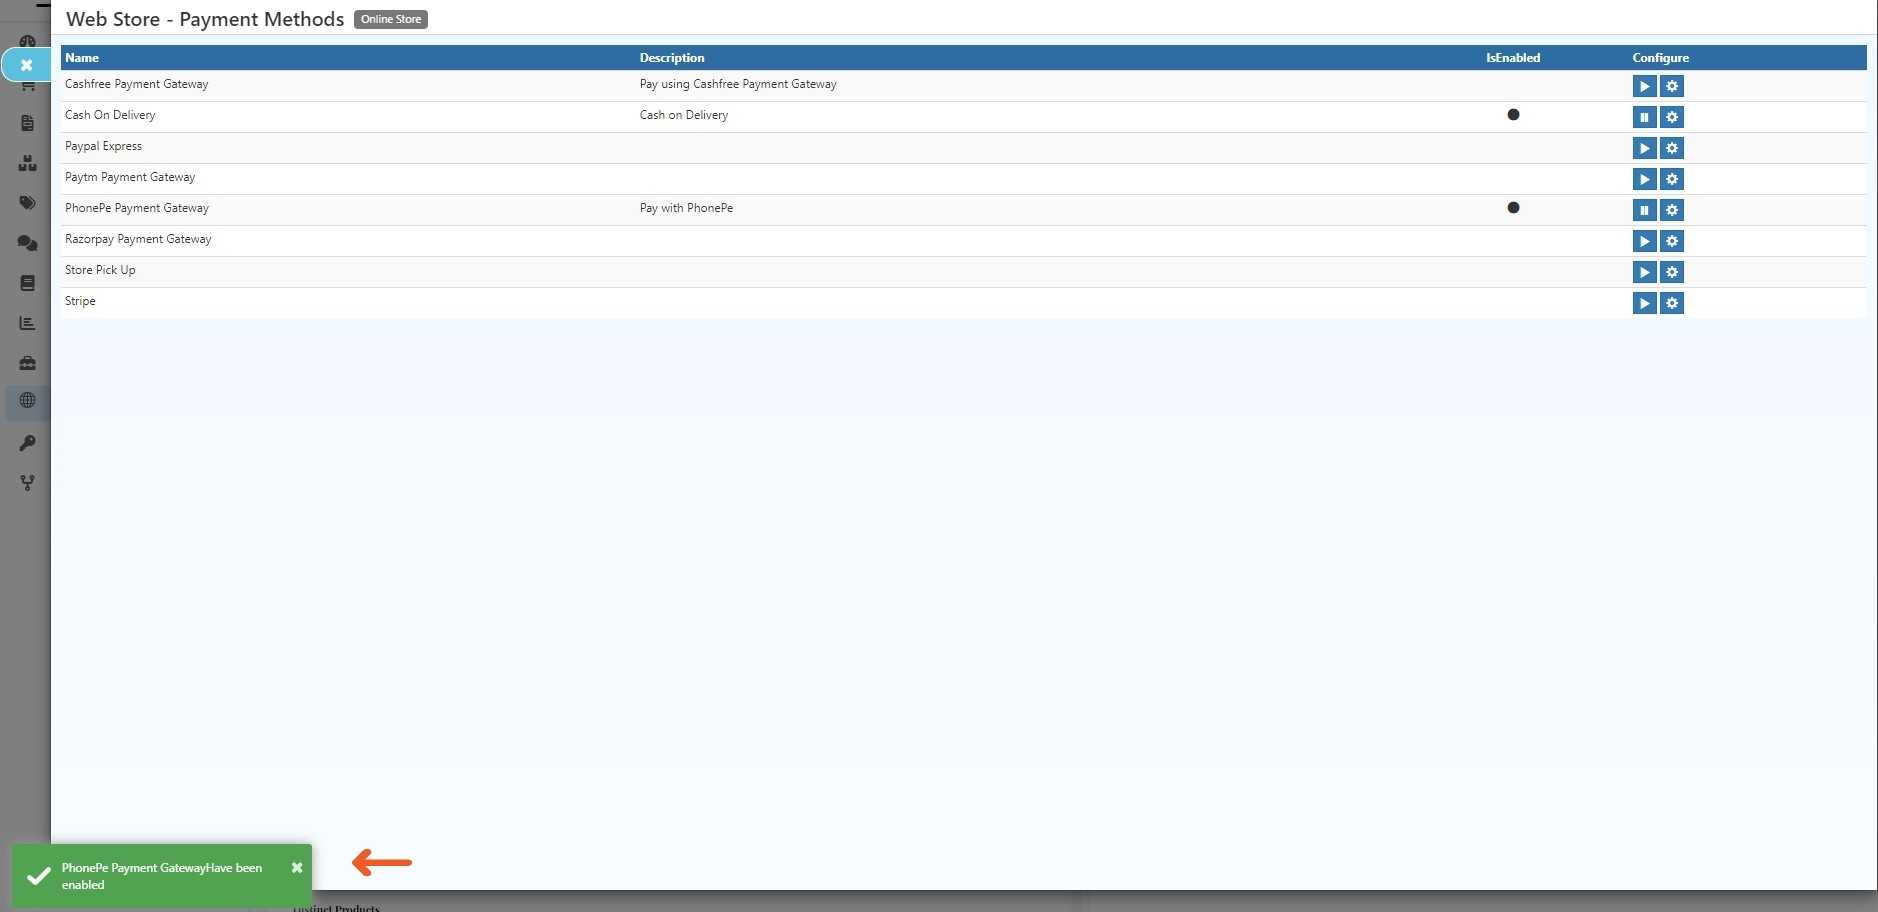
STEP 2: Enable Phonepe Integration:
2.1 - Go To Backoffice
2.2 - Go to the online store -> select Setup Payment Method.
2.3 - Activate the PhonePe payment gateway, when a pop-up appears and click OK.

2.4 - Phonepe Payments Gateway has been Enabled.