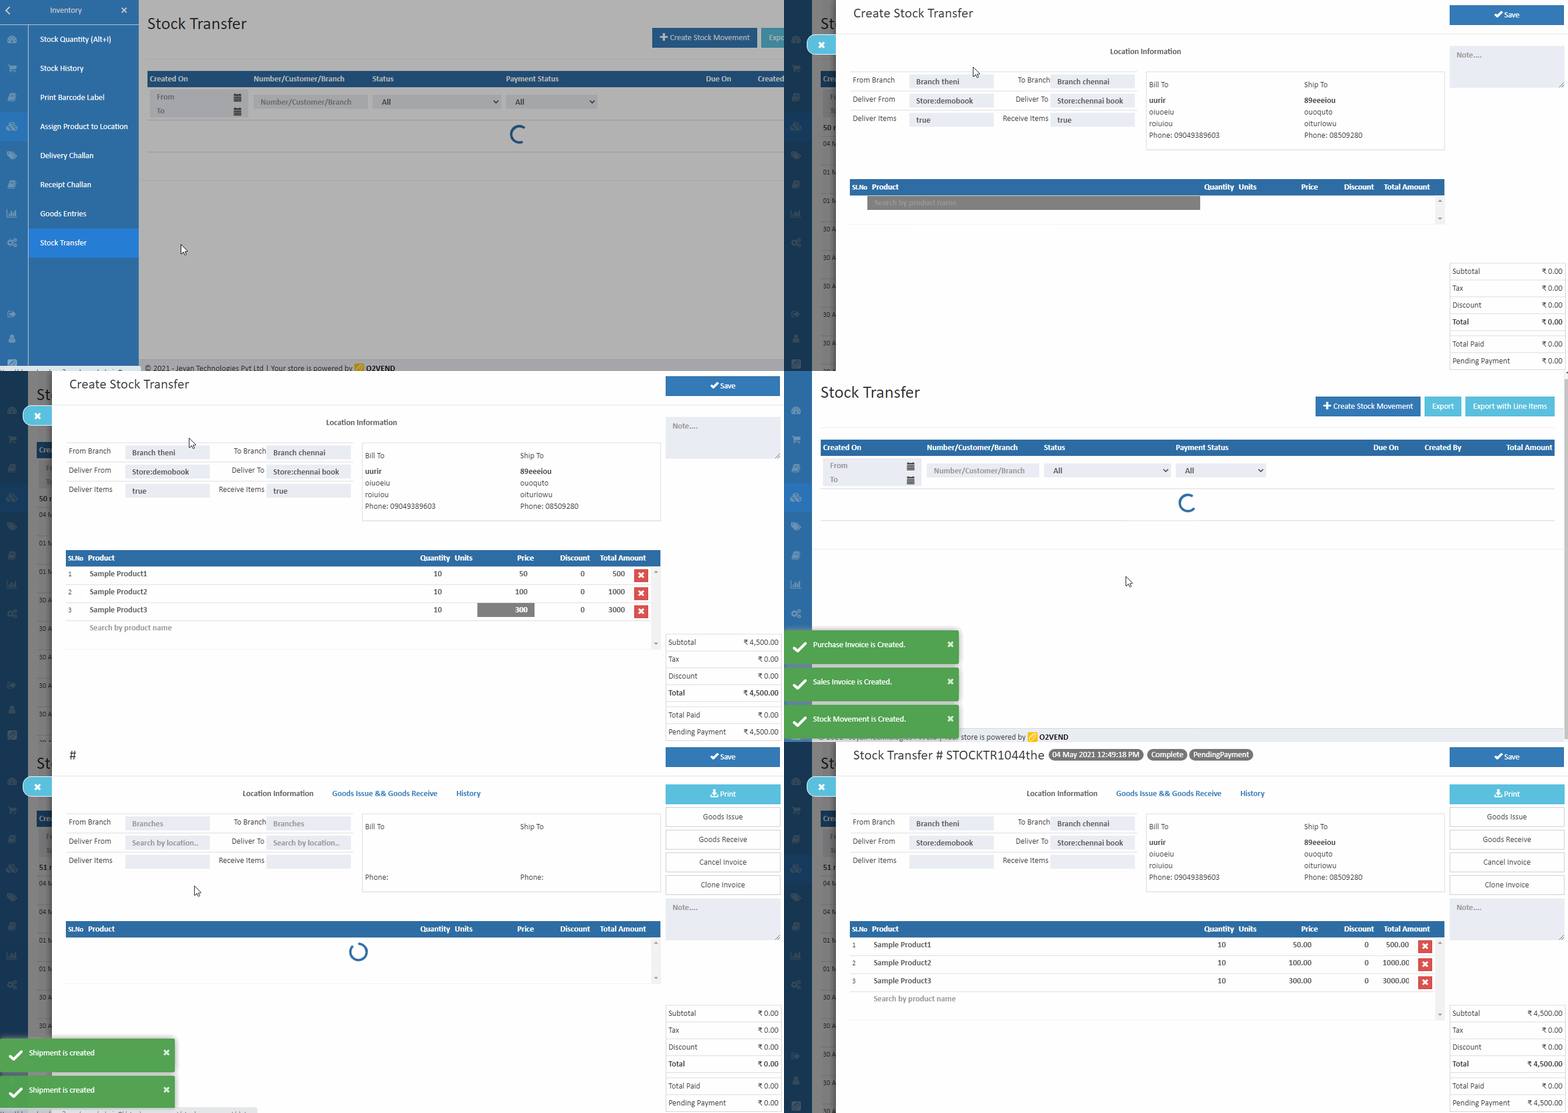
Stock Transfer
Stock transfer is an essential process in inventory management and supply chain operations, as it allows organizations to efficiently redistribute inventory across different locations or branches. This can be done to meet customer demand, relocate inventory to different warehouses or branches, or consolidate inventory from multiple locations.
In O2VEND system, the stock transfer process is fully automated, which simplifies the process and ensures that all the necessary documents and records are accurately and automatically created. The first step in the process is the creation of a stock transfer document, which details the items being transferred, the quantity of each item, and the location or branch they are being transferred to. This document serves as the instructions for the inventory movement and acts as a record of the transfer.
After the stock transfer document is created, the next step is the actual physical movement of the goods. This can be done through various ways, like using a third-party logistics provider or in-house logistics team, depending on the organization's preference and infrastructure.
The stock transfer process also updates the inventory records in the system, ensuring that the records are accurate and up-to-date. This allows organizations to efficiently use inventory across different branches or locations, avoiding stockouts and overstocking, which in turn can help to improve customer service and sales.
How To create a Stock Movement
- Open the Back Office.
- Go to the Inventory menu.
- Click and open the Stock Transfer section.
- Click the Create Stock Movement button in the top right corner.
- Enter the From branch and To branch name in the branch search box.
- Select the From location and To location name in the location search box.
- After selecting the location and branch, automatically fill in the location billing address, shipping address
- Select the Deliver items and Receive items that are True or False.
- Select product name by entering the product name in a Product Name search box.
- Summary will show at the end of the page. Kindly check the summary before saving the order.
- Finally, Click the top right corner Save or click the Ctrl+S button to create stock movement.
- Now the Sales and purchase invoices are created and shipment is also created.

How to add lot in Goods Issue
Click Goods Issue button.
Click Allot Lot button for the products.
Enter the lot number, manufacturer batch, mfg date, expiration date, and adjust the quantity for this product, or pick an existing lot number. After pressing the enter key, the information is stored.
Click Save button. A lot is allocated, and the stock is added to the designated warehouse.
Click Print Challan button to print goods delivered items.
How to add lot in Goods Received
Click Goods Received button.
Click Allot Lot button for the products.
Enter the lot number, manufacturer batch, mfg date, expiration date, and adjust the quantity for this product, or pick an existing lot number. After pressing the enter key, the information is stored.
Click Save button. A lot is allocated, and the stock is added to the designated warehouse.
Click Print Challan button to print goods received items.
