Orders in the Physical Stores
The sales screen in O2VEND is where you create sales orders. Once the orders are created, they can be converted to invoices in the receipt screen, which is the final step in the checkout process for a store. To create a sales order using O2VEND:
1.Open the O2VEND POS application and log in using your credentials. 2.Navigate to the "Sales" screen. 3.Select the products that the customer wants to purchase. 4.Enter the necessary information, such as the customer's name and contact details. 5.Review the order to ensure that it is accurate. 6.When you are ready to complete the sale, click the "Save and Proceed for Receipt" button. 7. If the order to be put on hold and edited later - you shall click "Save" or "Save and Print" buttons. Please note Hold orders has to be enabled in the features of the POS. 7.The order will be converted to an invoice in the receipt screen, and the transaction will be recorded in the store's financial records.
By following these steps, you can efficiently process sales and complete the checkout process for your store using O2VEND POS.
Detailed steps are as below.
Create Sales Order
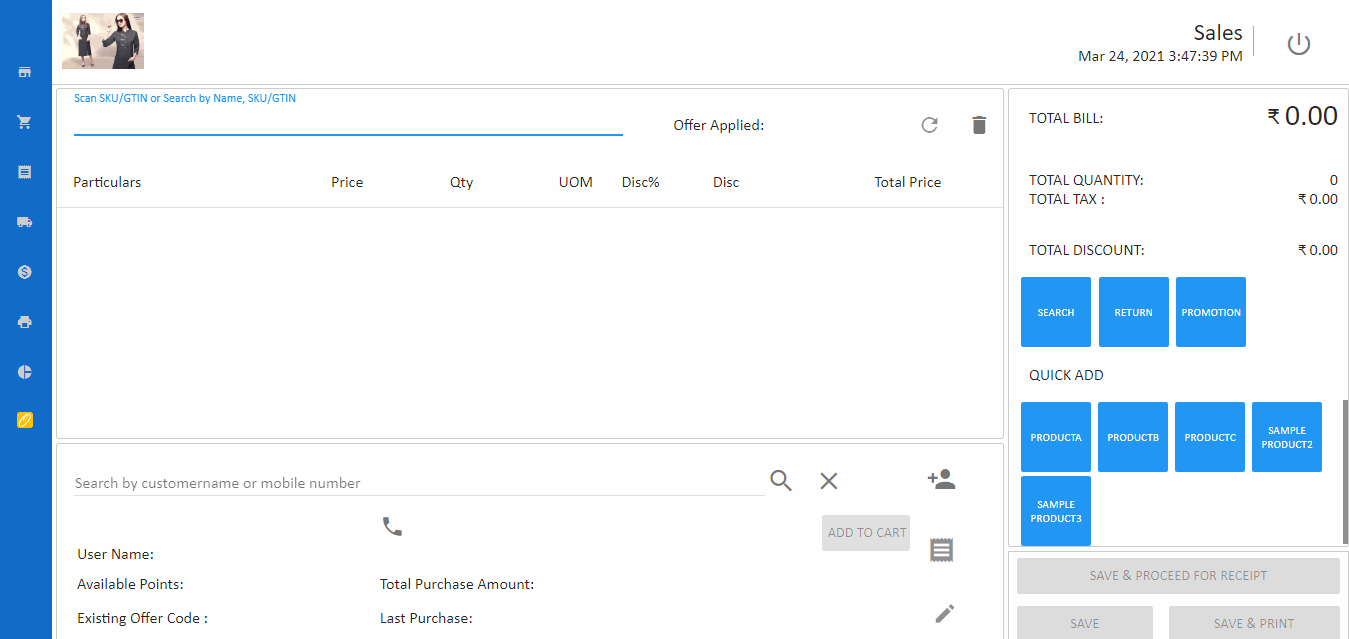
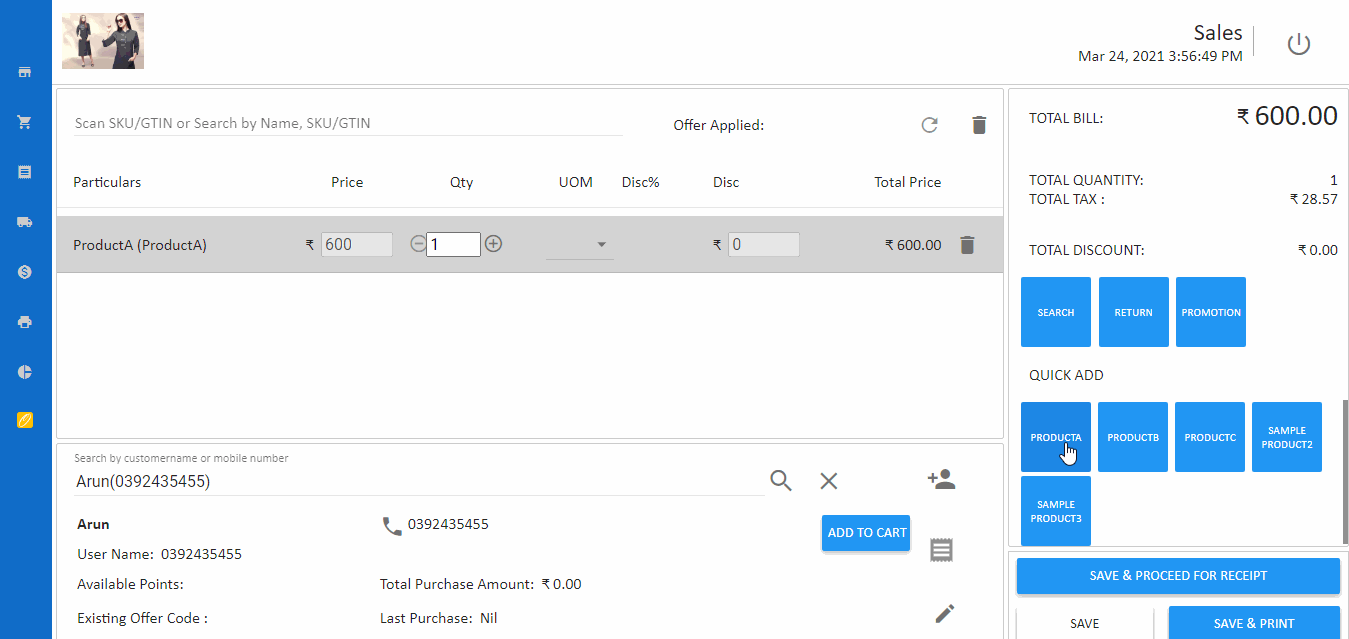
Sales screen creates orders for any customer.
How to create sales order
- Open the Point of Sale.
- Click Sales section.
- Search for the Registered Customer with their Name or Phone Number.
Tip
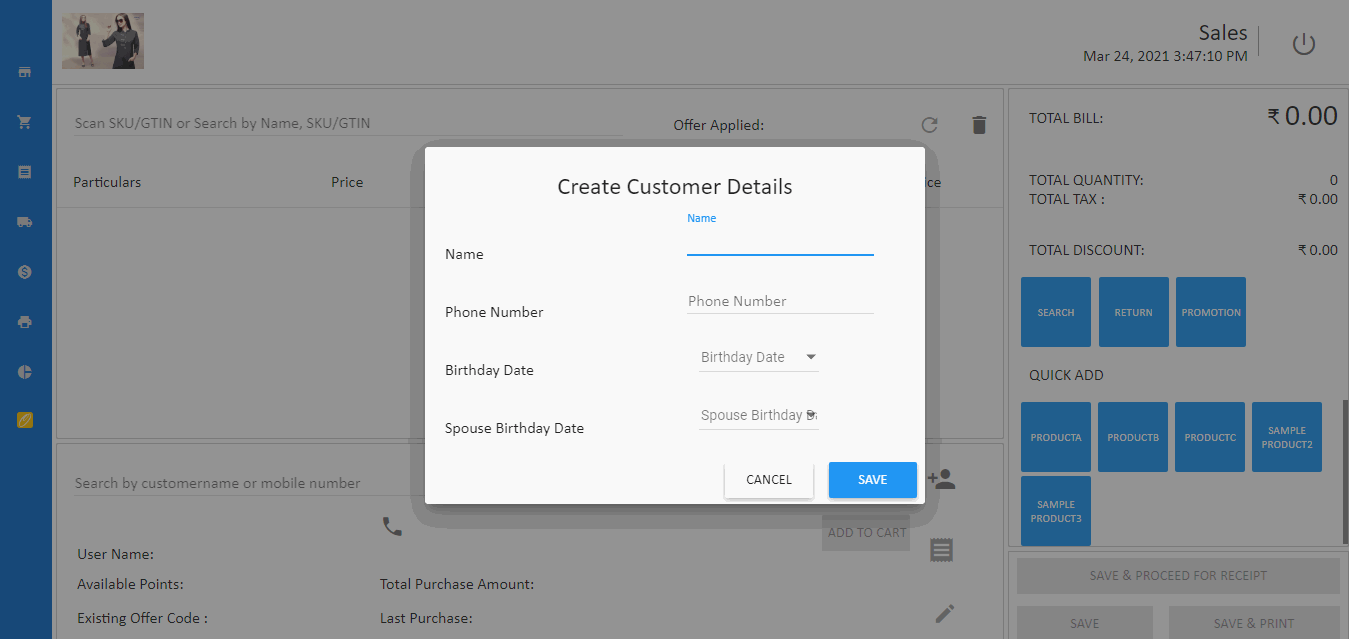
Sales can be made to a registered customer and to a unregisted customer. You Shall register a customer in this screen itself for any willing customers.
Tip
Use Add Customer icon button to register a new customer.
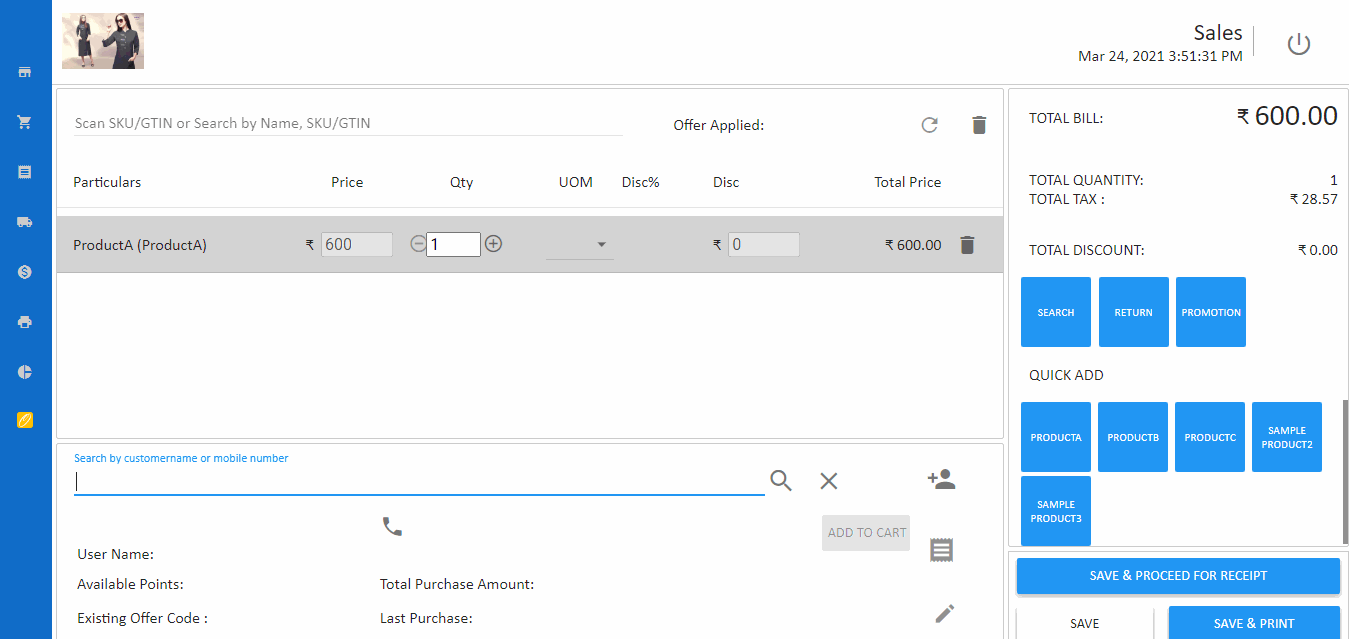
- Enter SKU or GTIN of the ordered product in the Sales Item box. The product will be added to Cart.
Tip
If using a Barcode scanner scan the product barcodes.
- Repeat the above step for all the products.
- Update product quanity in the cart if needed.
- Press Save button.
How to add product to customer cart
From the O2VEND POS sales screen, Add product to customer shopping cart by using ADD TO CART button.
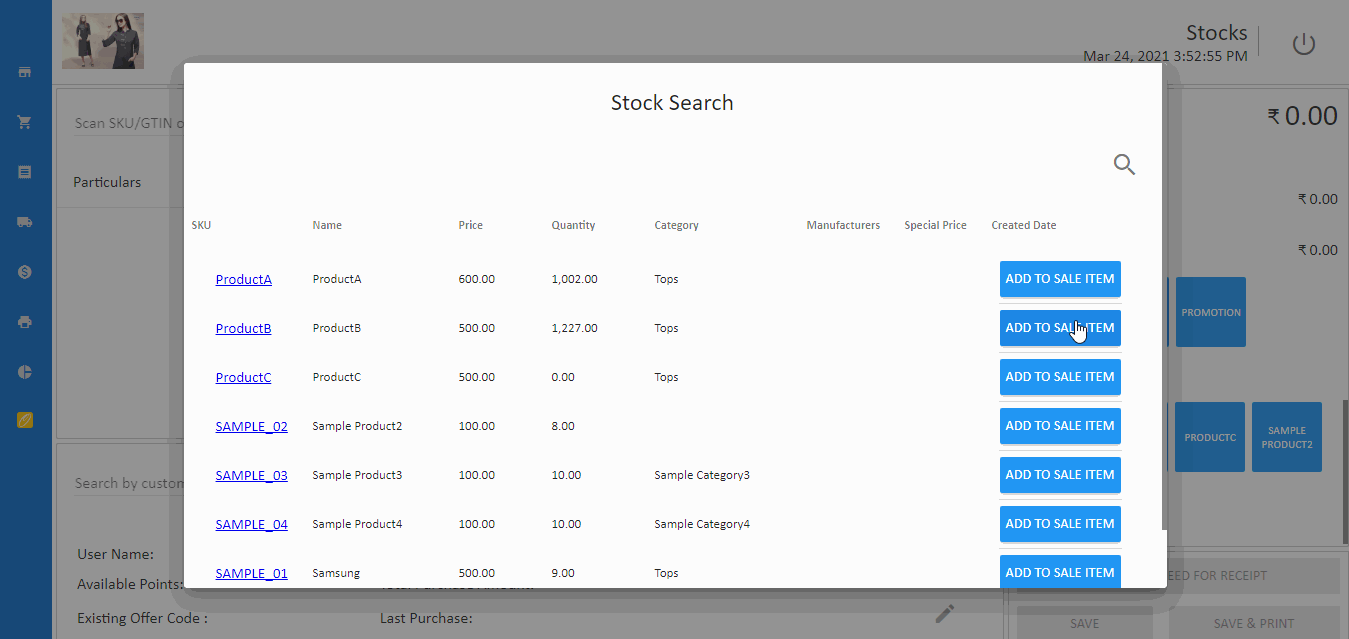
How to search products in Sales Screen
Sales screen allows to search for the available products in the warehouse. Follow below steps.
- Open the Sales screen in the POS application.
- In the right hand side - click Search button.
- In the opened popup - search for the product with any data.
- Once find the product, press Add to Sale Item against the product.
- The product will be added to the Cart.
How to apply offers.
O2VEND is an omnichannel platform that provides a seamless and integrated experience for all stakeholders, including customers, merchants, and employees. With O2VEND, you can offer the same promotions, discounts, and loyalty programs across online and physical stores. This helps to create a consistent and cohesive brand experience for customers, regardless of whether they are shopping online or in-store.
Omnichannel platforms like O2VEND enable businesses to effectively manage their operations and interactions with customers across multiple channels, such as ecommerce, social media, mobile apps, and physical stores. By providing a unified view of customer data and activity, omnichannel platforms help businesses to deliver a personalized and seamless customer experience.
- Open the Sales screen in the POS application.
- In the right hand side - click on the Promotions button.
- Applicable Offers are displayed.
- Click on any of the Offer and press Apply.
- The selected offer will get applied to the cart and discount applied.

Tip
See more of setting offers in Cart Price Rule
Warning
Any changes to the Cart or Customer after the offer is applied - will mark the offer in Red color. In such cases Re apply offer.
How to add products quickly to the Cart.
O2VEND proviedes features to add products quickly to the cart via Quick Add
- Open the Sales screen in the POS application.
- In the right hand side - click on any of the products under Qucik add section.
- The products will be added to the Cart.

Tip
Setup products to be shown in the quick add section. Set up the Quick add products in Quick Add
Print Point of Sale bills
O2VEND provides functionality to print Point of Sale bill.
How to print sale bill
- Open the Sales screen in the POS application.
- Once all the details are entered press Save and Print
- Print bill is generated and printed.
- Shall use Thermal printer or Laser-A4 to print the bill.
- Reprint the created sales order in Reprint.
Tip
Use Edit customer icon button to edit customer information during the billing process. Always check with the customer in the billing counter on their data accuracy.
How to assign serial and lot number
- Open the Sales screen in the POS application.
- Enter the serial or lot number enable products.
- Now enter the serial or lot number.
- Press Save button.