Sales Features in O2VEND
Sales features help control POS behavior, pricing flexibility, branch mapping, and payment handling.
These settings improve billing accuracy, faster checkout, and better operational control.
Location in Back Office
Navigation Path:
Back Office → Features → Sales
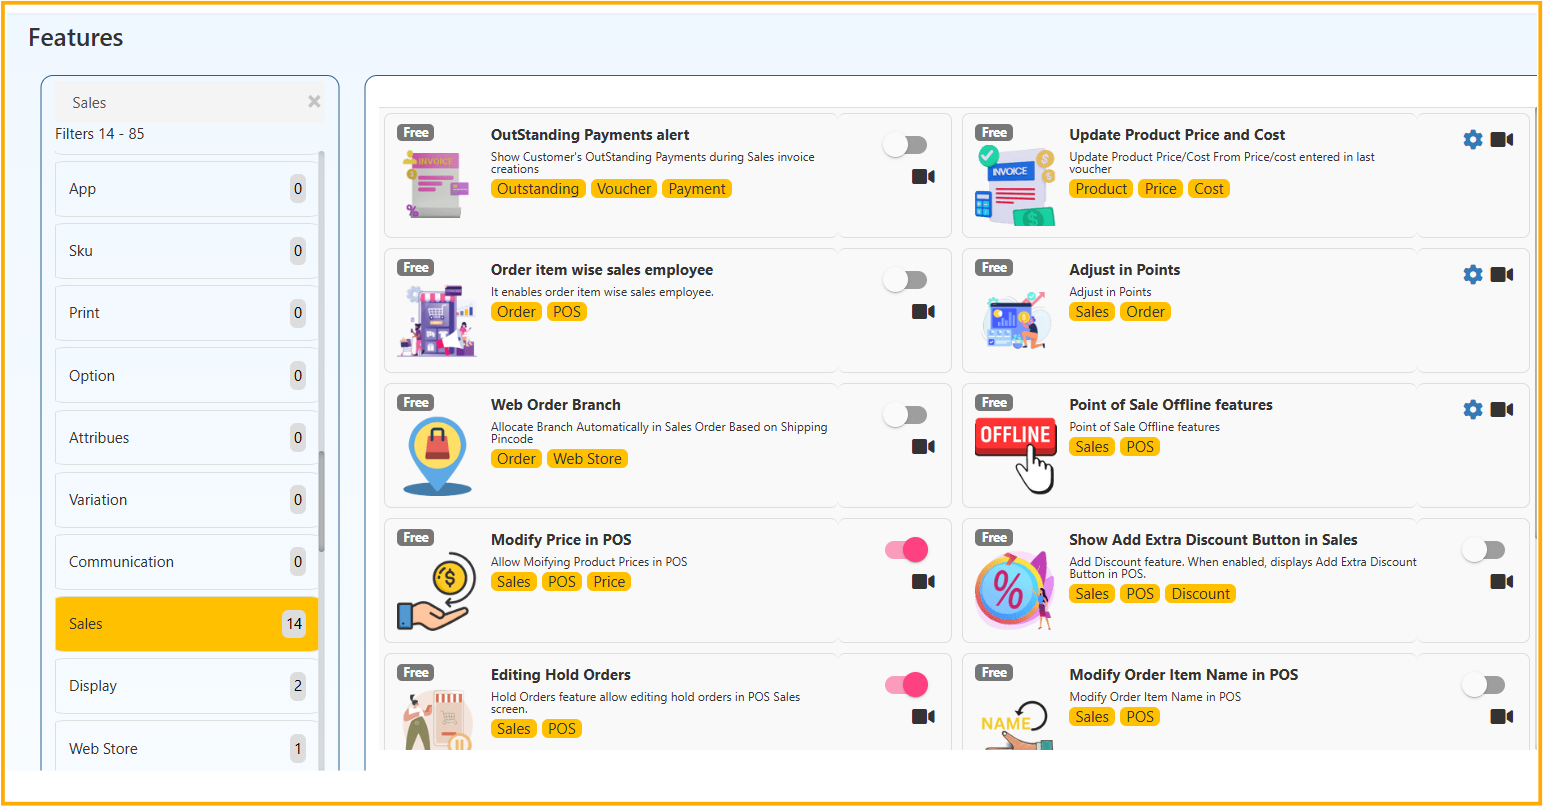
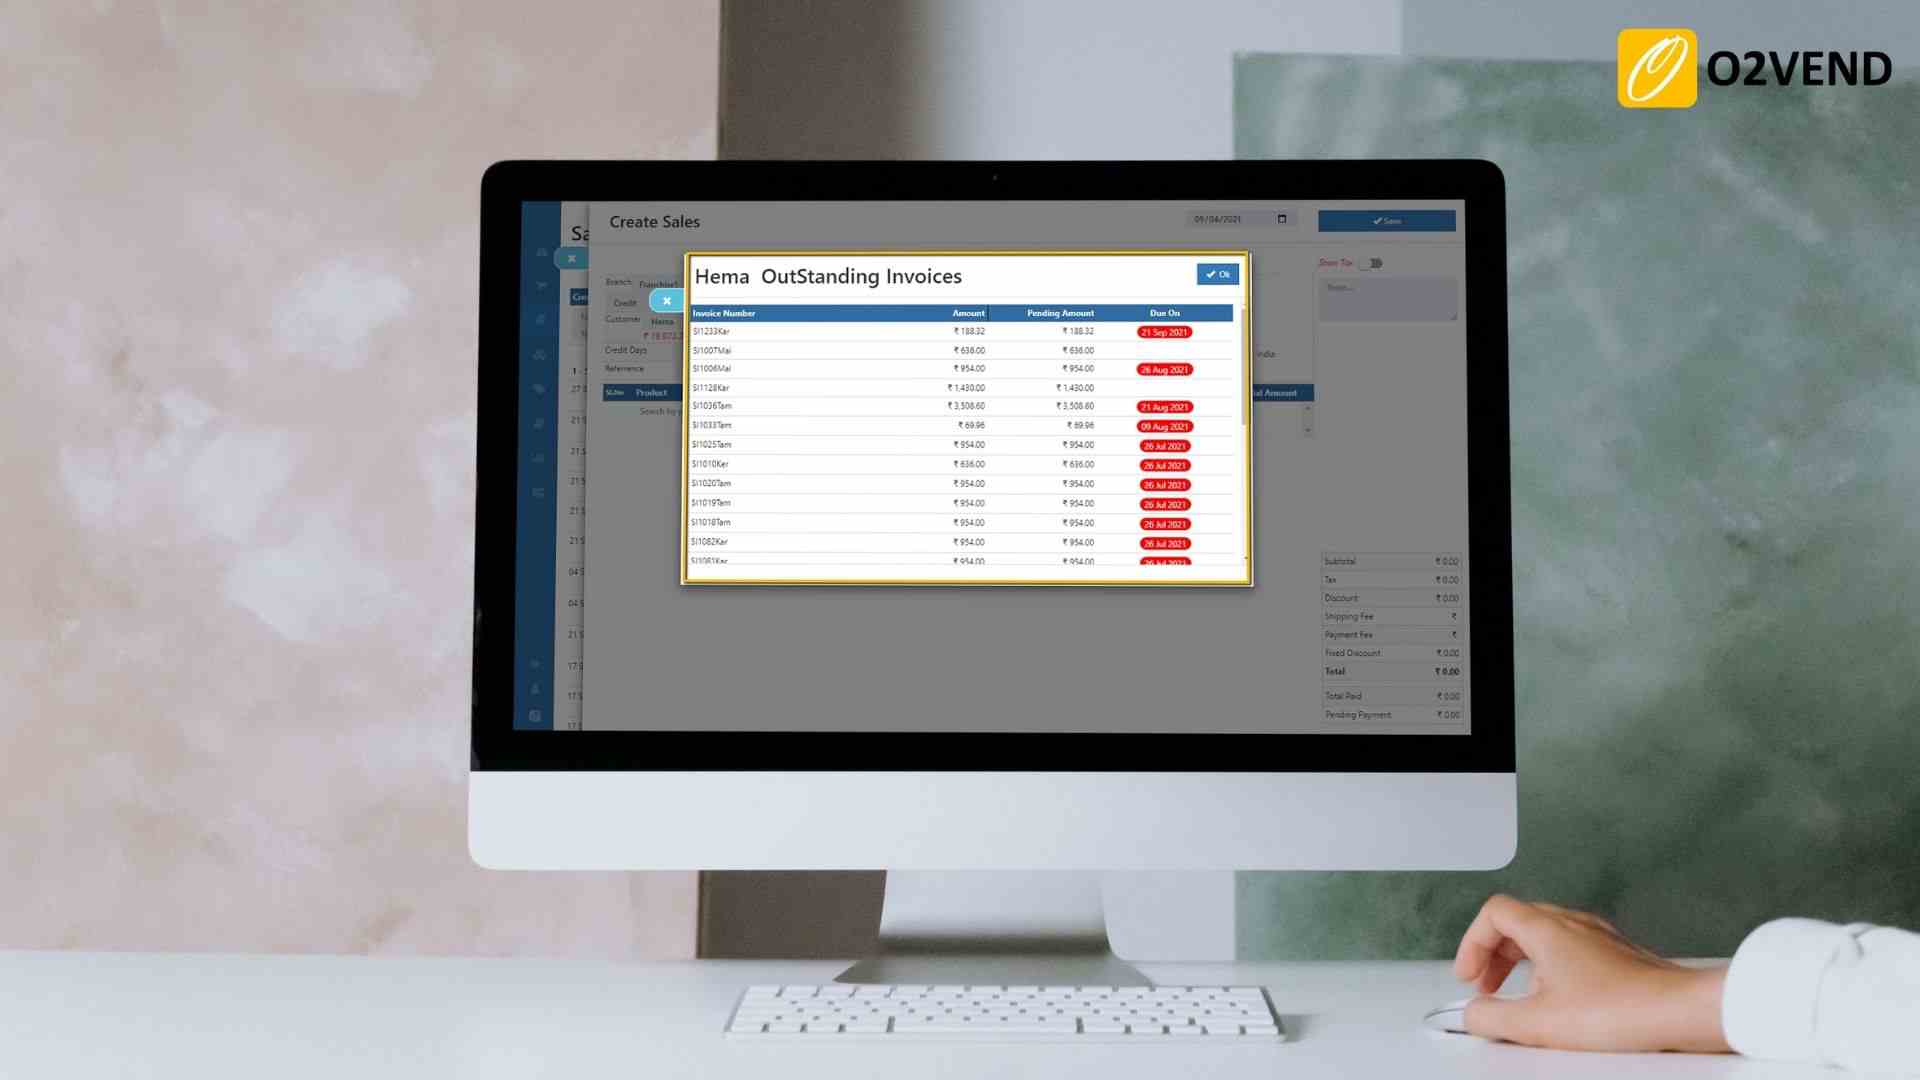
OutStanding Payments alert
Shows customer outstanding due amount during sales invoice creation.
Update Product Price and Cost
Updates product price and cost from the latest voucher entry.

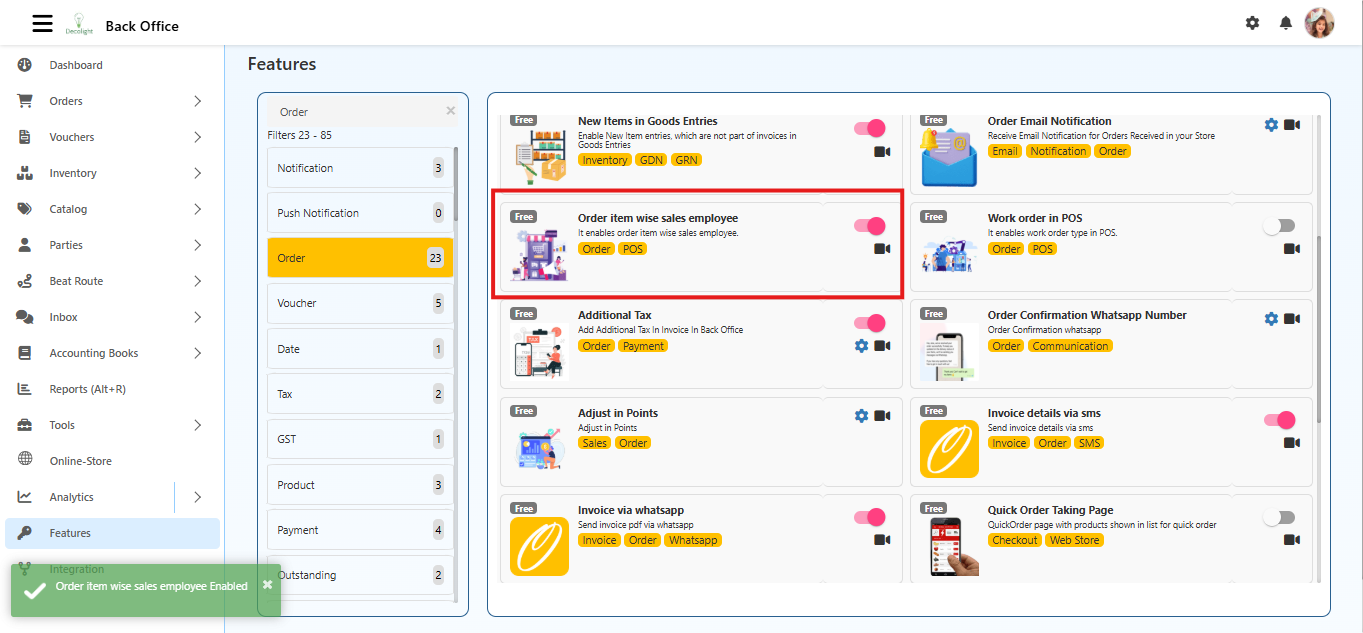
Order item wise sales employee
Allows assigning sales employee at item level in a single order.
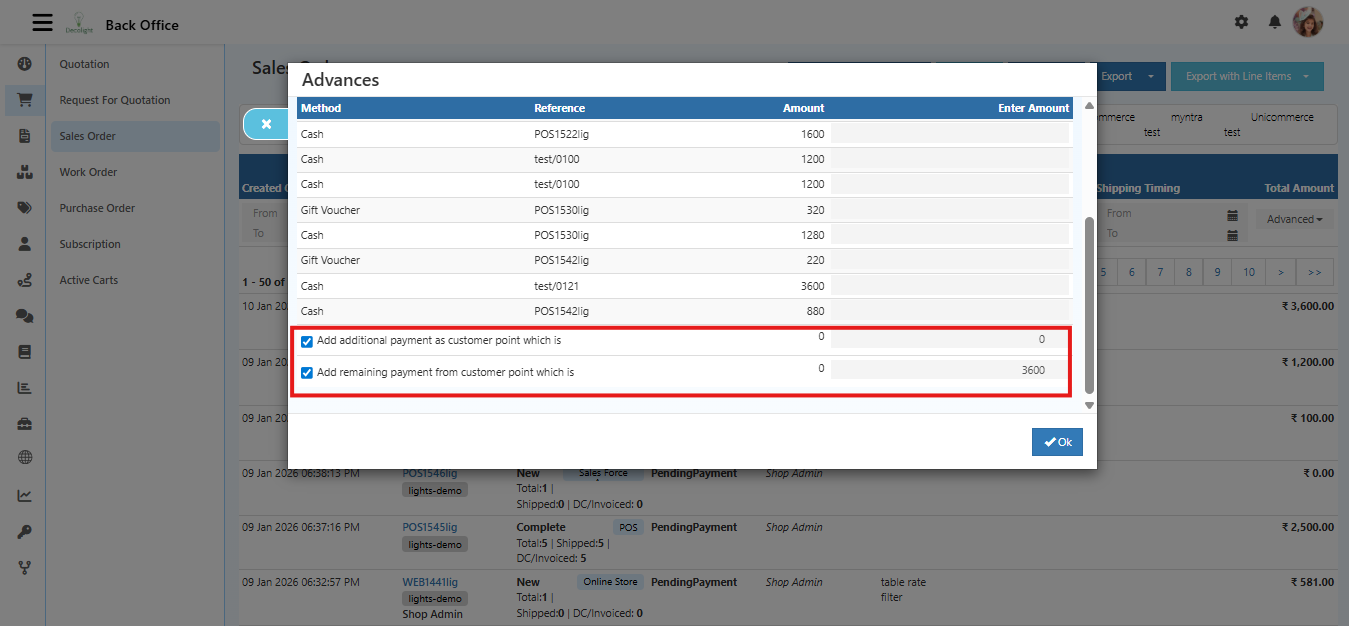
Adjust in Points
Allows converting payment to points and redeeming points in sales flow.
Web Order Branch
Automatically maps web orders to branch based on shipping pincode.

Point of Sale Offline features
Enables POS billing continuity in offline mode when internet is unavailable.
Modify Price in POS
Allows editing product price directly in POS billing screen.
Show Add Extra Discount Button in Sales
Shows extra discount button in POS sales screen.
Editing Hold Orders
Allows editing already held orders in POS sales screen.
Modify Order Item Name in POS
Allows changing order item name before finalizing POS billing.
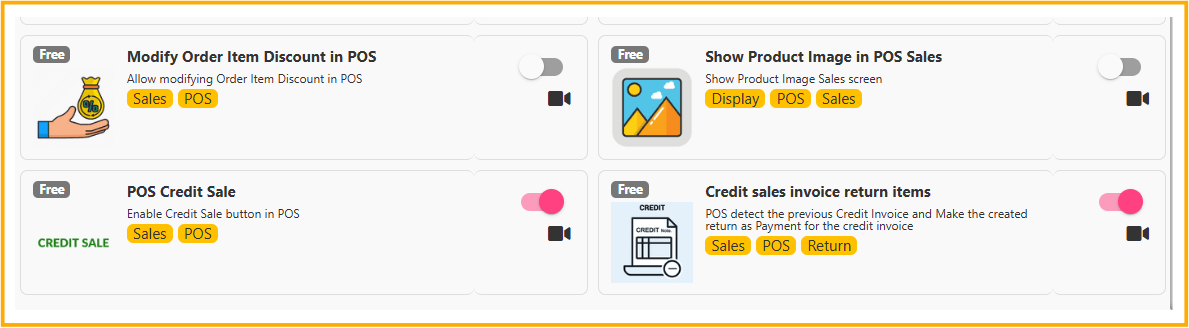
Modify Order Item Discount in POS
Allows changing item-level discount during POS billing.
Show Product Image in POS Sales
Displays product image in POS sales screen for quicker identification.
POS Credit Sale
Enables credit sale option in POS billing flow.
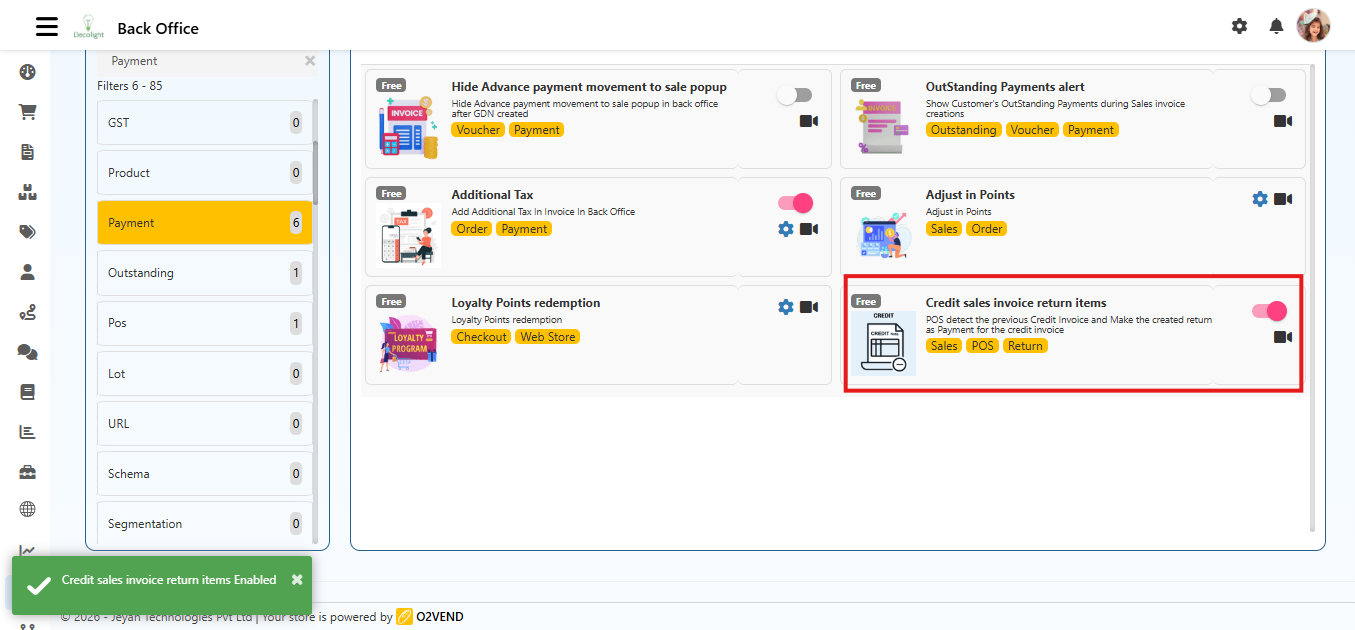
Credit sales invoice return items
Detects previous credit invoice and applies return amount as payment for that invoice.