Shiprocket Integration in O2VEND
Shiprocket integration helps you manage shipping, courier selection, and order tracking بسهولة from your O2VEND store.
Navigation Path
Back Office → Integration → Shiprocket
Step 1: Create Shiprocket Account
- Register here: https://shorturl.at/acU79
- Enter email, password, and phone number
- Complete KYC verification
- Login to Shiprocket Dashboard
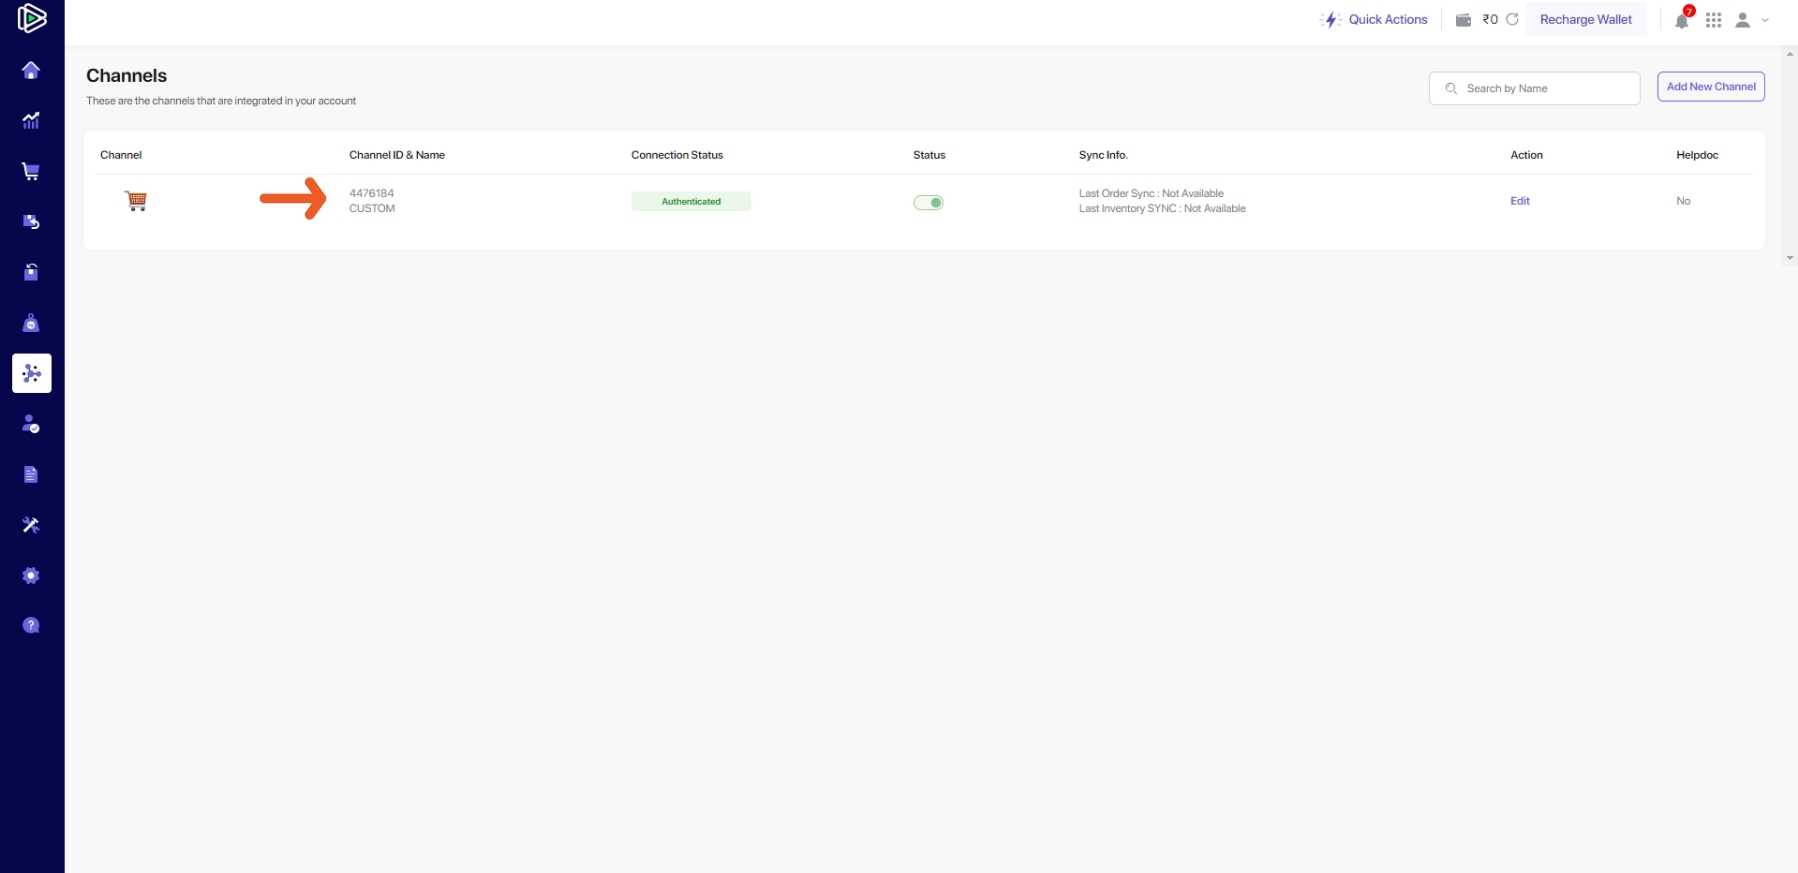
Step 2: Get Required Details
Channel ID
- Go to Setup & Manage → Channels
- Copy your Channel ID
API Credentials
- Go to Settings → API
- Click Create API User
- Use a different email ID (not your login email)
- Click Generate API Credentials
- Copy:
- Email ID
- Password

Step 3: Setup Pickup Location
- Go to Settings → Pickup Address
- Add/Edit your pickup address
- Save changes
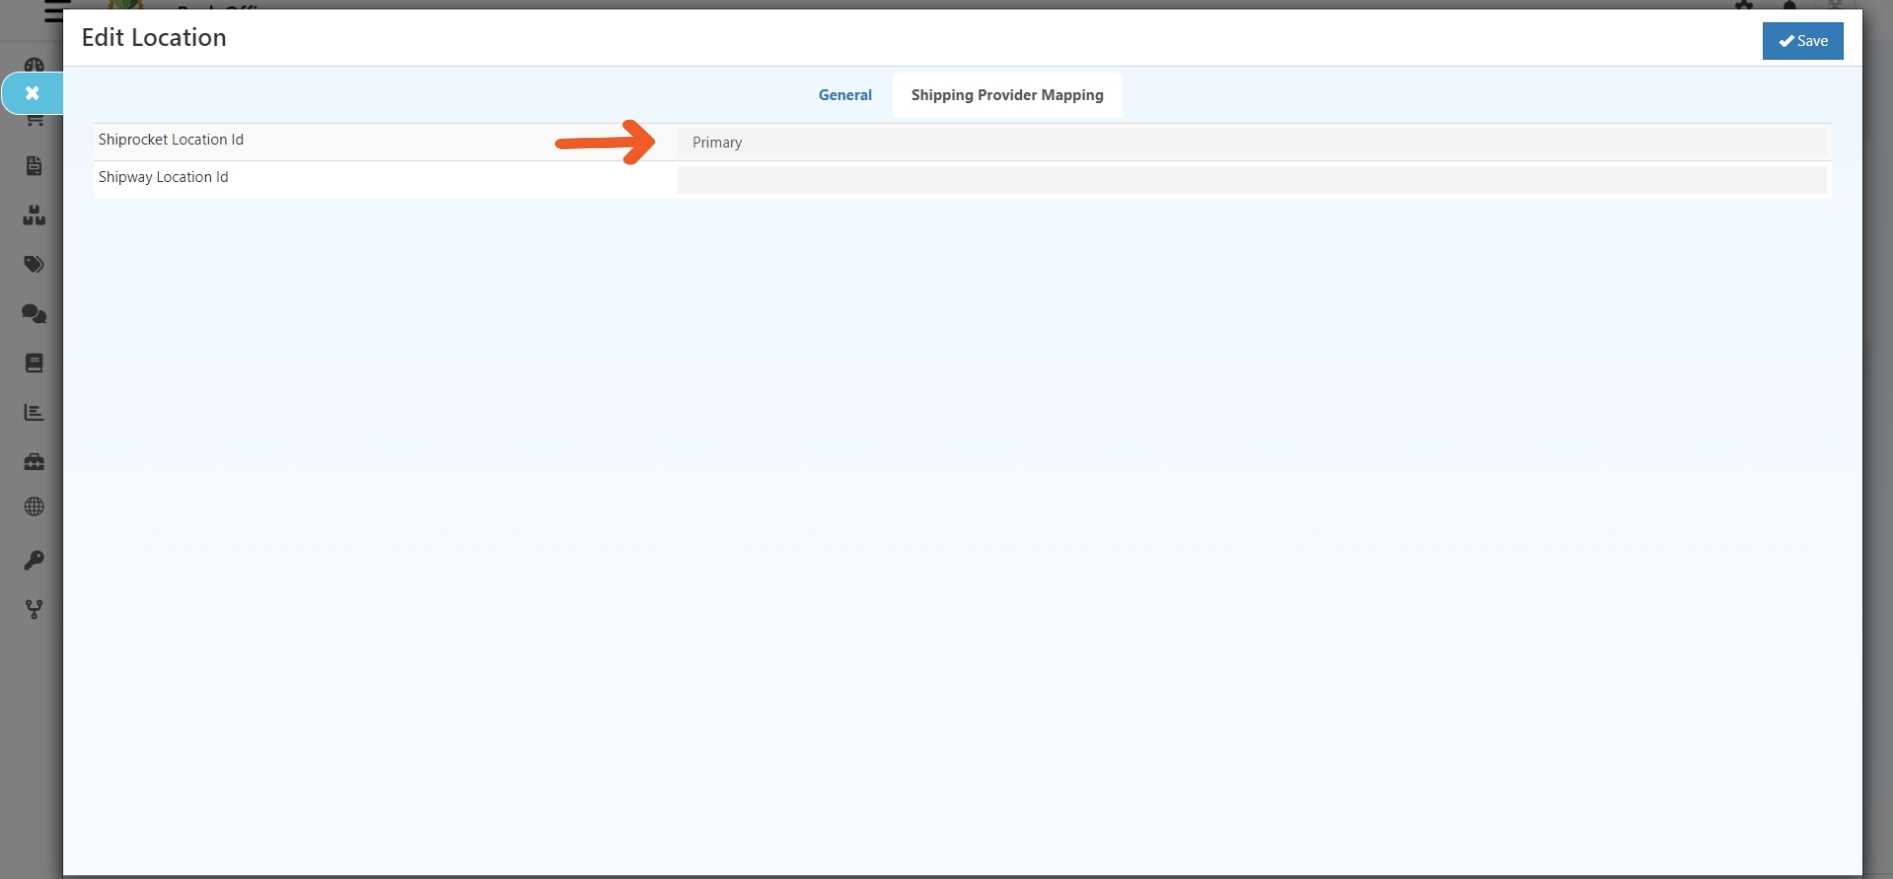
Step 4: Map Location in O2VEND
- Go to Back Office → Settings → Inventory
- Edit your location
- Paste Shiprocket Location ID
- Save
Step 5: Configure Shiprocket in O2VEND
- Go to Back Office → Integration → Shiprocket
- Enter:
- API Email
- API Password
- Channel ID
- Set Default Pickup Pincode
- Enable Is Enabled = True
- Save
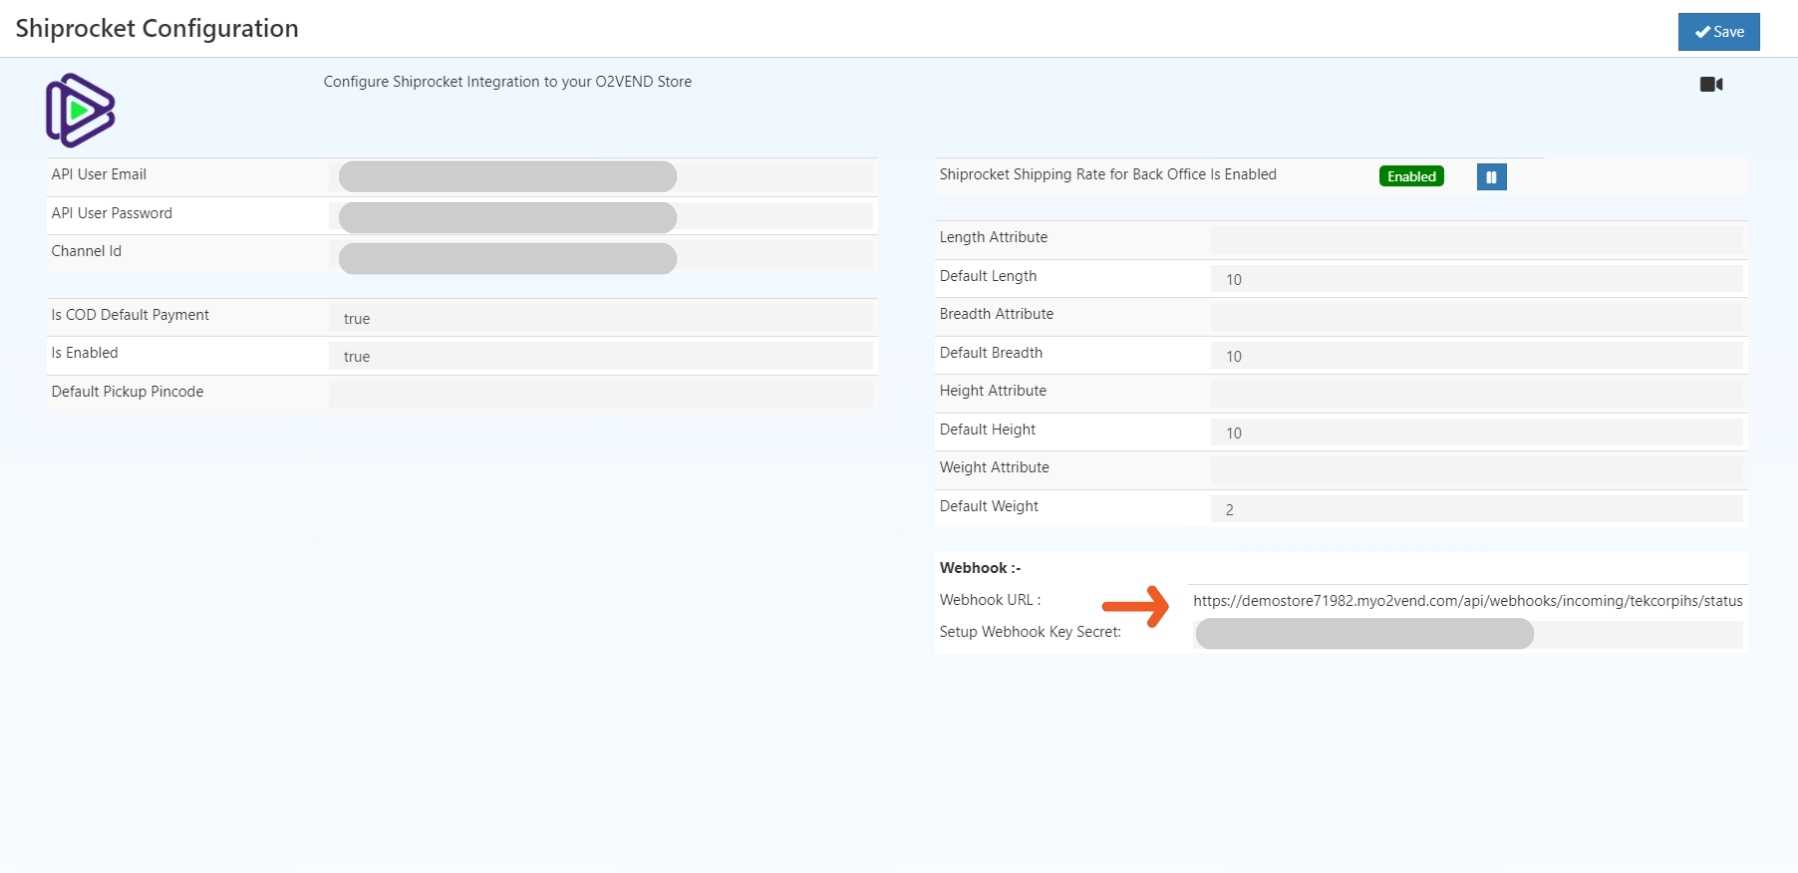
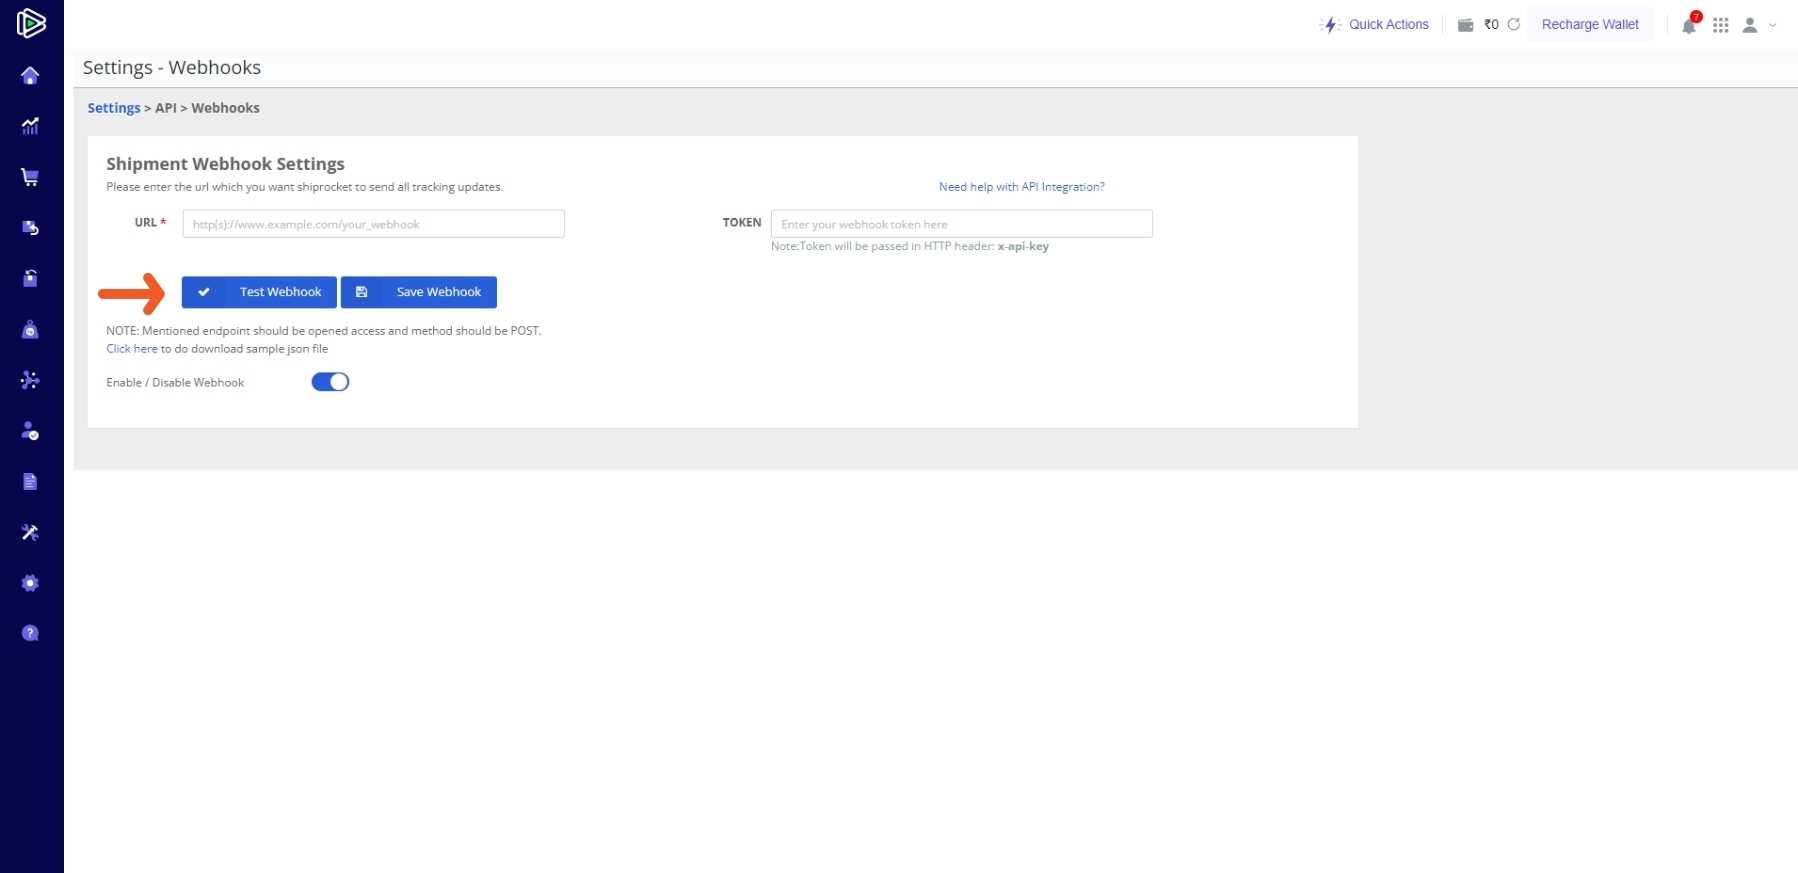
Step 6: Setup Webhook (Important)
- Copy Webhook URL & Key from O2VEND
- Go to Shiprocket → Settings → API → Webhooks
- Enable webhook
- Paste:
- Webhook URL
- Key Secret
- Click Test Webhook → Save
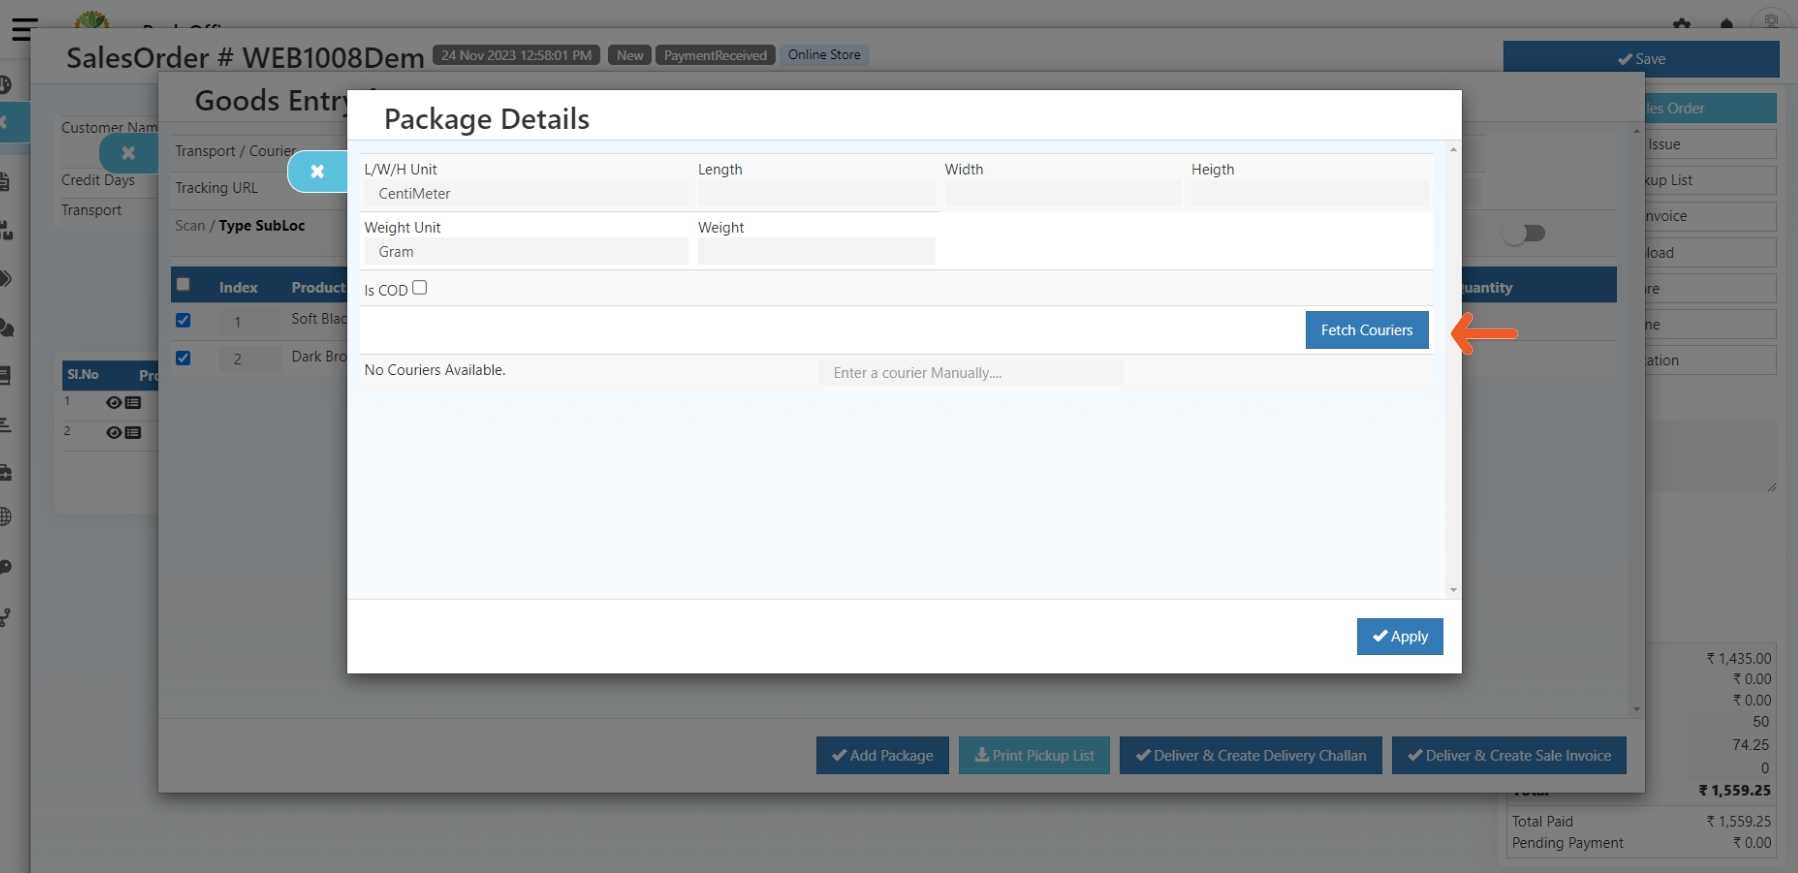
Step 7: Process Orders
- Go to Back Office → Orders → Sales Order
- Create order
- Click Issue Goods
- Click Add Package
- Click Fetch Courier
- Select courier and confirm
Important Notes
⚠️ Recharge your Shiprocket wallet before shipping
Orders will not be created without sufficient balance
Shiprocket is now successfully integrated.
You can fetch couriers, ship orders, and track deliveries directly from O2VEND.