How to Configure and Manage Sales Channels in O2VEND
Use Sales Channels to manage where you sell (Online Store, POS, marketplaces, and apps) from a single place in O2VEND Back Office.
You can:
- View all channels and their types
- Create new channels and assign them to a Channel Group
- Edit existing channels
- Control product/price/warehouse mapping using Channel Groups
Overview
| Term | What it means |
|---|---|
| Sales Channel | A selling source you manage in O2VEND (Online Store, POS, Android/iOS apps, marketplaces, etc.). |
| Channel Type | Defines how the channel behaves (for example: eCommerce / Direct to Consumer or Brick and Mortar Store). |
| Channel Group | Shared configuration you can apply to one or more channels (products, price list, warehouse, zone, currency, and more). |
| Channel Id | A system-generated identifier for internal tracking. |
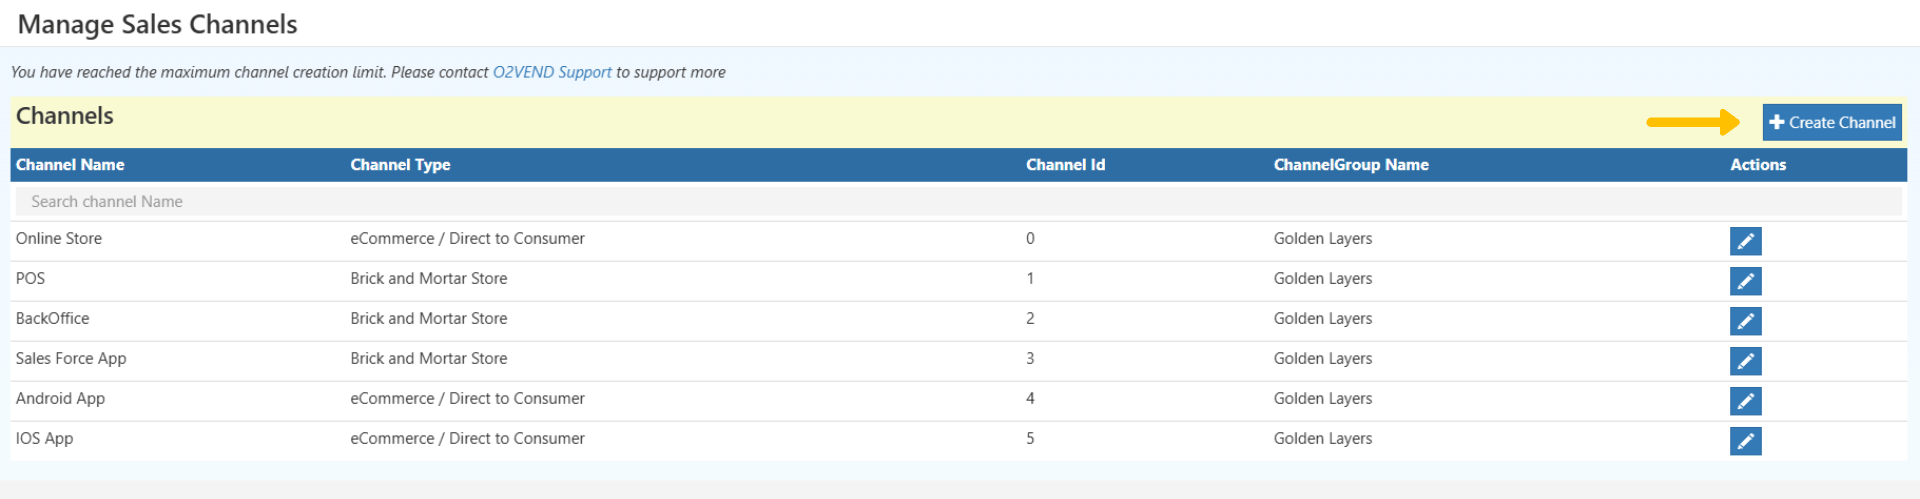
Can't create more channels?
If you see "You have reached the maximum channel creation limit...", contact O2VEND Support to increase your limit.
Open the Sales Channels page
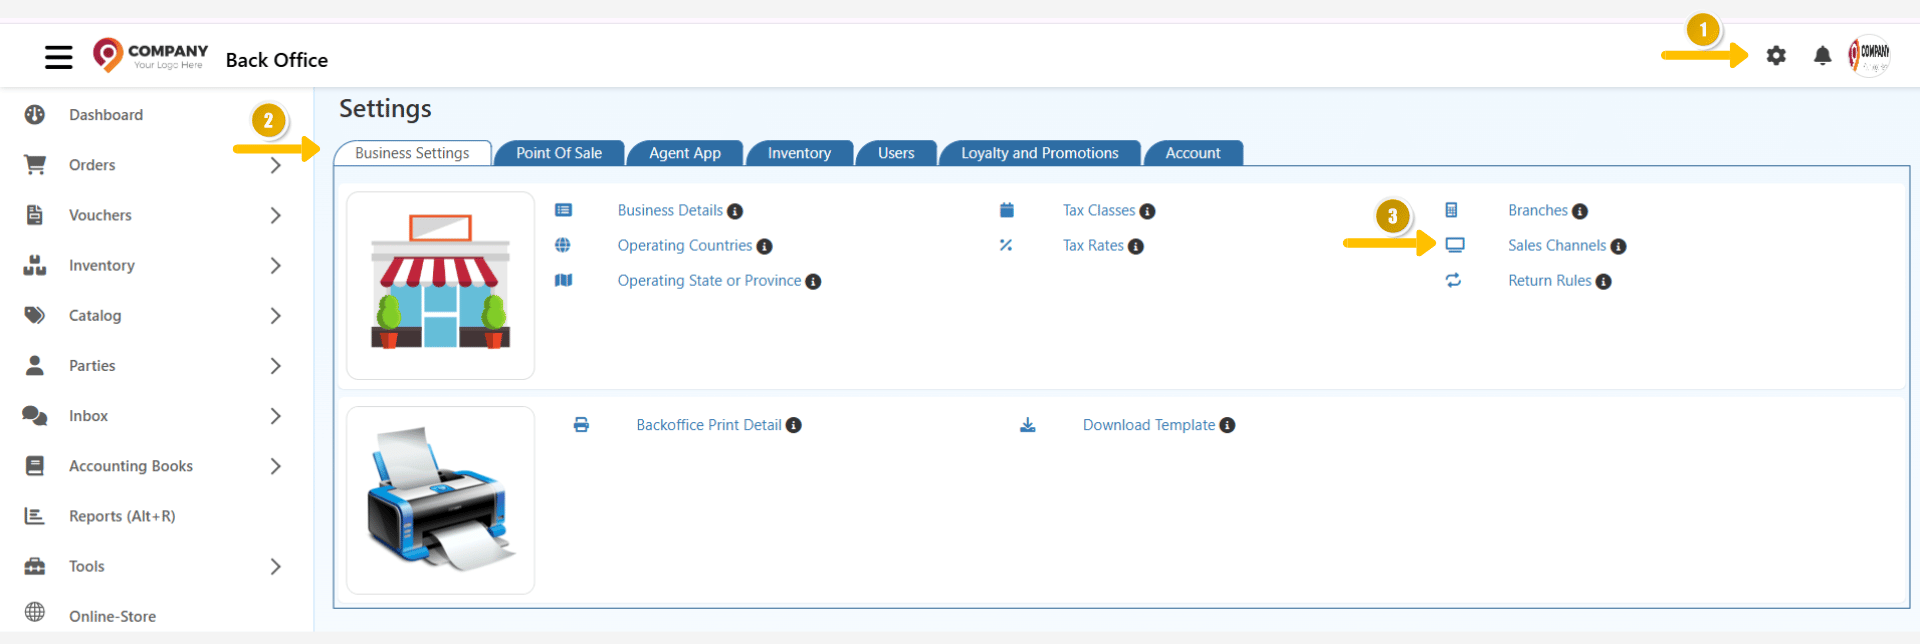
Open Settings
In Back Office, click Settings (gear icon).
Go to Business Settings
Select the Business Settings tab.
Open Sales Channels
Click Sales Channels to open Manage Sales Channels.
Understand the "Manage Sales Channels" list
The list page shows all channels configured for your business. Use the Search channel Name box to quickly filter by channel name.
| Column | Description |
|---|---|
| Channel Name | Display name for the channel (for example: Online Store, POS, Android App). |
| Channel Type | The channel category (for example: eCommerce / Direct to Consumer). |
| Channel Id | System-generated ID for internal use. |
| ChannelGroup Name | The Channel Group assigned to that channel. |
| Actions | Use the pencil icon to edit the channel. |
Create a new Sales Channel
Click Create Channel
From Manage Sales Channels, click Create Channel.
Fill the channel details
Enter a name, select a Channel Group, and choose the Channel Type.
Save
Click Save to create the channel.
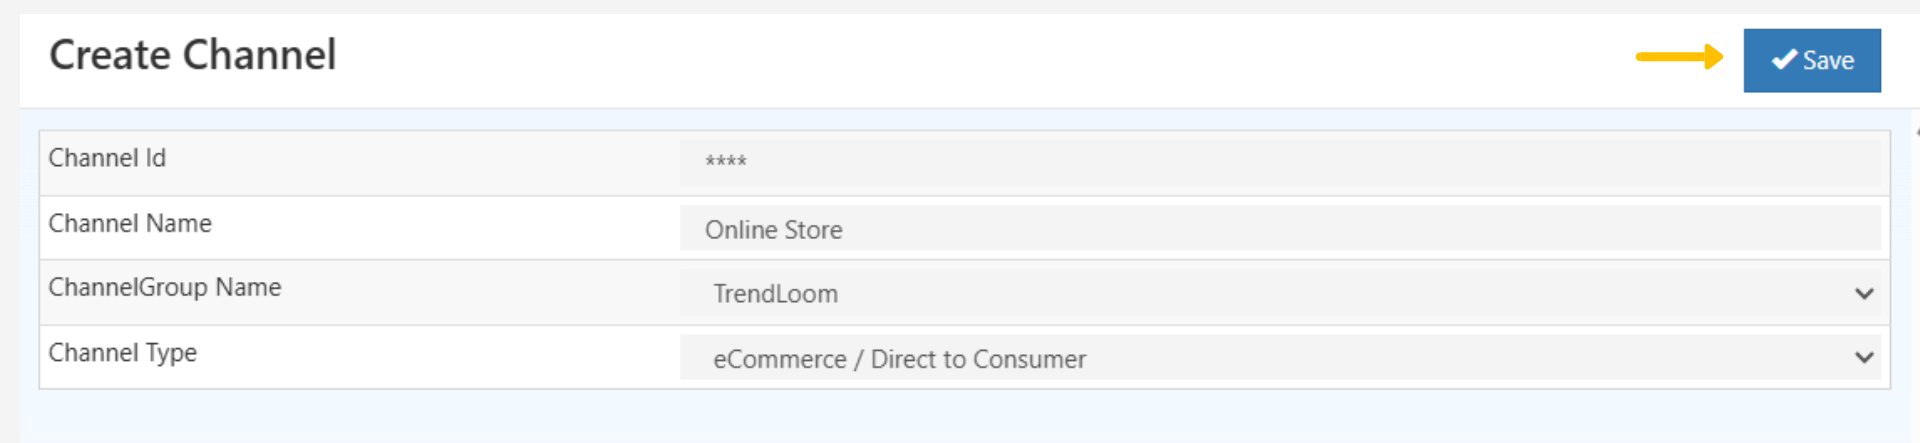
Channel fields
| Field | What to enter |
|---|---|
| Channel Name | A clear name (for example: Online Store, WhatsApp Sales, Amazon). |
| ChannelGroup Name | Select the group that should control products/pricing/warehouse mapping for this channel. |
| Channel Type | Choose eCommerce / Direct to Consumer or Brick and Mortar Store. |
| Channel Id | Auto-generated by the system (for reference). |
Edit an existing channel
- In Manage Sales Channels, click the Edit (pencil) icon.
- Update the required fields (for example: Channel Name, ChannelGroup Name, or Channel Type).
- Click Save.

Tip
If the channel is connected to an integration, update channel settings carefully to avoid mismatched pricing or inventory mapping.
Organize channels with Channel Groups
Channel Groups help you apply a single configuration across multiple channels. This is useful when each selling source needs different:
- Products or categories
- Price lists
- Warehouses
- Zones or currencies
Create a Channel Group
- Go to Settings > Business Settings > Sales Channels.
- Click Create Channel Group.
- Enter the group details and mapping configuration.
- Click Save.
| Field | Description |
|---|---|
| Channel Group Name | A recognizable name (for example: Online Store - Chennai or Marketplace - India). |
| Description | Optional notes about what this group is used for. |
| Product / Category / Brand | Controls what products appear for the channels in this group. |
| Price List | Controls which prices apply for those channels. |
| Zone / Currency | Controls region and currency rules for the group. |
| Warehouse | Controls where inventory is reserved/fulfilled from. |
How Channel Group settings work
When you assign Product, Category, Brand, Price List, Zone, Currency, or Warehouse to a Channel Group, only those parameters apply to channels linked to that group.
Example:
If a Channel Group is linked to a particular warehouse and price list, only products available in that warehouse and price list will appear for connected channels.
Need help?
To expand your sales channel limit or resolve configuration issues, contact O2VEND Support via the Admin Panel or official email support.