O2VEND Retail ERP
  • Product
  • Solutions
  • Resources
    • Blog
    • Community
    • Partnership
    • Find Partner
    • Developer
  • Pricing
  • Docs
    • Getting Started
      • Channels
        • Sales Channel
        • O2VEND to O2VEND Channel
        • Shopify Integration Guide
    • Commerce
      • Ecommerce
      • POS
      • Agent App
      • CMS
      • Themes & Apps
      • Apps
        • Sales Navigator
    • Operations
      • OMS
      • WMS
      • O2C
      • Vendor Portal
      • Supplier Portal
    • Back Office
      • Accounting
      • Reports
      • PIM
      • Communication
      • Back Office
Search Results for

    Show / Hide Table of Contents
    • Retail ERP Back Office Overview
    • Back Office Dashboard
    • Analytics & Reports
      • Visitor Analytics
      • E-commerce Analytics
      • Product Analytics
      • Campaigns Analytics
    • API & Webhook Integration
      • Webhook
      • Examples of JSON format data via webhook
      • Testing webhook
    • Back Office Settings
      • Settings Overview
      • Store Settings
        • Business Details
        • Tax Classes
        • Tax Rates
        • Operating Countries
        • Operating State or Province
        • Branches
        • Sales Channels
        • Return Rule
        • Back Office Print Detail
        • Download Template
        • Order Numbering
        • Push Notification
      • POS Settings
        • Quick Add Buttons
        • Print Settings
        • Payment Methods
        • Delivery Settings
        • Language
        • POS Offline Mode
      • Agent App Settings
        • Agent App Print Details
      • Stock Settings
        • Unit Of Measure
        • Location
        • Unit Of Measure Conversions
        • Stock Levels
        • Sub Location
        • Print Barcode Label Settings
        • Package Material
        • Delivery Zone
      • User Settings
        • Vendors
        • User Date Setup
        • Employees
        • Vendors Commission
        • Credit Rules
        • Automatic User Code
        • User Authorization
      • User Role Mapping
        • Set Up Employee Roles
        • Ecommerce
        • Point Of Sale
        • Back Office
        • Sales App
        • Roles
      • Loyalty and Promotions
        • Reward Points
        • Coupons
        • Gift Vouchers
        • Offers and Discounts
        • Benefits
        • Affiliate
        • Coupon Print Setting
      • Account Settings
        • Financial Year
        • Voucher Numbering
        • Sales Account Map
        • Voucher Numbering Rules
      • Integrations
        • Shiprocket Configuration
        • Shipway Configuration
    • Profile

    Branch Setup in Back Office | Multi-Branch Management Made Easy

    Set up and manage multiple branches in Back Office with ease. Learn branch creation, stock visibility, store pickup setup, and special pricing configuration for faster business control.


    Accessing Branch Configuration

    1. Open Settings → Business Settings.
    2. Select Branches from the menu.
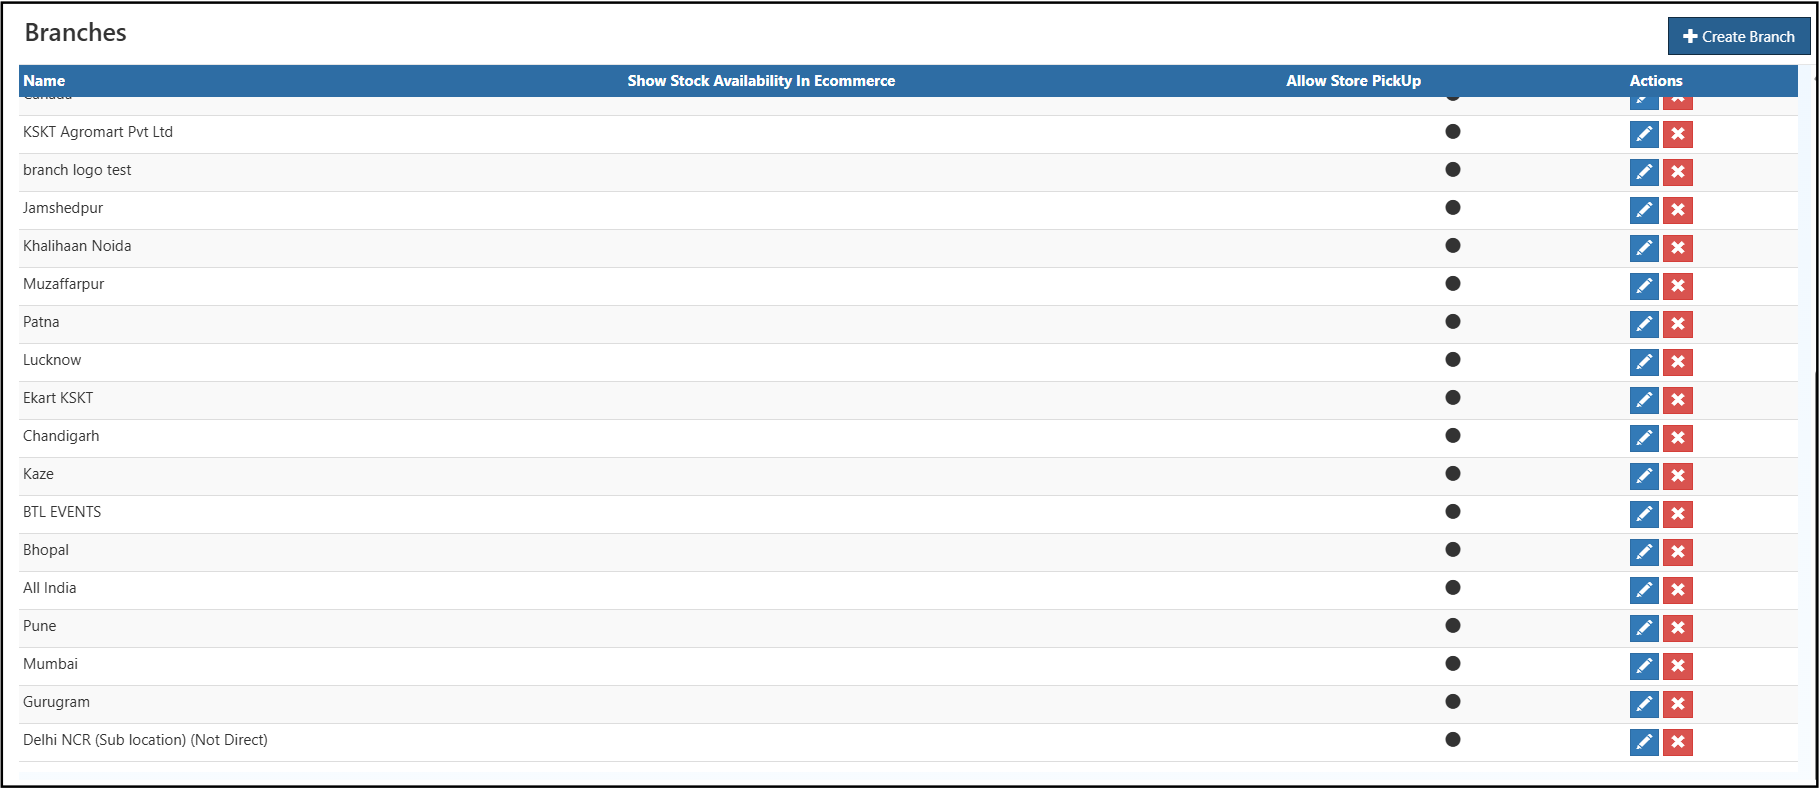
    3. The list of existing branches appears on the screen.

    To add a new branch, click Create Branch located at the top right corner.


    Creating a New Branch

    1. Navigate to Settings → Business Settings → Branches.
    2. Select Create Branch to open the creation form.

    branchcreate

    Required Fields

    Field Description
    Name Unique name identifying the branch.
    Is Main Branch? Defines whether the branch is the primary office.
    GST Number Tax registration number applicable to the branch.
    PAN Number Permanent Account Number for business operations.
    FSSAI Applicable for food or beverage-based businesses.
    CIN Corporate Identification Number for registered companies.
    Select Price List Assigns a price list specific to this branch.
    Location Physical or warehouse location linked to the branch.
    Address Line 1 & 2 Address details for delivery and identification.
    City / State / Country / Postal Code Geographic details used for tax and shipping calculations.
    Contact Name & Phone Contact person and branch phone information.

    BRANCH CREATION

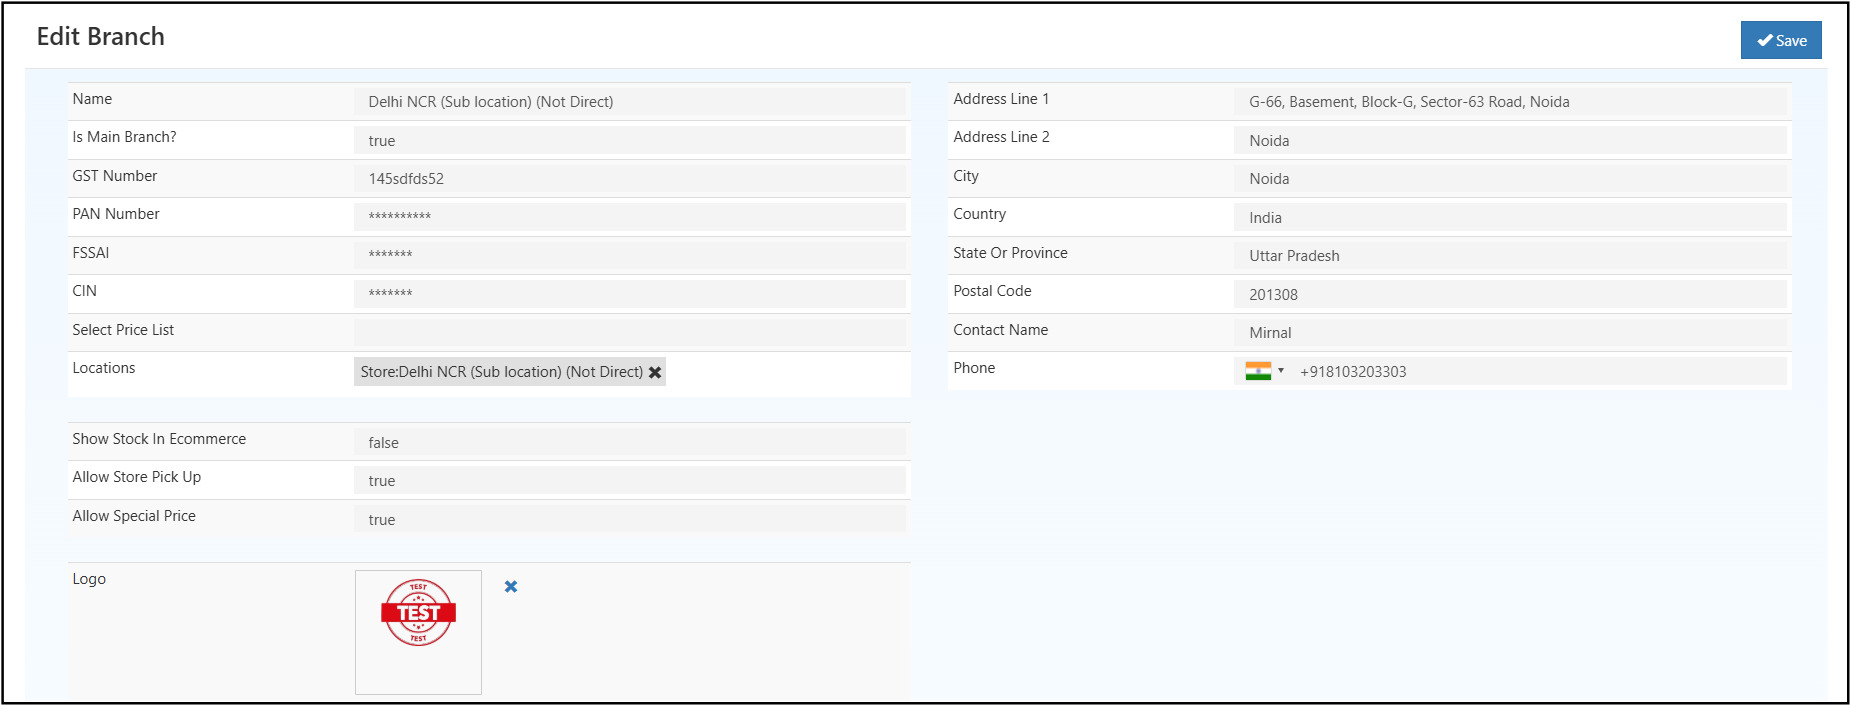
    Branch Configuration Options

    Option Description
    Show Stock in Ecommerce Displays product stock availability from this branch in the online store.
    Allow Store Pickup Enables order pickup directly from the selected branch.
    Allow Special Price Activates custom or promotional pricing specific to the branch.
    Logo Allows uploading of a branch-specific logo for identification.

    Example Scenario

    A business operates two locations — chennai Branch and Bangalore Branch.
    Each branch follows its own price list and stock configuration:

    • chennai Branch: Store pickup enabled and offers special pricing.
    • Bangalore Branch: Displays stock online but pickup option remains disabled.

    This configuration allows independent control over regional operations and pricing.

    Related Docs

    • Warehouse & Location Setup
    • GRN & Dispatch
    • Tax & Shipping Setup
    • Inventory Stock Transfer

    In this article
    © 2019-2026 Jeyan Technologies Private Limited • www.o2vend.com • Create your own store