O2VEND Webhook Integration | Real Time Events & Automation Setup
Configure O2VEND webhooks to receive real-time order, shipment, inventory, cart, and product events. This complete guide covers webhook subscription, event selection, security configuration, and automation workflows for seamless system integration.
Step 1: Open Integrations
- Login to the O2VEND Back Office.
- From the left sidebar, select Integration.
- Locate O2VEND Webhook and click it.
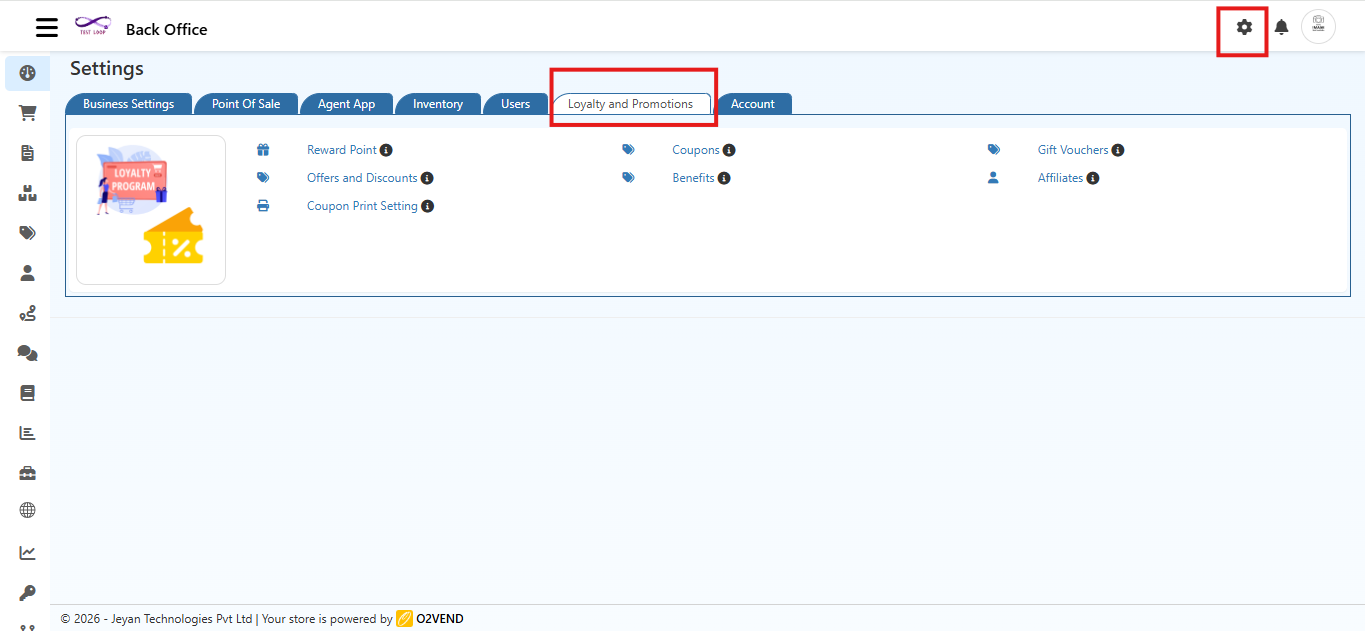
Step 2: View Webhook Subscriptions
- Click the gear icon.
- A popup displays Webhook Subscriptions.
The following information is available for each active webhook:
- Subscription URL
- Secret
- Headers
- Active status
- Edit/Delete options
Build, Test & Go Live with O2VEND Webhooks Faster
Configure O2VEND webhooks with confidence to receive real-time events instantly. Get expert support or log in to your store and start automating workflows in minutes.
Step 3: Create a New Webhook
- Click + Create Webhook at the top-right corner of the popup.
- The Create Webhook window will appear.
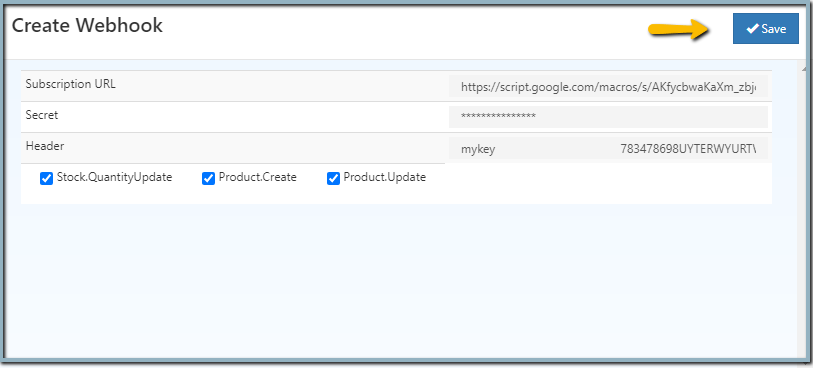
Step 4: Configure Webhook Details
- Subscription URL: Enter the endpoint URL for receiving webhook data (e.g., a Make.com webhook URL).
- Secret: Add a secret key to verify webhook requests.
- Headers: Add custom key-value headers if required by the endpoint.
Step 5: Select Events
- Scroll to the event selection section.
Available events include:
- Stock.QuantityUpdate – Triggered whenever a products stock quantity changes.
- Shipment.Exception – Triggered when there�s an issue with a shipment.
- Shipment.Unknown – Triggered when a shipment status is unknown or cannot be determined.
- Shipment.ReStocked – Triggered when returned shipment items are added back to stock.
- Shipment.GoodsReceived – Triggered when shipped goods are received at the destination.
- Shipment.GoodsReturned – Triggered when goods are returned to the warehouse.
- Shipment.Accepted – Triggered when a shipment is accepted by the carrier.
- Shipment.GoodsUnderInspection – Triggered when shipment goods are under inspection.
- Shipment.PickedUp – Triggered when the shipment is picked up by the courier.
- Cart.Update – Triggered whenever a cart is updated (item added/removed).
- Product.Create – Triggered when a new product is added to the catalog.
- Cart.Create – Triggered when a new cart is created by a customer.
- Order.Update – Triggered whenever an existing order is updated.
- Product.Update – Triggered when product details are updated.
- Order.Create – Triggered when a new order is placed.
- Shipment.Create – Triggered when a new shipment is created.
- Shipment.GoodsDispatched – Triggered when shipment goods are dispatched from the warehouse.
- Shipment.OutForDelivery – Triggered when the shipment is out for delivery.
- Shipment.Delivered – Triggered when the shipment is successfully delivered.
- Shipment.AttemptFail – Triggered when a delivery attempt fails.
Test O2VEND Webhooks with Google Sheets
Learn how Google Sheets can be used to capture, validate, and analyze O2VEND webhook events for order, shipment, inventory, and product updates during integration testing.
Step 6: Save the Webhook
- After configuring details and selecting events, click Save.
- The webhook appears in the Webhook Subscriptions list.
- Ensure IsActive is set to true to start receiving events.
Related Topics
Testing Webhooks in O2VEND
Learn how to test webhook delivery, inspect payloads, and validate real-time event data during integration.O2VEND Webhook Integration Reference
Detailed reference covering webhook configuration, supported events, security headers, and retry behavior.Create Product API Guide
Understand product creation workflows and sample JSON payloads used in Product.Create and Product.Update events.
Explore O2VEND Integrations
Subscribe to real-time order, shipment, inventory, cart, and product events using O2VEND webhooks to automate workflows and system integrations.