Coupon Setup | Create and Manage Discount Coupons
The Coupon Setup feature in O2VEND helps you create discount coupons for both physical stores and online channels.
It can be used to:
- create discount coupons
- apply percentage or fixed discounts
- target selected customers, groups, products, categories, or brands
- link cashback or commission benefits
- control coupon usage and validity
If you want to add cashback or commission, see Benefits.
Open Coupons
- Sign in to Back Office.
- Go to Settings -> Loyalty and Promotions.
- Click Coupons.
- Click Create Coupon.
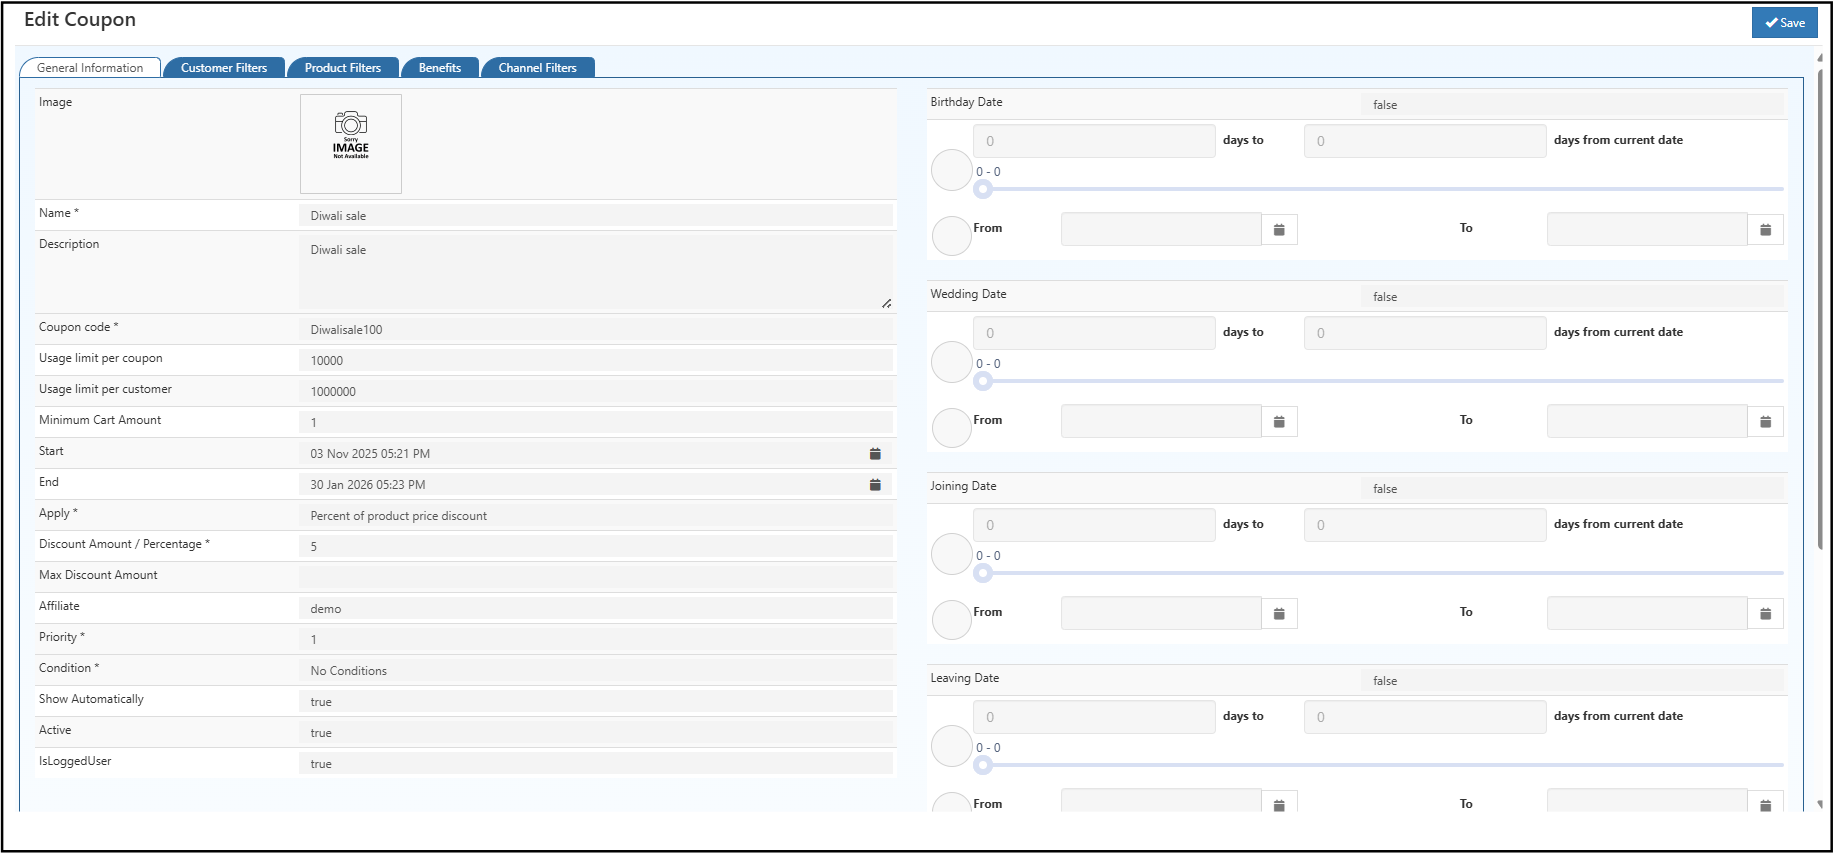
Enter Coupon Details
Fill in the details below:
- Name: Enter the internal name for the coupon
- Description: Enter an optional internal note
- Coupon Code: Enter the code customers use at checkout
- Usage limit per coupon: Enter the total number of times the coupon can be used
- Usage limit per customer: Enter how many times one customer can use the coupon
- Minimum Cart Amount: Enter the minimum order value required
- Start: Enter the date and time when the coupon becomes active
- End: Enter the date and time when the coupon expires
- Apply: Select the discount type
- Discount Amount / Percentage: Enter the discount value
- Max Discount Amount: Enter the maximum discount allowed
- Affiliate: Select an optional affiliate
- Priority: Enter the rule priority
- Condition: Select the rule condition
- Show Automatically: Set whether the coupon should display automatically
- Active: Set whether the coupon is active
- IsLoggedUser: Set whether the coupon is for logged-in users only
Use a clear coupon code so it is easy to recognize, test, and promote.
Set Discount
Choose how the discount should work and define the limits that control usage.
Discount Type
- Percentage: Gives a percentage discount on the eligible amount
- Fixed Amount: Gives a fixed discount amount
Usage Limits
- Total Uses: Maximum number of times the coupon can be used overall
- Per Customer: Maximum number of times one customer can use it
- Min Cart: Minimum order value required
- Max Discount: Highest discount amount allowed
These limits help keep promotions under control and reduce misuse.
Add Date Filters
Use date filters when you want the coupon to depend on a customer date such as birthday or anniversary.
Birthday Date
Use this for birthday offers such as 20% off on your birthday.
Wedding Date
Use this for anniversary offers such as 10% off anniversary.
Joining Date
Use this for loyalty or onboarding offers such as 5% off joining anniversary.
Leaving Date
Use this for retention or expiry-based offers before membership ends.
These filters help create personalized offers and improve customer engagement.
Select Customers
Use the Customer Filters tab when the coupon should apply only to selected customers or groups.
Customer Selection
Select individual customers if the coupon is meant for specific VIP or loyal customers.
Customer Group Selection
Select customer groups such as Retail, Wholesale, or VIP if the coupon should apply to a segment.
Leave these blank if the coupon should apply to all customers.
Select Products
Use the Product Filters tab to decide which products, categories, or brands the coupon applies to.
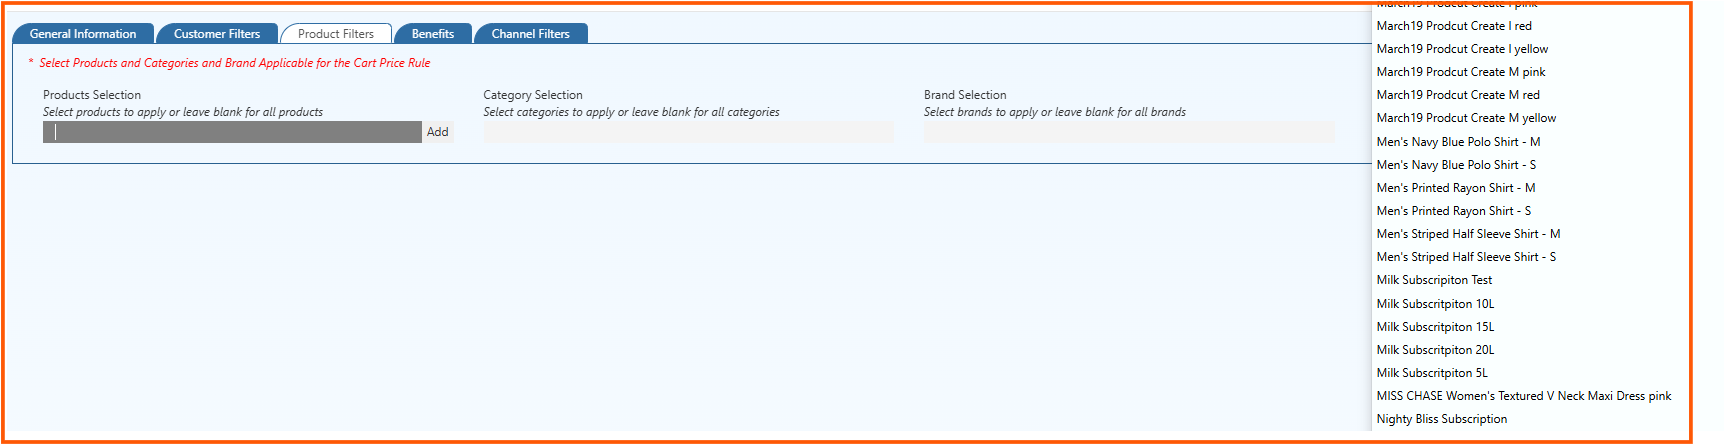
Product Selection
Choose specific products if the coupon should apply only to selected items.
Category Selection
Choose specific categories if the coupon should apply to a product group like Electronics or Apparel.
Brand Selection
Choose specific brands if the coupon should apply only to selected brands.
If no filter is selected, the coupon is valid for all products by default.
Link a Benefit
The Benefits tab lets you connect a coupon to a cashback or commission rule.

- Open the Benefits tab.
- Select the required Benefit Rule from the dropdown.
- Click Save.
Example:
If a coupon gives 20% discount and the linked benefit gives 10% cashback, both can apply according to the configured rules.
For more details, see Benefits.
Select Sales Channels
Use the Channel Filters tab when the coupon should be available only in selected sales channels.
Channel Group Selection
Select one or more channel groups to restrict coupon usage to specific channels.
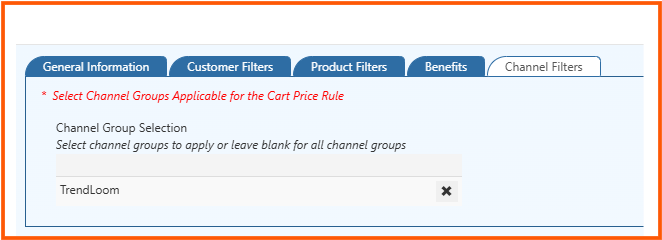
Examples:
- POS
- Shopify
- Unicommerce
- Agent channels
Leave this blank if the coupon should be available across all channels.