How to Create and Edit Stock Transfer in O2VEND ERP
Use Stock Transfer when you want to move stock from one branch, warehouse, or store to another within the same business.
This process is used for internal stock movement only. It does not create a sales invoice or purchase entry. It helps your team send stock to the correct location, balance quantity between branches, and keep inventory records clear.
In O2VEND, the process has two important confirmation steps. Goods Issue means the stock has left the source location. Goods Receive means the stock has reached the destination location. When both steps are completed correctly, stock updates stay accurate and the chance of stock mismatch is lower.
Navigation Path
Back Office -> Inventory -> Stock Transfer
This opens the Stock Transfer list page, where you can create a new transfer or open an existing one.
How to Create Stock Transfer
Create the transfer first, then complete the stock movement in the next steps. This order makes the process easier to track.
Step 1: Open Stock Transfer
- Go to Back Office
- Click Inventory
- Open Stock Transfer
- Click + Create Stock Movement
This is the starting point for creating a new stock transfer.
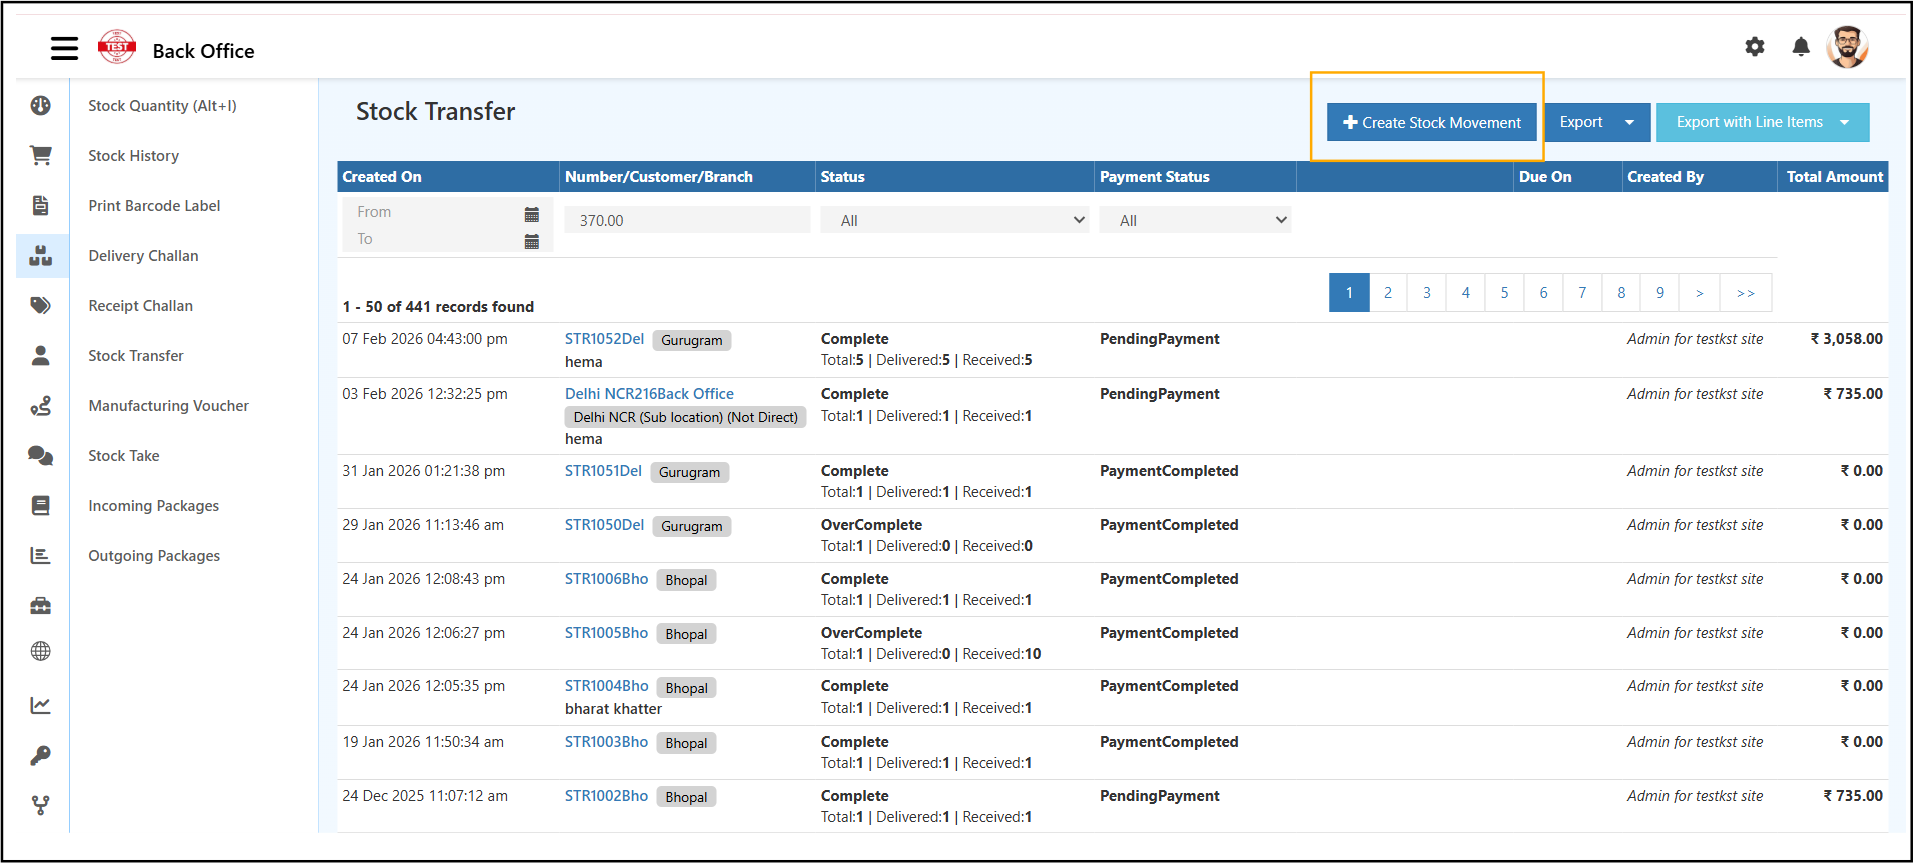
This screen also shows previous transfer records. You can check the transfer number, status, payment status, created date, and total amount. If needed, you can also use Export or Export with Line Items.
Step 2: Select source and destination location
Choose the correct source and destination locations before adding products. This decides where the stock will move from and where it will be received.
In Location Information, select:
- Seller Branch/location as the source location
- Buyer Branch/location as the destination location
You can also enter Customer, Supplier, Reference, or Note / Notification if your team needs extra details for tracking.
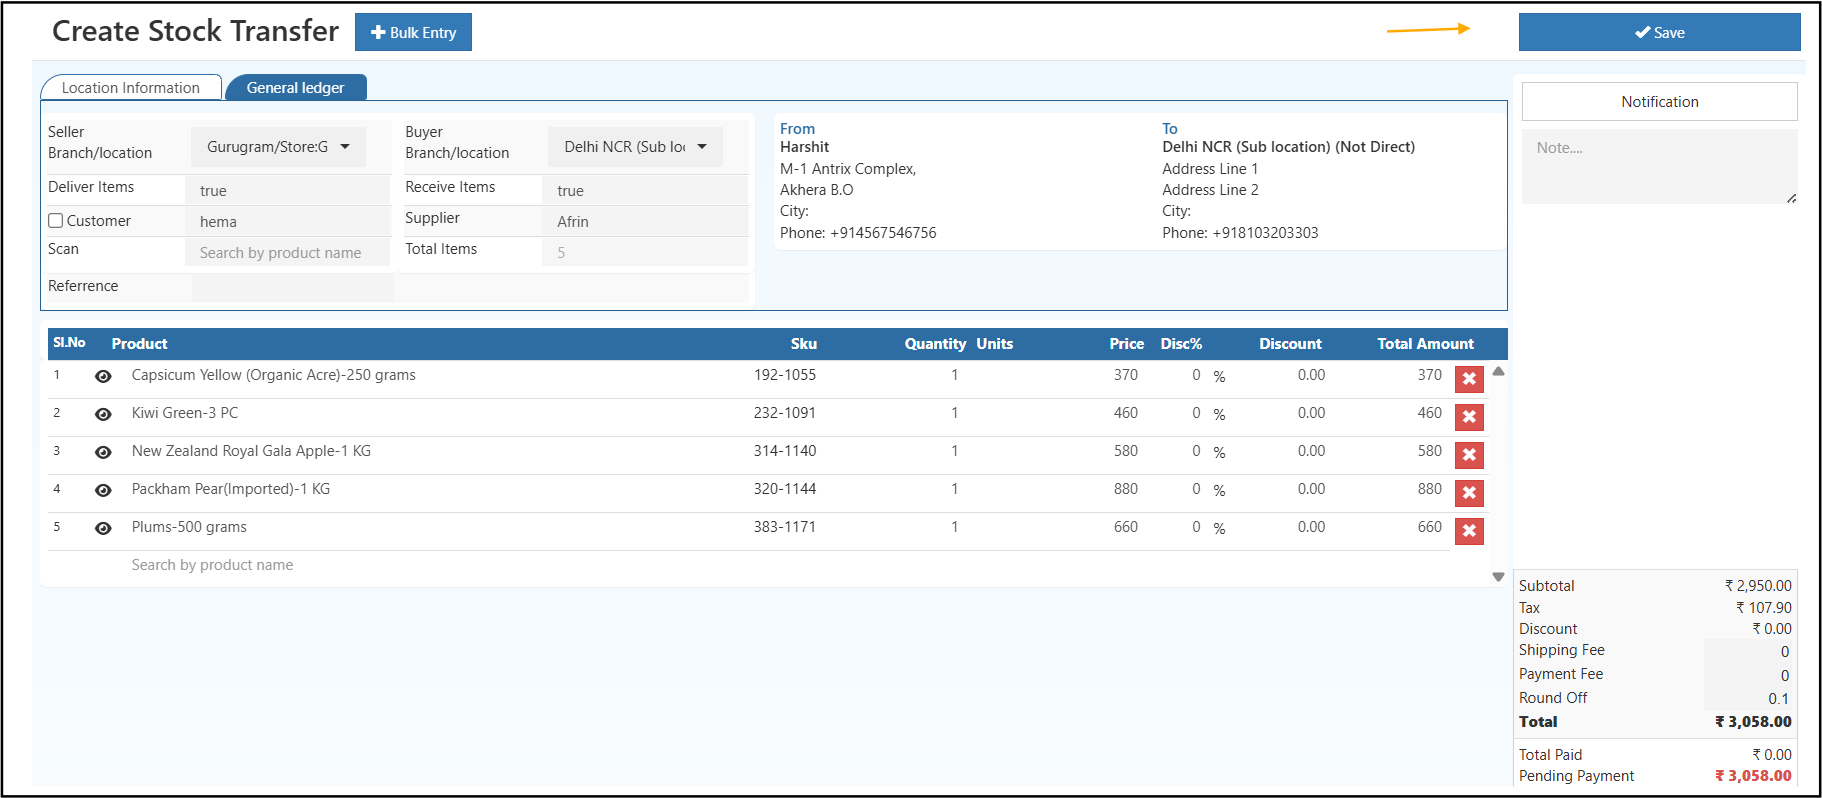
The screen shows Location Information, General ledger, a product entry section, and a summary panel on the right side.
Step 3: Add products and quantity
Add the items that need to be moved. You can use product search or Bulk Entry.
Check the product, SKU, quantity, and unit carefully before saving. This helps avoid sending the wrong item or wrong quantity.
Check these details before saving:
- product name
- SKU
- quantity
- unit
The item table also shows Price, Disc%, Discount, and Total Amount for each row.
Step 4: Save the transfer
After checking all details, click Save.
Saving creates the stock transfer document. At this stage, the transfer is created, but the stock has not fully moved yet.
Before saving, review the summary values such as Subtotal, Tax, Discount, Shipping Fee, Payment Fee, Round Off, Total, and Pending Payment.
To finish the transfer properly, you must complete Goods Issue and Goods Receive after this.
How to Edit the Stock Transfer
After saving, you can open the same transfer again to review details, make changes if needed, and complete the next actions.
Step 5: Open the saved stock transfer
- Go to the Stock Transfer list
- Find the required transfer entry
- Click the transfer number or open the record
- Review the saved details before continuing
This edit screen helps you review the saved transfer before you continue with dispatch or receipt.
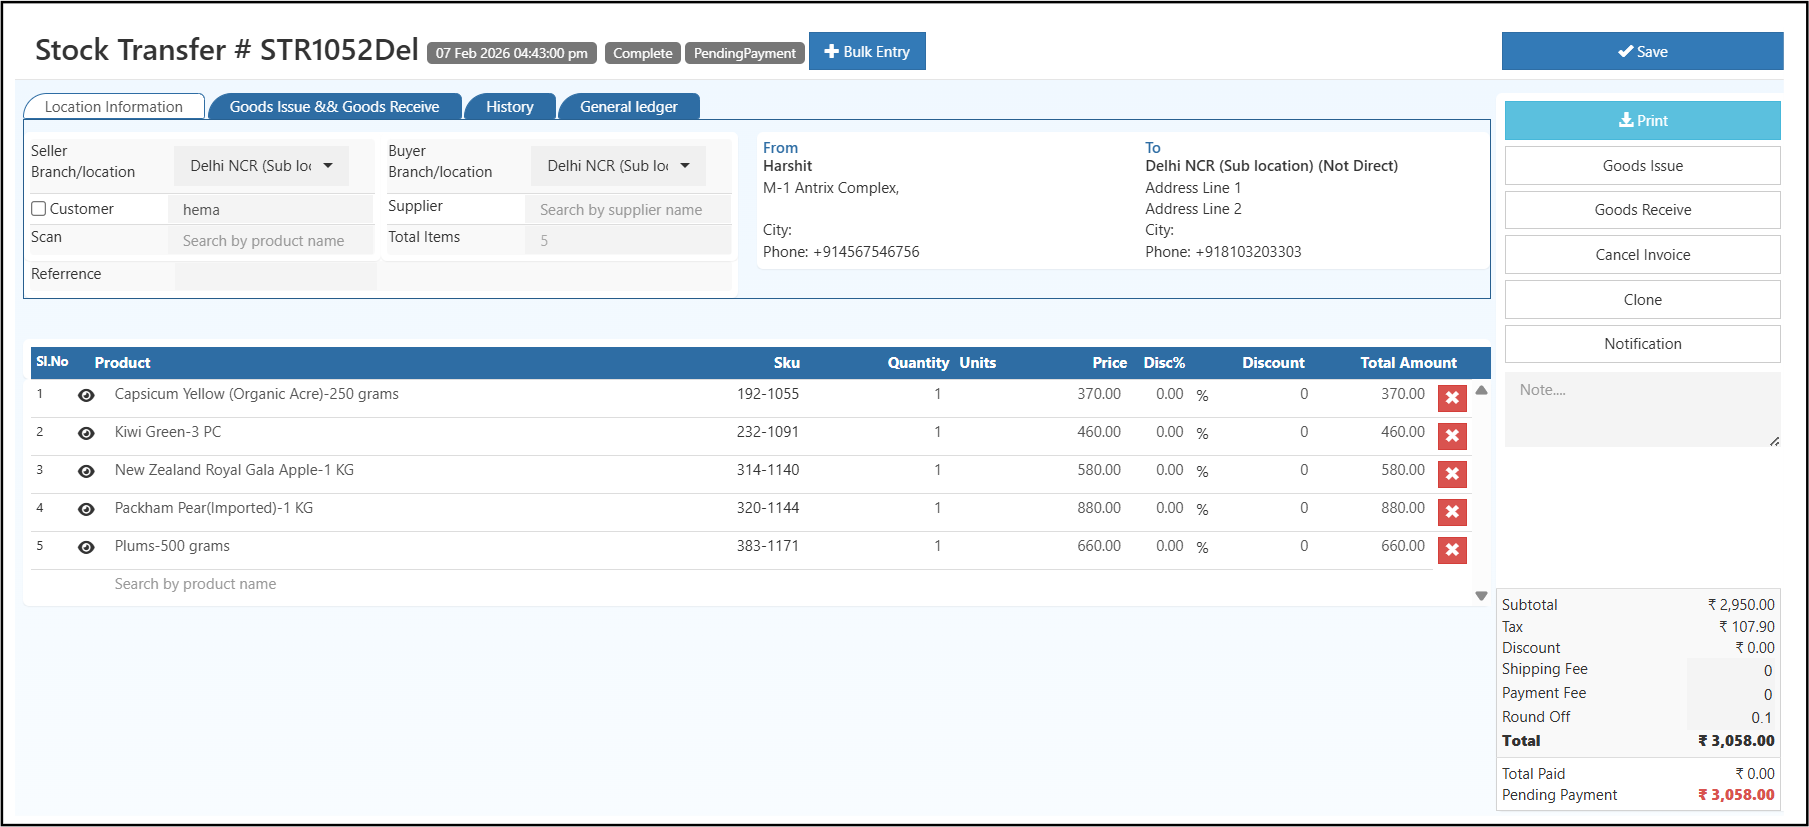
You can use buttons like Print, Goods Issue, Goods Receive, Cancel Invoice, and Clone. Tabs like History and General ledger help you review the entry.
Step 6: Complete Goods Issue
Complete this step after the stock is packed and sent from the source location.
- Open the saved transfer
- Click Goods Issue
- Enter the dispatched quantity
- Click Save
This reduces stock from the source location in the system.
Do not complete Goods Issue before the physical dispatch is done. Otherwise, the stock quantity may become incorrect.
Step 7: Complete Goods Receive
Complete this step after the stock reaches the destination location.
- Open the same transfer
- Click Goods Receive
- Enter the received quantity
- Click Save
This adds stock to the destination location in the system.
Before saving, make sure the receiving branch has checked the items. If there is a shortage or mismatch, review the received quantity carefully.
After completion, verify the update in:
This helps confirm that stock was reduced in the source location and added in the destination location correctly.
Related Guides
These related pages are useful when you want to verify stock, review movement history, or handle stock differences after transfer.
- Warehouse Management System overview - Understand the overall warehouse workflow.
- Stock Quantity - Verify available stock before and after transfer.
- Stock History - Review the movement trail for transferred items.
- Stock Audit - Reconcile stock if a mismatch is reported.