O2VEND Retail ERP
  • Product
  • Solutions
  • Resources
    • Blog
    • Community
    • Partnership
    • Find Partner
    • Developer
  • Pricing
  • Docs
    • Getting Started
      • Channels
        • Sales Channel
        • O2VEND to O2VEND Channel
        • Shopify Integration Guide
    • Commerce
      • Ecommerce
      • POS
      • Agent App
      • CMS
      • Themes & Apps
      • Apps
        • Sales Navigator
    • Operations
      • OMS
      • WMS
      • O2C
      • Vendor Portal
      • Supplier Portal
    • Back Office
      • Accounting
      • Reports
      • PIM
      • Communication
      • Back Office
Search Results for

    Show / Hide Table of Contents
    • Retail ERP Back Office Overview
    • Back Office Dashboard
    • Analytics & Reports
      • Visitor Analytics
      • E-commerce Analytics
      • Product Analytics
      • Campaigns Analytics
    • API & Webhook Integration
      • Webhook
      • Examples of JSON format data via webhook
      • Testing webhook
    • Back Office Settings
      • Settings Overview
      • Store Settings
        • Business Details
        • Tax Classes
        • Tax Rates
        • Operating Countries
        • Operating State or Province
        • Branches
        • Sales Channels
        • Return Rule
        • Back Office Print Detail
        • Download Template
        • Order Numbering
        • Push Notification
      • POS Settings
        • Quick Add Buttons
        • Print Settings
        • Payment Methods
        • Delivery Settings
        • Language
        • POS Offline Mode
      • Agent App Settings
        • Agent App Print Details
      • Stock Settings
        • Unit Of Measure
        • Location
        • Unit Of Measure Conversions
        • Stock Levels
        • Sub Location
        • Print Barcode Label Settings
        • Package Material
        • Delivery Zone
      • User Settings
        • Vendors
        • User Date Setup
        • Employees
        • Vendors Commission
        • Credit Rules
        • Automatic User Code
        • User Authorization
      • User Role Mapping
        • Set Up Employee Roles
        • Ecommerce
        • Point Of Sale
        • Back Office
        • Sales App
        • Roles
      • Loyalty and Promotions
        • Reward Points
        • Coupons
        • Gift Vouchers
        • Offers and Discounts
        • Benefits
        • Affiliate
        • Coupon Print Setting
      • Account Settings
        • Financial Year
        • Voucher Numbering
        • Sales Account Map
        • Voucher Numbering Rules
      • Integrations
        • Shiprocket Configuration
        • Shipway Configuration
    • Profile

    Manage Return Rule

    This section guide to create the Return Rule.

    Return Rule

    Return rules allow a customer to return a purchased product based on the condition. Set various return rules for the products, category, customer and customer groups.

    How to create Return Rule
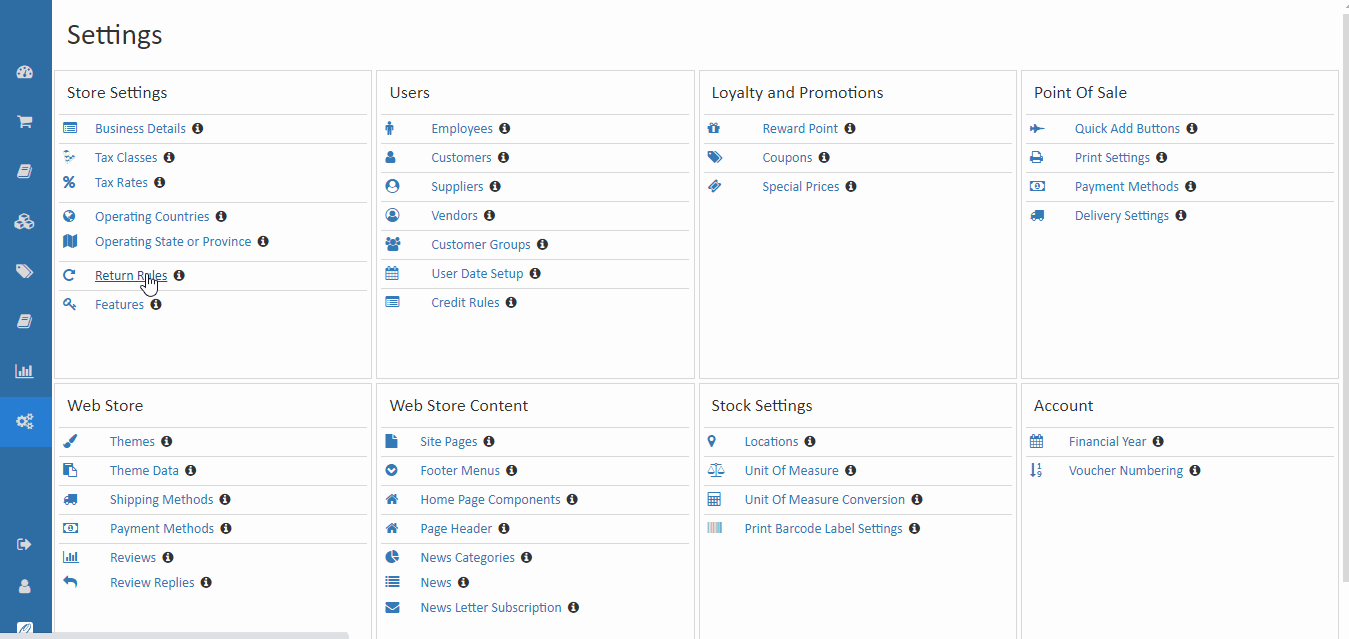
    1. Open Back Office.
    2. Go to Configurations menu.
    3. Click and open Return Rules.
    4. Click Create Return Rule in the top right corner.
    5. Enter all of the needed details.
    6. Press Save button.
    Manage Return Rule

    Name

    Enter the unique name of the Return Rule. It is a mandatory field.

    Describtion

    Write the description of the Return Rule. It is optional.

    Return

    Enter the return days. Return a purchased product within a return days.

    Priority

    If two return rules applicable to the product then based on the priority the rule will apply. So, Set the priority of the rule. This is mandatory.

    Active

    Set the Active is enabled or not. It is mandatory. When Active is true, then the return rule is a valid one.

    Filters

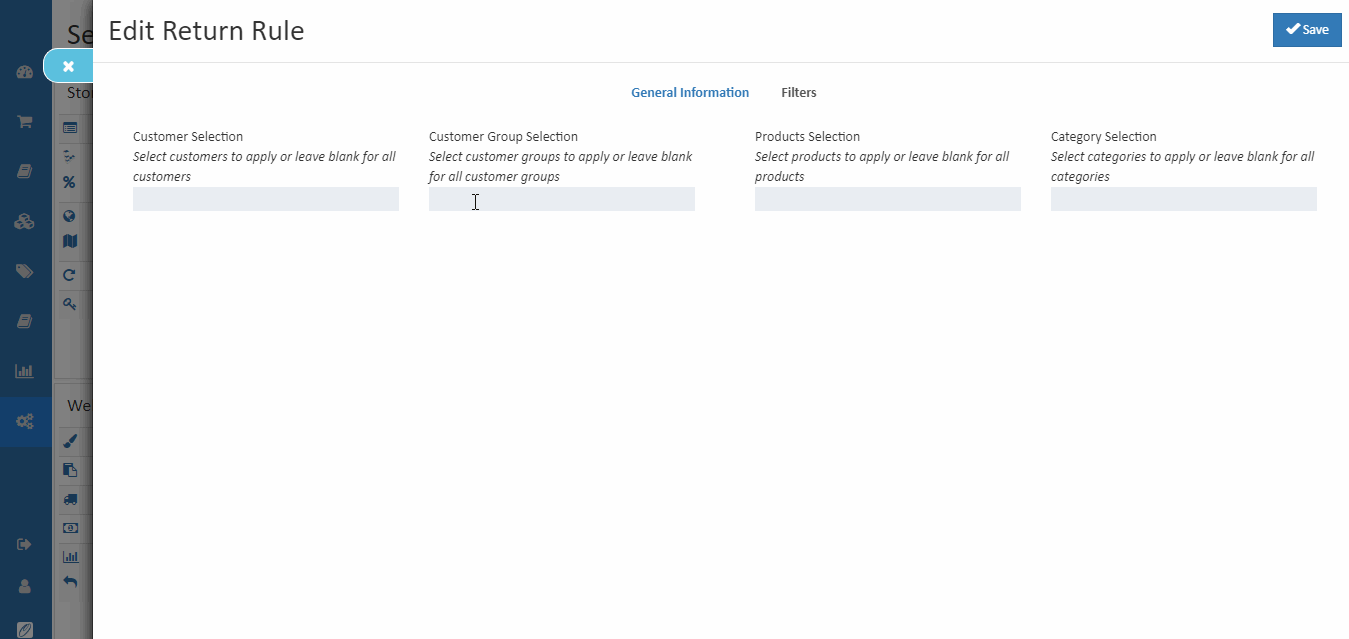
    Enter the details of customer, customer group, product selection and category selection.

    Products Selection

    Select products to which the rule will be applied and select the products in the list or leave them blank. Then click **Save button.

    Tip

    If Product Selection has no products then this rule applies for all products.
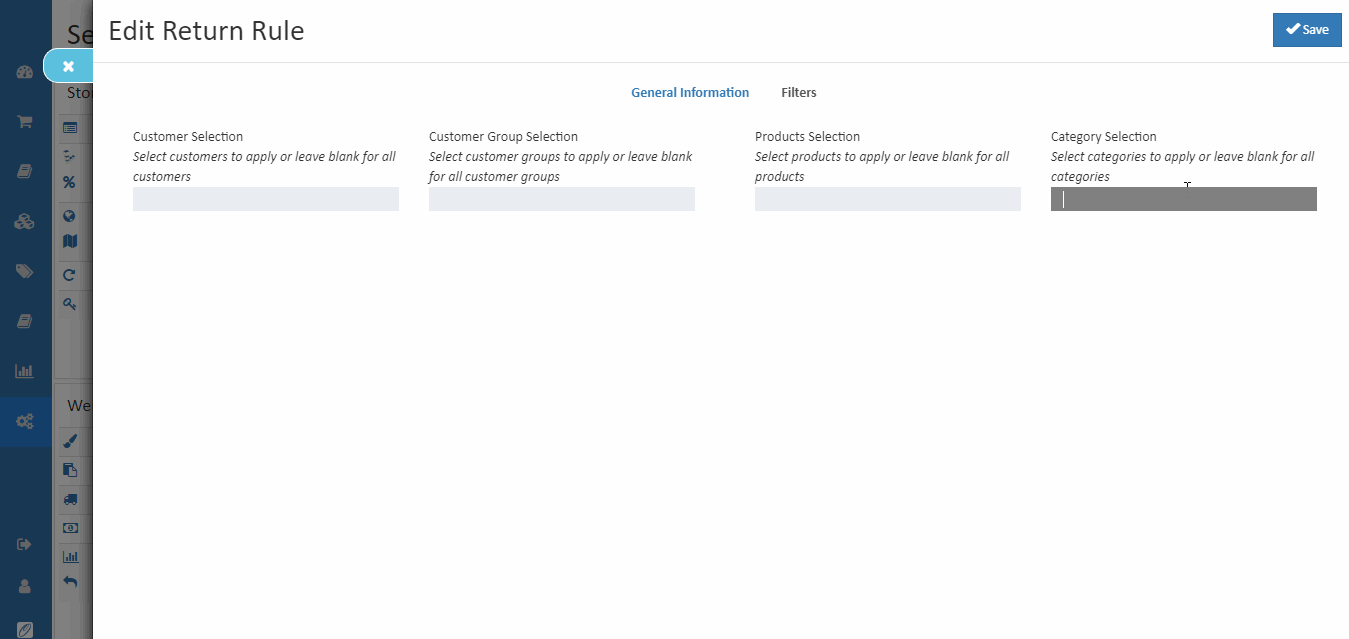
    Manage Return Rule

    Catagory Selection

    Select the category to which the rule will be applied and select the category in the list or leave them blank. Then click Ok and press Save button.

    Tip

    If Catagory Selection has no category then this rule applies for all categories.

    Manage Return Rule

    Customer Selection

    Select the customer to which the rule will be applied. Click and Select the customer in the list or leave them blank. Then click Ok and press Save button.

    Tip

    If Customer Selection has no customer then this rule applies for all customers.

    Manage Return Rule

    Customer Group Selection

    Select customer groups to which the rule will be applied. Click and Select the customer group or leave them blank. Then click Ok and press Save button.

    Tip

    If Customer Group Selection has no customer group then this rule applies for all customer group.

    Manage Return Rule
    In this article
    © 2019-2026 Jeyan Technologies Private Limited • www.o2vend.com • Create your own store