Shipping Methods Setup | Configure Shipping Class in O2VEND
Learn how to create and manage shipping classes in O2VEND Online Store. This tutorial explains where to open the shipping class section, how to create a shipping class, and how to use general, filter, and customer-based filter settings.
What Is Shipping Methods Setup?
The Shipping Methods Setup section helps you manage the shipping classes available in your online store.
It is useful for:
- creating shipping classes
- controlling shipping provider setup
- managing shipping rules by product and category
- applying customer-based shipping conditions
- organizing store shipping options from one place
Navigation Path
Back Office -> Online Store -> Setup Shipping Class
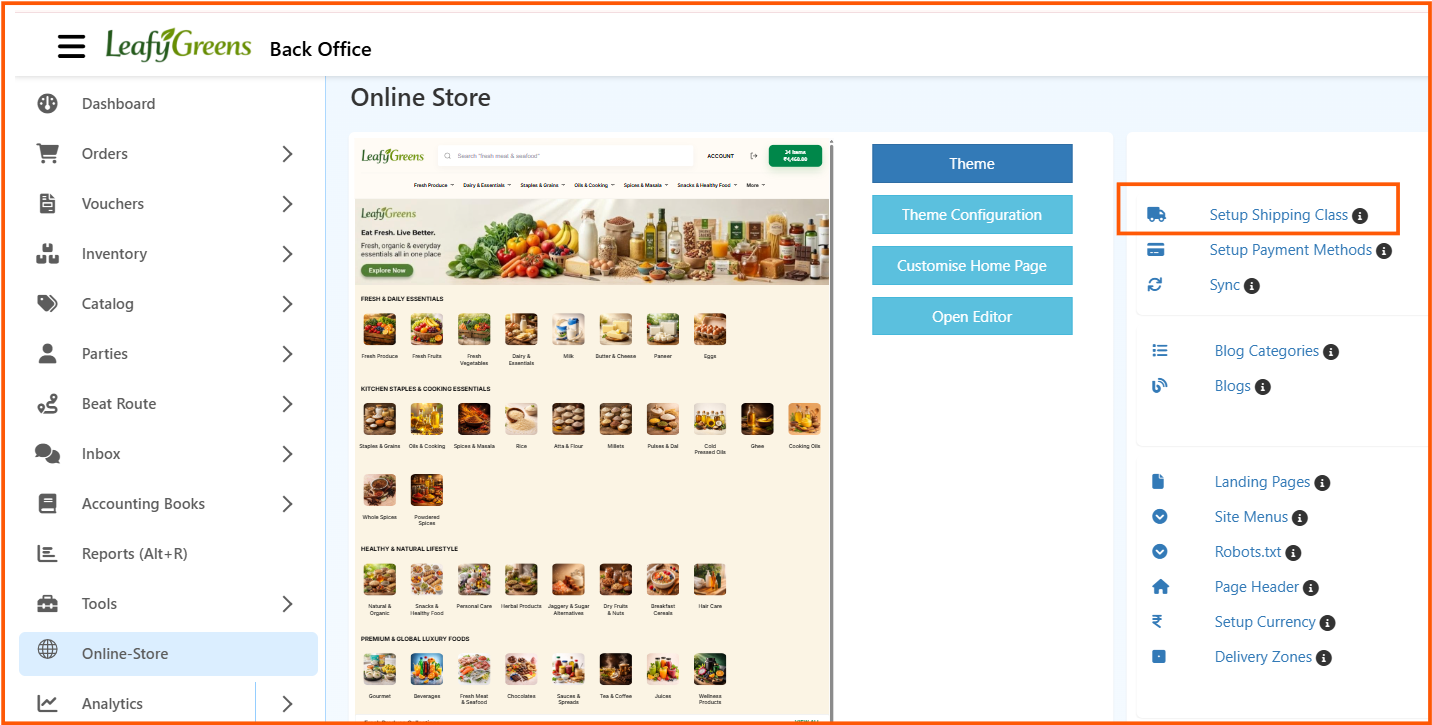
From the Online Store page, click Setup Shipping Class to open the shipping class management screen.
Shipping Class List Page
The Shipping Class page shows all created shipping classes in one place.
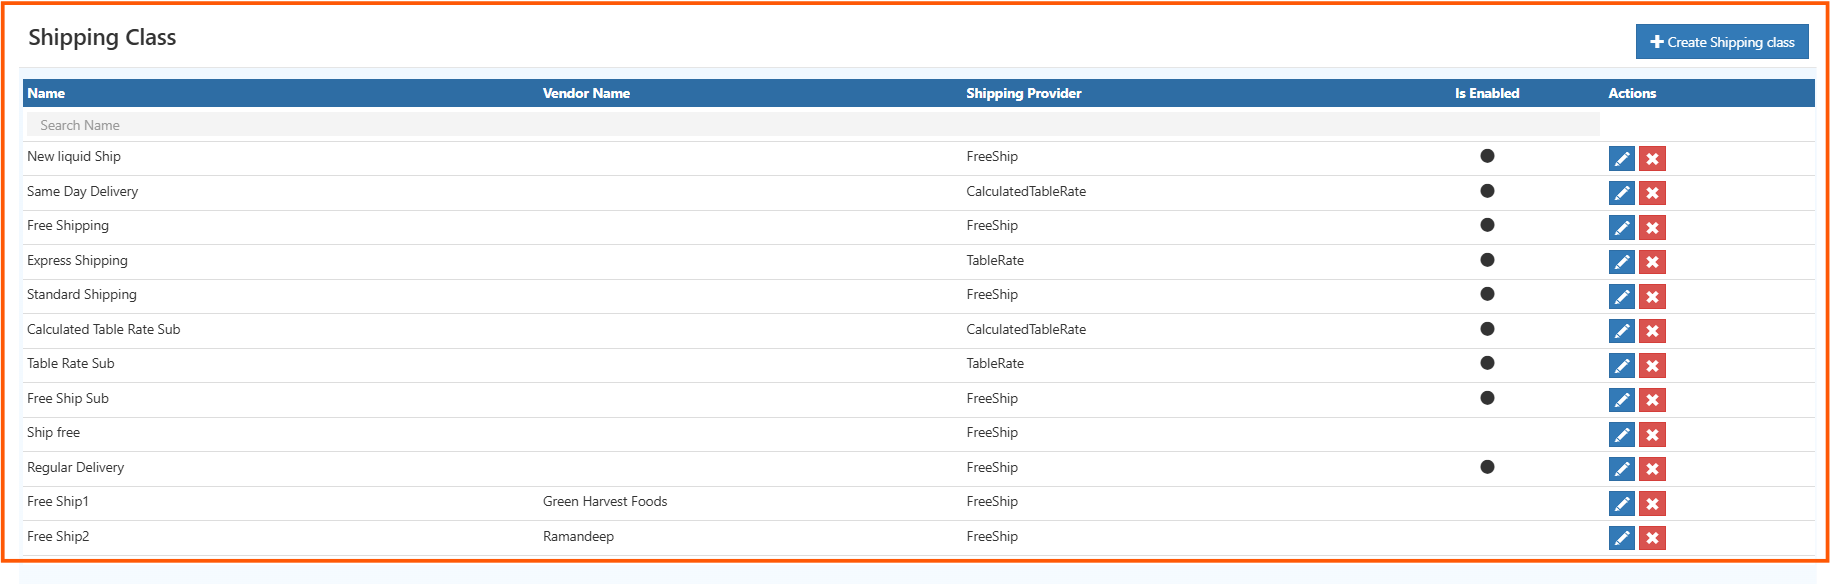
The list page includes columns such as:
- Name
- Vendor Name
- Shipping Provider
- Is Enabled
- Actions
From this page, you can:
- click + Create Shipping class to add a new shipping class
- use Edit to update a shipping class
- use Delete to remove a shipping class if it is no longer needed
How to Create a Shipping Class
- Open Back Office
- Go to Online Store
- Click Setup Shipping Class
- Click + Create Shipping class
- Enter the general shipping class details
- Add filter rules if needed
- Add customer-based filter rules if needed
- Click Save
Create Shipping Class - General Tab
The General tab is used to enter the main shipping class details.

Name
Enter the shipping class name.
Example: Standard Delivery
Shipping Provider
Select the shipping provider for the class.
Example: Free Ship
Is Enabled
Set whether the shipping class is active.
If set to true, the shipping class can be used in the store.
Offer Price
Enter the offer price if applicable.
Example: 50
Condition
Select the condition that controls when the shipping class is applied.
Example: No Conditions, For orders
Description
Enter a short description for the shipping class.
DisableForGuest
Set this to true if guest users should not use this shipping class.
Channel Groups
Select the channel group where this shipping class should be available.
Delivery Zone Name
Select the delivery zone linked to the shipping class.
Order Cut Off Timing
Set the cut-off time for order processing.
Shipping Timing
Enter the shipping time value.
Delivery Timing
Enter the delivery time value.
Save
After entering the required details, click Save to create the shipping class.
Create Shipping Class - Filters Tab
The Filters tab is used to limit the shipping class to selected products, categories, and brands.
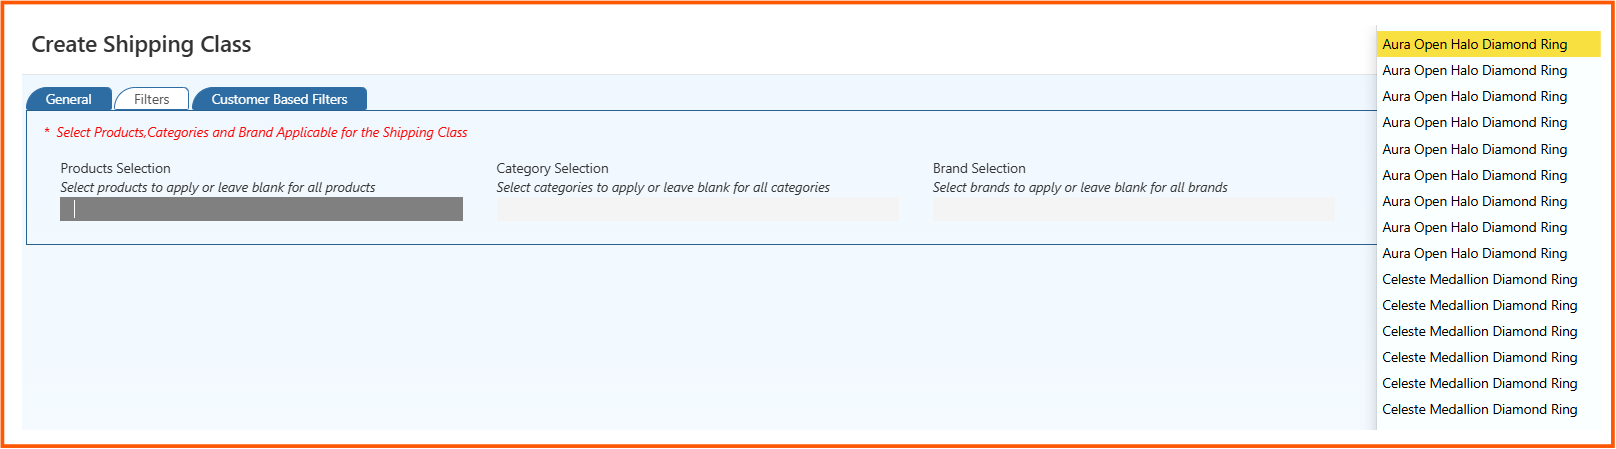
This tab includes:
- Products Selection
- Category Selection
- Brand Selection
Use this tab when the shipping class should apply only to selected items.
Create Shipping Class - Customer Based Filters Tab
The Customer Based Filters tab is used to limit the shipping class to selected customers or customer groups.
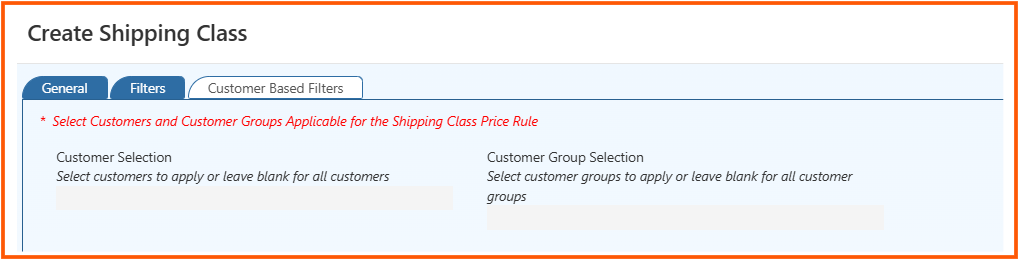
This tab includes:
- Customer Selection
- Customer Group Selection
Use this tab when the shipping class should apply only to specific customers or customer groups.
Benefits of Shipping Methods Setup
Using the shipping class section in O2VEND helps you:
- organize shipping options clearly
- apply shipping rules by product and category
- control shipping by customer group
- manage delivery timing settings easily
- support better checkout and delivery planning