Benefits Setup | Customer Cashback and Affiliate Commission
Learn how to create cashback and commission rules, set conditions, choose triggers, define limits, and link benefits to coupons.
What Is a Benefit?
A benefit is an automatic reward that gets paid when a customer uses a coupon.
Simple Example:
- You create a coupon:
SAVE10 - You add a benefit: "Give 10% cashback"
- Customer uses
SAVE10→ They automatically get 10% cashback
Benefits = Automatic rewards for customers or affiliates when they use your coupons
What You Can Do With Benefits:
- Give cashback to customers (e.g., "Get $5 back")
- Give cashback to affiliates (e.g., "Partners earn $10")
- Pay commission to affiliates (e.g., "5% commission on sales")
- Choose when to pay (immediately or after order is delivered)
- Set spending limits (max per order, max total budget)
Workflow: Create a benefit rule → Link it to a coupon → Rewards apply automatically
📖 Need help with coupons? See Coupon Setup Guide
Step 1: Open the Benefits Page
Navigation Path: Settings → Loyalty and Promotion → Benefits → Create Benefit
- Sign in to Back Office
- Navigate to Settings → Loyalty and Promotion → Benefits
- Click Create Benefit

💡 The Benefits page displays all existing benefit rules, so you can review, update, or manage previously created entries.
Step 2: Configure the Benefit Details
Complete each field carefully. These settings determine how the reward is calculated and when it is applied.
1️⃣ Name
Enter a clear and descriptive name for the benefit rule.
Example: Customer 10% Cashback
2️⃣ Type
Select the benefit type based on the reward you want to configure.
| Type | Description |
|---|---|
| 💳 Customer Fixed Cashback | Credits a fixed cashback amount to the customer. |
| 📈 Customer Percentage Cashback | Credits cashback to the customer as a percentage of the order value. |
| 🤝 Affiliate Fixed Cashback | Credits a fixed cashback amount to the affiliate. |
| 📊 Affiliate Percentage Cashback | Credits cashback to the affiliate as a percentage of the order value. |
| 💼 Affiliate Fixed Commission | Credits a fixed commission amount to the affiliate. |
| 📉 Affiliate Percentage Commission | Credits commission to the affiliate as a percentage of the order value. |
3️⃣ Condition
Use this field to define when the benefit should be applied.
- No Condition: The benefit applies to all eligible orders.
- For Order Placed: The benefit applies only when the order matches the configured range or condition.
4️⃣ Cashback Trigger
Choose when the cashback or commission should be credited.
- Once Order Placed: The reward is credited as soon as the order is placed.
- Once Order Complete: The reward is credited only after the order is completed.
💡 Pro Tip: Many businesses prefer Once Order Complete for better control, especially when orders may be cancelled or changed.
5️⃣ Discount Amount
Enter the reward value.
- Enter an amount for fixed benefits (e.g.,
5for $5) - Enter a percentage for percentage-based benefits (e.g.,
10for 10%)
6️⃣ Max Discount Amount
Enter the maximum reward amount allowed for the rule.
💡 This is especially useful for percentage-based benefits because it prevents the reward from exceeding a fixed limit.
7️⃣ Total Lifetime Cashback
Enter the total maximum cashback allowed under this benefit rule.
💡 This helps you control the total reward value for long-running campaigns.
8️⃣ Active
Set this field to true to activate the benefit rule.
⚠️ If the rule remains inactive, it will not apply even if it is linked to a coupon.
✅ Step 3: Save the Benefit Rule
- Review all entered details
- Confirm that the type, trigger, and limits are correct
- Click Save
🎉 After saving, the benefit rule becomes available in coupon configuration.
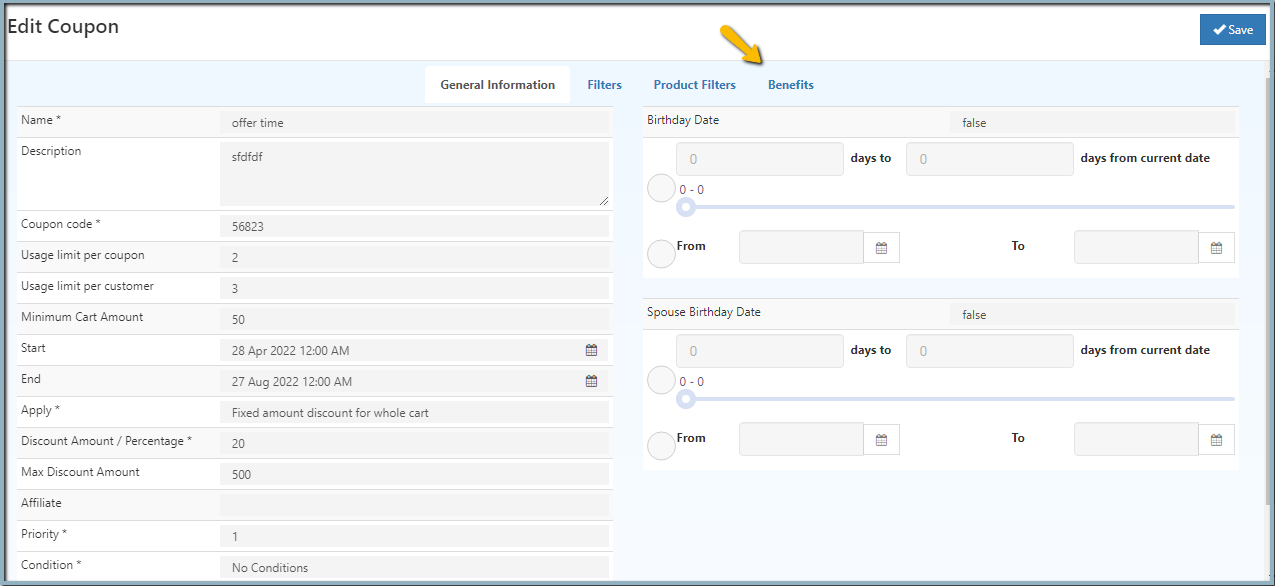
🔗 Step 4: Link the Benefit to a Coupon
Important: The benefit rule must be linked to a coupon before it can be used in transactions.
- Open Back Office
- Go to Settings → Loyalty and Promotion → Coupons
- Open the coupon you want to edit
- Navigate to the Benefits section
- Select the required benefit from the dropdown list
- Click Save

After the coupon is updated, the selected benefit will be applied automatically whenever the coupon is used in a valid order.
Example
The following example shows a typical customer cashback configuration:
Steps:
- Create a benefit named
Customer 10% Cashback - Select Customer Percentage Cashback as the benefit type
- Enter
10in Discount Amount - Select Once Order Complete in Cashback Trigger
- Save the benefit
- Link the benefit to a coupon
Result:
✅ When the customer uses that coupon on an eligible order, 10% cashback is credited after the order is completed.
📖 Related Articles
🎫 Coupon Management:
🤝 Affiliate & Rewards:
💳 Promotions: