O2VEND Gift Voucher Setup Guide
Learn how to create, configure, generate, and print Gift Vouchers in O2VEND Back Office using the available setup screens and templates.
Gift Voucher setup should be completed carefully so the voucher value, validity period, usage limit, and print format all work correctly across your business flow.
Open Gift Voucher Settings
Follow these steps to open the Gift Voucher page:
- Sign in to Back Office.
- Go to Settings.
- Open Loyalty and Promotions.
- Select Gift Voucher.
This screen shows where the Gift Voucher option is available inside Back Office.
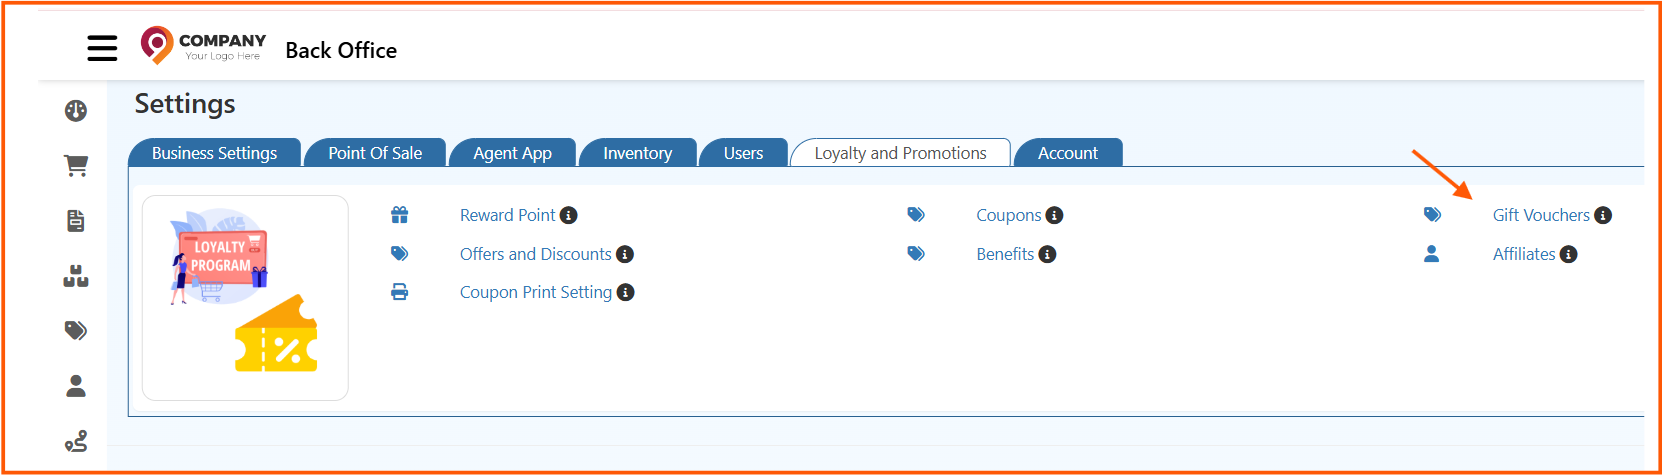
This image gives another view of the loyalty settings area where Gift Voucher configuration is managed.
After opening the page, you can review existing Gift Voucher entries and create a new one.

Create a New Gift Voucher
To create a new Gift Voucher:
- Open the Gift Voucher page.
- Click Create Voucher.
- Complete the details in each setup tab.
- Save the voucher after verifying all values.
Use a clear voucher name so users can identify the campaign easily during billing, reporting, and support follow-up.
Fill General Information
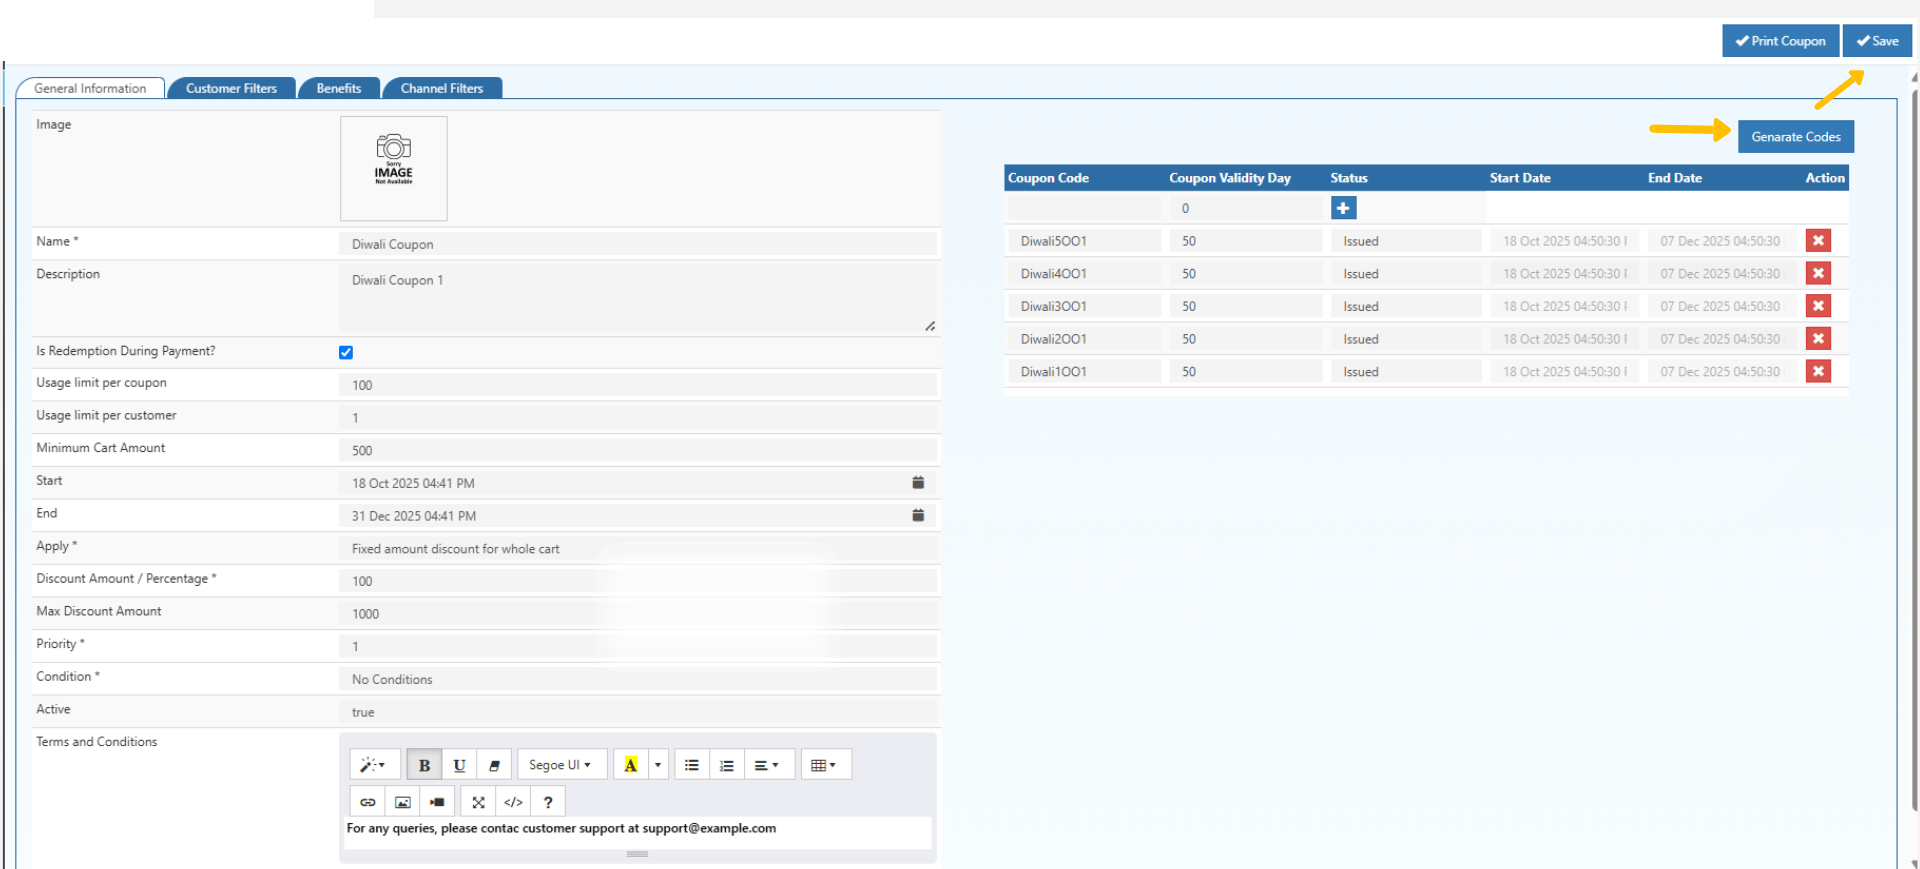
The General Information tab is where you define the main Gift Voucher rules.
Use this section to enter and review the following:
| Field | Purpose |
|---|---|
| Name | Internal name of the Gift Voucher |
| Description | Short explanation of the Gift Voucher campaign |
| Is Redemption During Payment | Controls whether the voucher can be redeemed at billing time |
| Usage Limit per Coupon | Number of times one voucher code can be used |
| Usage Limit per Customer | Number of times one customer can redeem the Gift Voucher |
| Minimum Cart Amount | Minimum bill amount required to apply the voucher |
| Start Date | Date from which the Gift Voucher becomes active |
| End Date | Date after which the Gift Voucher expires |
| Discount Type | Choose fixed amount or percentage |
| Discount Amount | Value of the Gift Voucher benefit |
| Maximum Discount Amount | Maximum discount allowed for percentage-based vouchers |
| Priority | Priority when multiple benefits are available |
| Active | Enables or disables the Gift Voucher |
While filling this screen:
- Enter a business-friendly voucher name.
- Add a simple description so internal teams understand the purpose.
- Set the discount type and amount carefully.
- Define usage limits to avoid repeated misuse.
- Confirm the start and end date before activating the voucher.
Generate Gift Voucher Codes
Once the main Gift Voucher details are saved, open the Generate Codes tab to create redeemable voucher codes.
This image shows the code generation section in more detail.
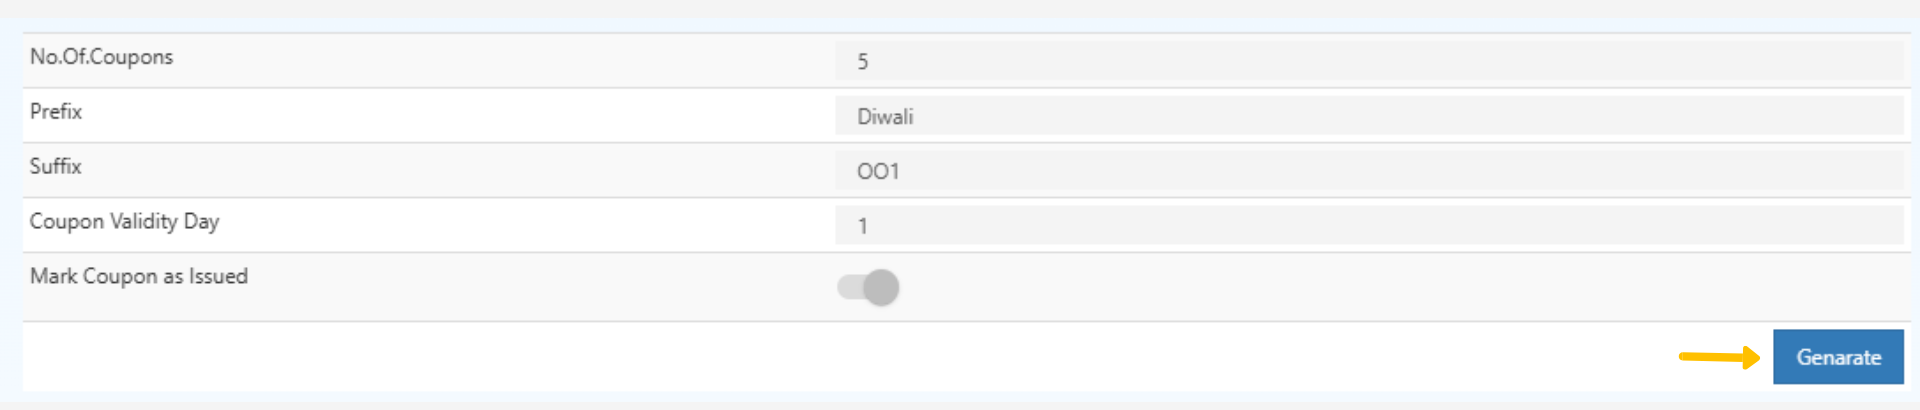
Use the following settings while generating codes:
| Setting | Purpose |
|---|---|
| No. of Coupons | Total number of Gift Voucher codes to generate |
| Prefix | Adds a starting text to all codes |
| Suffix | Adds an ending text to all codes |
| Coupon Validity Days | Validity duration for generated voucher codes |
| Mark Coupon as Issued | Marks the generated codes as issued immediately |
Steps to generate codes:
- Open the Generate Codes tab.
- Enter the number of Gift Voucher codes required.
- Add a prefix or suffix if your business needs a naming pattern.
- Set the validity days for the generated codes.
- Choose whether the codes should be marked as issued.
- Click the generate option to create the Gift Voucher codes.
Use prefixes like store name, campaign name, or seasonal code to make the Gift Voucher batch easier to track.
Print Gift Voucher Coupons
After code generation, you can print the Gift Voucher for distribution to customers.
This screen shows the print setup where you can choose the template and print the required vouchers.

Use this step when you need physical Gift Voucher coupons for stores, events, or promotional campaigns.
- Return to the Gift Voucher record.
- Click Print Coupon.
- Select the required print template.
- Choose the voucher codes to print.
- Continue with the print action.
The following image shows how the printed Gift Voucher output appears with offer details and voucher information.

This additional preview helps you verify barcode and layout details before final printing.

Before printing in bulk, review:
- Voucher code visibility.
- Discount or value shown on the coupon.
- Expiry date accuracy.
- Template alignment and barcode readability.
Recommended Setup Flow
For best results, follow this order while creating a Gift Voucher:
- Open Gift Voucher from Loyalty and Promotions.
- Create the Gift Voucher and complete General Information.
- Save the voucher with correct validity dates and limits.
- Generate the required Gift Voucher codes.
- Review the generated codes.
- Print sample coupons first.
- Activate and share the Gift Voucher with customers.
Best Practices
- Use a clear Gift Voucher name that matches the campaign or occasion.
- Keep the validity period realistic so customers have enough time to redeem it.
- Limit redemptions per customer when the voucher is promotional.
- Test one Gift Voucher in a controlled billing scenario before full rollout.
- Print a sample coupon and verify barcode readability before bulk printing.