Financial Year Setup
The Financial Year section lets you define the accounting period used for sales, purchases, expenses, and reporting.
Quick Links
Setting this up correctly is important. It helps keep your reports accurate, makes audits easier, and ensures your financial data is always aligned with the right time period.
What You Can Do in Financial Year Settings
From this section, you can:
- define the start and end of your accounting year
- mark which financial year is currently active
- review previously created financial years
- archive older years without deleting them
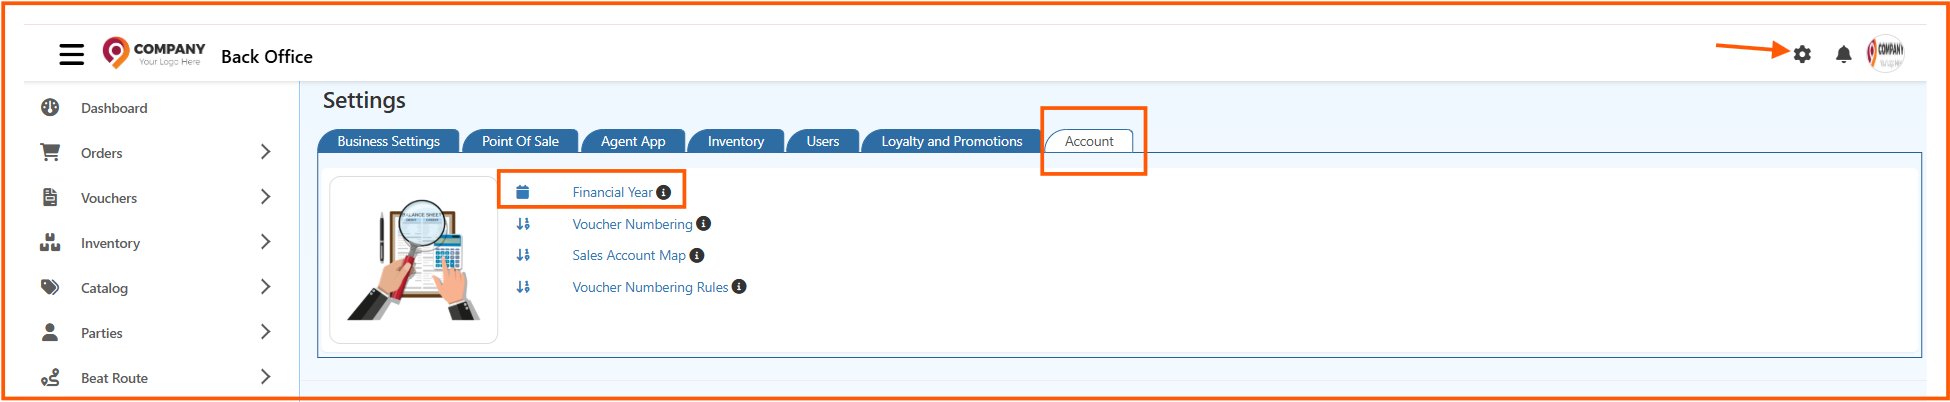
How to Access Financial Year Settings
To open this section:
- Go to Back Office
- Click the Settings icon (top-right corner)
- Open the Account tab
- Select Financial Year
Financial Year List Overview
Once you open the page, you’ll see a list of all configured financial years.
Each row shows:
- Financial Year (name or label)
- From Date
- To Date
- IsCurrent (active year)
- IsArchive (archived status)
You can use this list to quickly check which year is active or review past records.
To add a new year, click Create.

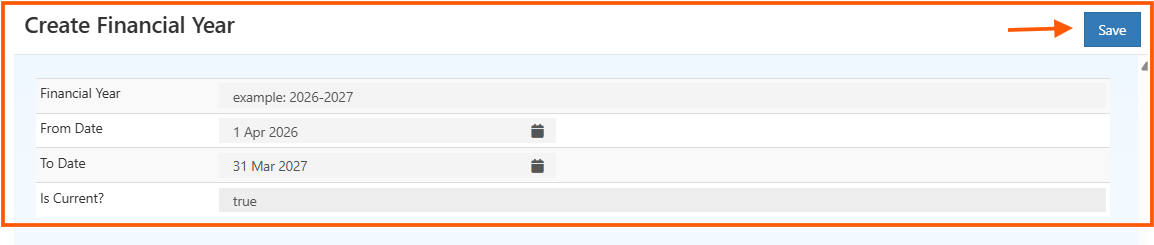
How to Create a Financial Year
Follow these steps to add a new financial year:
- Click Create
- Enter a label (for example,
2026–2027) - Select the From Date
- Select the To Date
- Set Is Current? to
trueif this is your active year - Click Save
Best Practices
A few things that usually help:
- Create the next financial year before the current one ends—this avoids last-minute setup
- Keep only one year marked as Is Current
- Use IsArchive instead of deleting old records
- Archive past years once all entries are finalized
Why This Matters
Your financial year setup directly affects how reports are generated.
If the dates are not set correctly, reports like Balance Sheet or Profit & Loss may not reflect the right data. Taking a minute to configure this properly saves a lot of confusion later.