O2VEND Retail ERP
  • Product
  • Solutions
  • Resources
    • Blog
    • Community
    • Partnership
    • Find Partner
    • Developer
  • Pricing
  • Docs
    • Getting Started
      • Channels
        • Sales Channel
        • O2VEND to O2VEND Channel
        • Shopify Integration Guide
    • Commerce
      • Ecommerce
      • POS
      • Agent App
      • CMS
      • Themes & Apps
      • Apps
        • Sales Navigator
    • Operations
      • OMS
      • WMS
      • O2C
      • Vendor Portal
      • Supplier Portal
    • Back Office
      • Accounting
      • Reports
      • PIM
      • Communication
      • Back Office
Search Results for

    Show / Hide Table of Contents
    • Retail ERP Back Office Overview
    • Back Office Dashboard
    • Analytics & Reports
      • Visitor Analytics
      • E-commerce Analytics
      • Product Analytics
      • Campaigns Analytics
    • API & Webhook Integration
      • Webhook
      • Examples of JSON format data via webhook
      • Testing webhook
    • Back Office Settings
      • Settings Overview
      • Store Settings
        • Business Details
        • Tax Classes
        • Tax Rates
        • Operating Countries
        • Operating State or Province
        • Branches
        • Sales Channels
        • Return Rule
        • Back Office Print Detail
        • Download Template
        • Order Numbering
        • Push Notification
      • POS Settings
        • Quick Add Buttons
        • Print Settings
        • Payment Methods
        • Delivery Settings
        • Language
        • POS Offline Mode
      • Agent App Settings
        • Agent App Print Details
      • Stock Settings
        • Unit Of Measure
        • Location
        • Unit Of Measure Conversions
        • Stock Levels
        • Sub Location
        • Print Barcode Label Settings
        • Package Material
        • Delivery Zone
      • User Settings
        • Vendors
        • User Date Setup
        • Employees
        • Vendors Commission
        • Credit Rules
        • Automatic User Code
        • User Authorization
      • User Role Mapping
        • Set Up Employee Roles
        • Ecommerce
        • Point Of Sale
        • Back Office
        • Sales App
        • Roles
      • Loyalty and Promotions
        • Reward Points
        • Coupons
        • Gift Vouchers
        • Offers and Discounts
        • Benefits
        • Affiliate
        • Coupon Print Setting
      • Account Settings
        • Financial Year
        • Voucher Numbering
        • Sales Account Map
        • Voucher Numbering Rules
      • Integrations
        • Shiprocket Configuration
        • Shipway Configuration
    • Profile

    Integrating O2VEND With Shipway

    This section explains how to integrate O2VEND with shipway.

    Settings in Shipway

    1. Create an account and login into shipway.
    2. Get the license key in the profile section.
    3. Setup the courier services enable/disable in the manage courier section.

    How to integrate O2VEND With Shipway

    1. log in to the O2VEND Back Office.
    2. Go to the Settings.
    3. See Integration section.
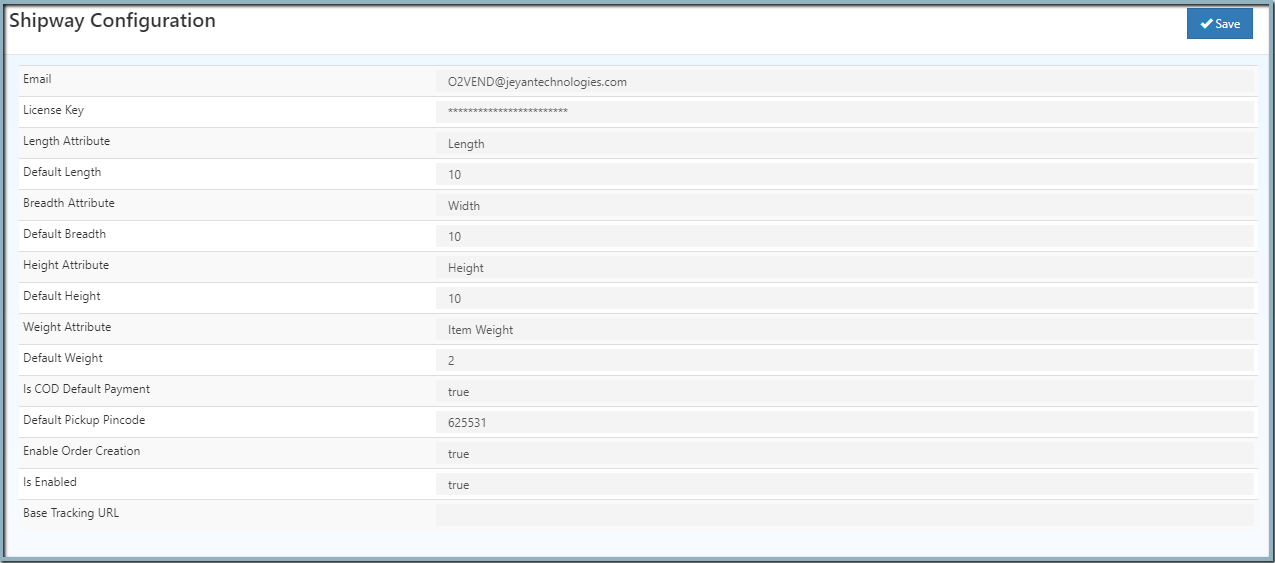
    4. Click and open Shipway Configuration.
    5. Enter the email id and license key.
    6. Set default pickup Pincode and select attributes.
    7. Set True - Enable order creation and enable.
    Integrating O2VEND With Shipway

    How to enable shipway in shipping methods

    1. log in to the O2VEND Back Office.
    2. Go to the Settings.
    3. See Web Store section.
    4. Click and open Shipping Methods.
    5. Now, enable the Shipway Shipping Rate.
    Integrating O2VEND With Shipway

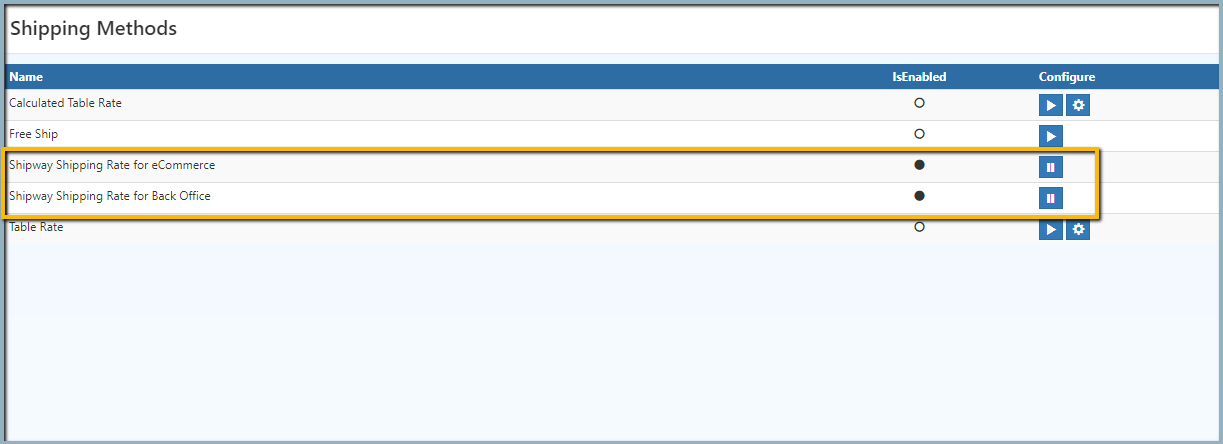
    Shipway shipping rate for eCommerce - Shipway courier services display when the customer enters the shipping address.

    Shipway shipping rate for Back-office - Admin can select the courier services when creating the goods issue in the O2VEND Back office.

    In this article
    © 2019-2026 Jeyan Technologies Private Limited • www.o2vend.com • Create your own store