Manage Product Lots in GDN - How to Allot Lots When Shipping Sales Orders
Learn how to manage product lots in a Goods Delivery Note (GDN) in O2VEND. Enable lot tracking on products, allot lots during goods issue, and verify stock deduction in Stock History.
When you sell lot-tracked products — such as medicines, cosmetics, or food items — O2VEND lets you specify exactly which batch (lot) is being shipped to the customer. This is done inside the Goods Issue (GDN) screen using the Allot Lot feature.
Lot tracking in GDN helps you:
- Know exactly which batch was shipped to each customer
- Track expiry dates for each shipment
- Maintain accurate lot-level stock records in your warehouse
Before You Begin
To use lot tracking in GDN, the product must first have Lot tracking enabled. This is a one-time setup done in the product settings.
Step 1 — Enable Lot Tracking on the Product
Go to Catalog → Products and open the product you want to track by lot.
In the General tab, find the Lot? field and set it to true. Then click Save.
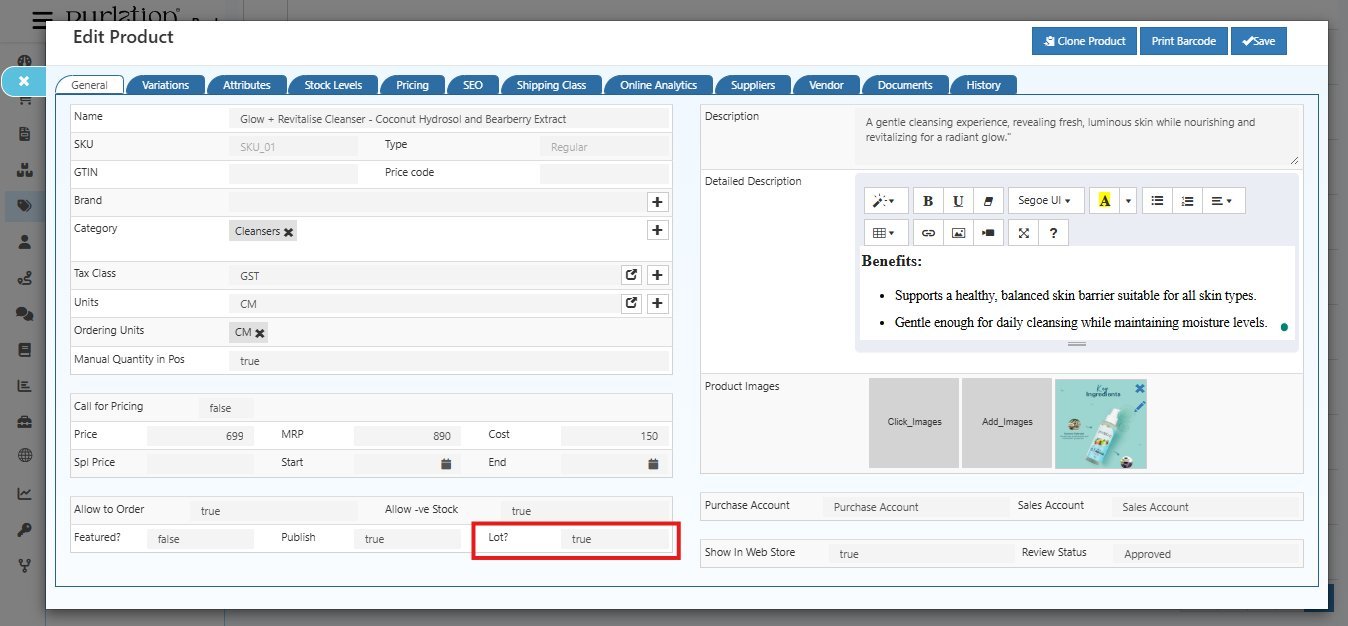
Once Lot? is set to true, the Allot Lot button will appear automatically in the Goods Issue screen whenever this product is part of a shipment.
This is a one-time setting per product. Once enabled, every GDN for this product will require a lot to be allotted before shipping.
Step 2 — Open the Goods Issue Screen
Go to Back Office → Voucher → Sales and open the sales invoice that contains the lot-enabled product.
Click the Goods Issue button from the right panel to open the Goods Issue screen.
You will notice that for lot-enabled products, an Allot Lot button appears in the Lot Number column of the product table — along with the Available Quantity showing the current stock.
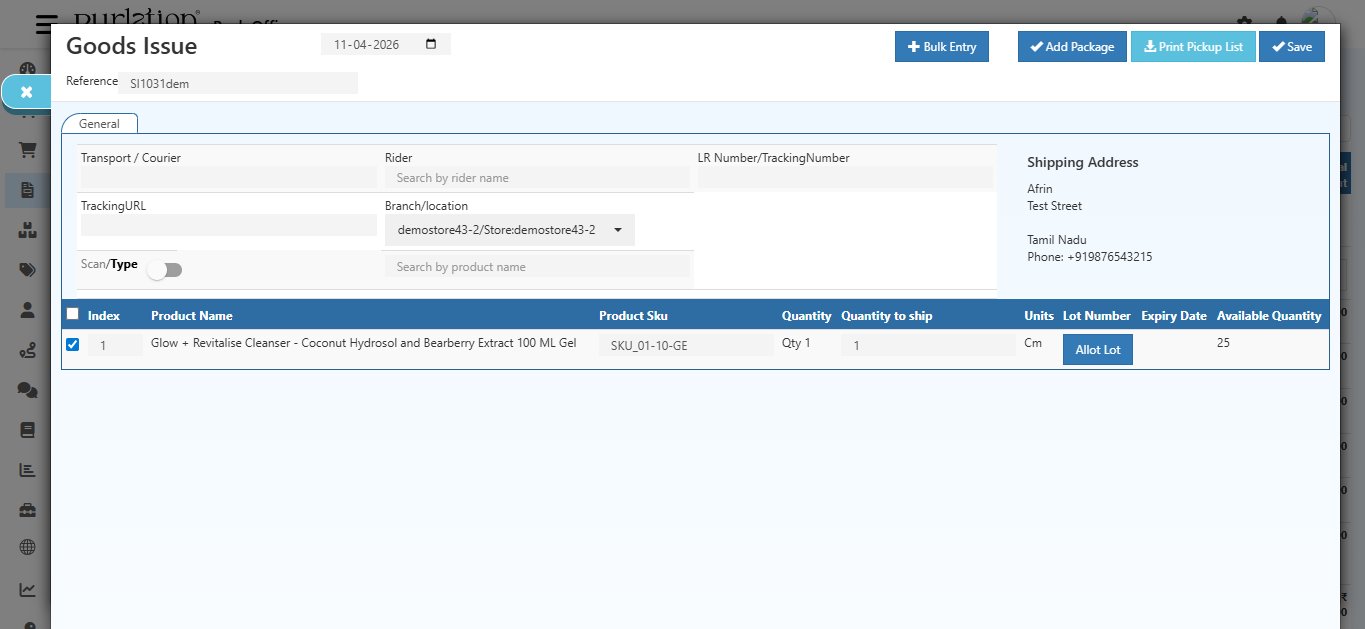
The product table shows:
| Column | Description |
|---|---|
| Product Name | Name of the lot-enabled product |
| Product SKU | SKU code of the product |
| Quantity | Original ordered quantity |
| Quantity to Ship | Enter how many units you are shipping |
| Units | Unit of Measure |
| Lot Number | Shows the Allot Lot button for lot-enabled products |
| Expiry Date | Auto-filled after the lot is selected |
| Available Quantity | Current stock in the selected warehouse |
Step 3 — Enter Quantity to Ship
In the Quantity to Ship field, enter how many units you are dispatching in this shipment.
The quantity to ship cannot exceed the available stock or the original ordered quantity.
Step 4 — Click Allot Lot
Click the Allot Lot button next to the product row.
The Lot dialog box opens, showing all existing lots available for this product.
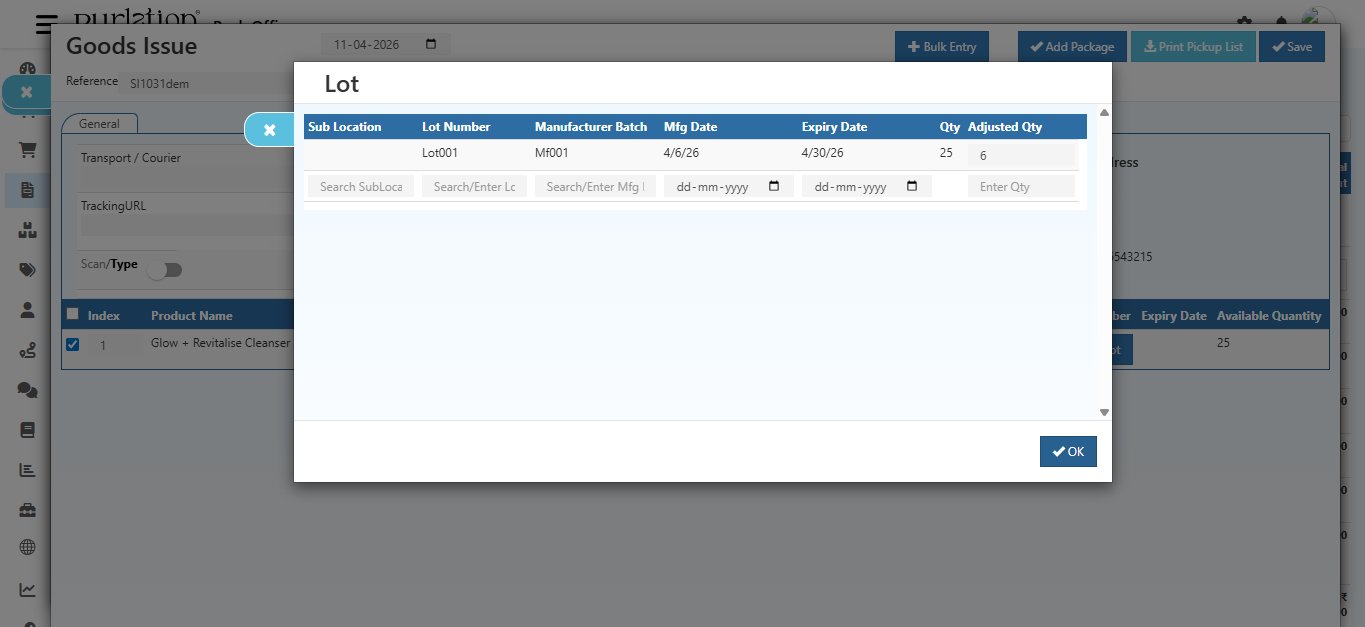
The lot dialog shows all available lots for this product with their details:
| Field | Description |
|---|---|
| Sub Location | The sub-location within the warehouse where this lot is stored |
| Lot Number | The batch identifier (e.g., Lot001) — search for an existing lot or enter a new one |
| Manufacturer Batch | The manufacturer's batch code (e.g., Mf001) |
| Mfg Date | Manufacturing date of this batch |
| Expiry Date | Expiry date of this batch — important for perishable products |
| Qty | Total quantity available in this lot |
| Adjusted Qty | Enter how many units from this lot you want to ship |
To allot a lot:
- Find the lot you want to use (e.g., Lot001)
- Enter the number of units in the Adjusted Qty field
- Press Enter to save the row
- Click OK to confirm
You can allot from multiple lots in a single shipment — useful when one lot does not have enough quantity to fulfil the full order. Just add quantities across different lot rows.
Step 5 — Save the GDN
After allotting the lot, click Save at the top right of the Goods Issue screen.
When saved:
- The lot is marked as shipped from your warehouse
- Stock is reduced specifically from the selected lot
- The sales invoice status updates to Shipped or Partially Shipped
- The GDN is recorded with the lot details for full traceability
Step 6 — Verify in Stock History
After saving, you can verify the lot deduction in Stock History.
Go to Back Office → Stock History.
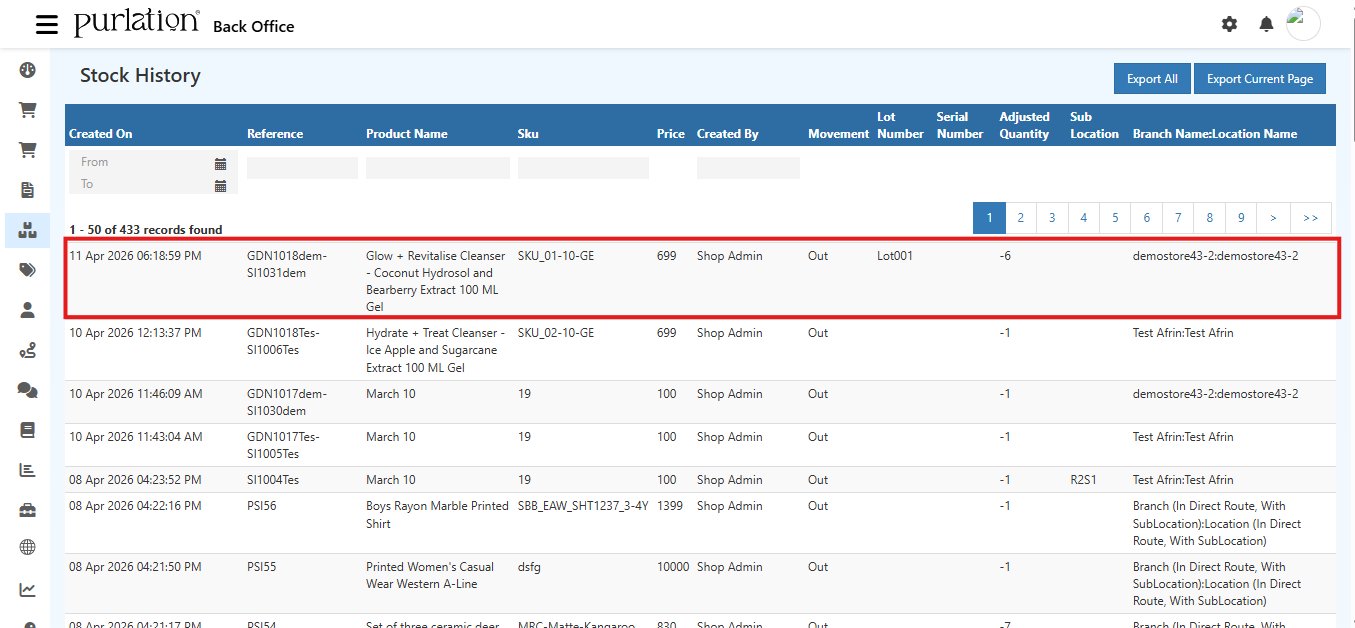
Look for the GDN reference number (e.g., GDN1018dem-SI1031dem). The entry will show:
| Column | What It Shows |
|---|---|
| Reference | GDN number linked to the sales invoice |
| Product Name | The lot-tracked product that was shipped |
| SKU | Product SKU code |
| Movement | Out — stock has been reduced (shipped out) |
| Lot Number | The specific lot that was dispatched (e.g., Lot001) |
| Adjusted Quantity | Negative value (e.g., -6) showing stock deducted |
| Branch / Location | The warehouse from which the lot was dispatched |
You can also manage and adjust lot quantities from Back Office → Stock Quantity (Alt+I) if needed.
After the GDN is Saved
- The specific lot's stock is reduced in your warehouse
- The lot details are permanently recorded against the GDN for audit and traceability
- Customers can be informed of the lot/batch number for their records
Quick Summary
| Step | Action |
|---|---|
| 1 | Go to Catalog → Products → Open product → Set Lot? = true → Save |
| 2 | Open the Sales Invoice → Click Goods Issue |
| 3 | Enter Quantity to Ship for the lot-enabled product |
| 4 | Click Allot Lot → Select lot → Enter Adjusted Qty → Press Enter → Click OK |
| 5 | Click Save — lot is shipped and stock is reduced |
| 6 | Verify in Back Office → Stock History — Movement shows Out with Lot Number |