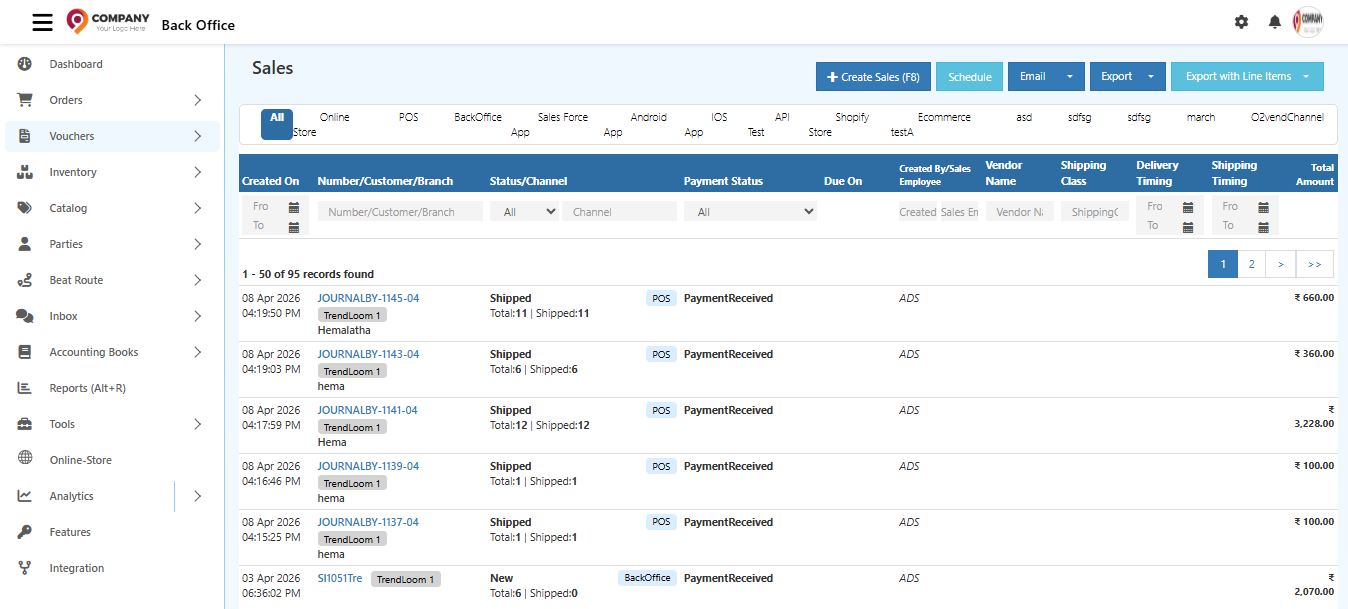
Create a Sales Invoice in O2VEND
Go to the Back Office, click Voucher and select the sales. Then Click Create Sales Invoice in the top right corner or use the shortcut key Alt+F8 to open the create sales invoice screen.
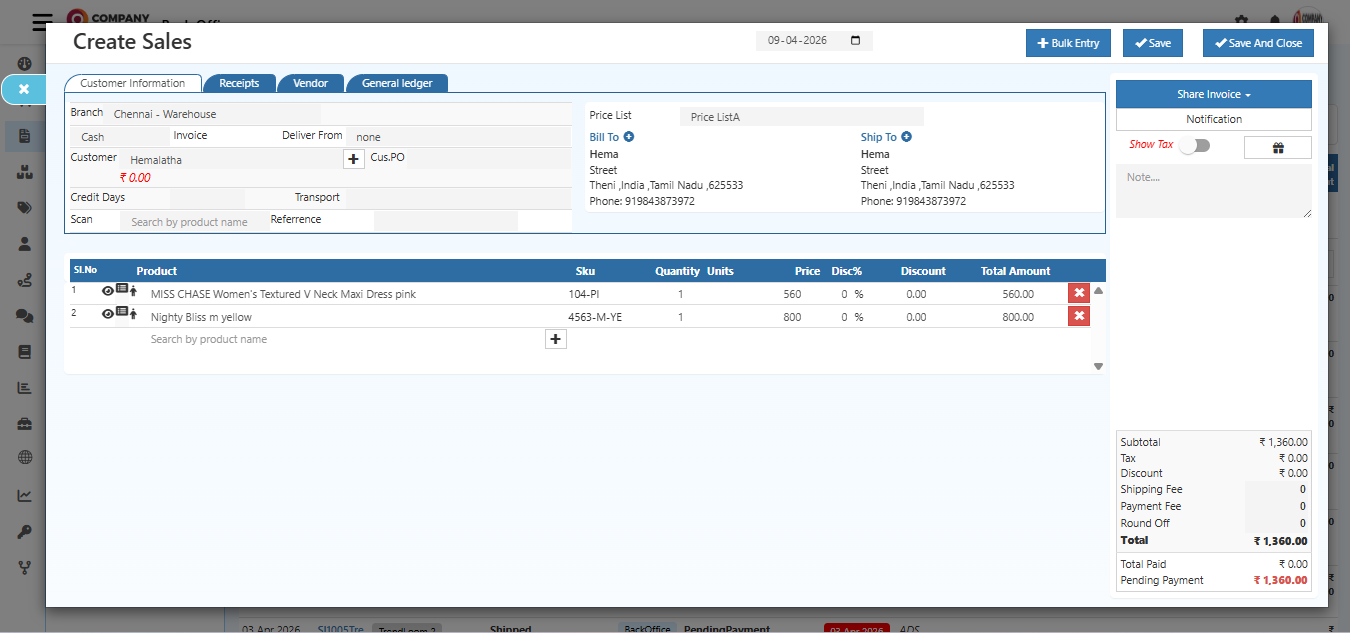
Customer Information
Enter the name of the customer and the contact information. This information will appear on sales invoices print.
Address
Click + symbol, the address section will open. Update the customer address in this field.
Invoice
Select any payment method cash or credit.
Cash
The seller or the admin receiving the full amount of cash from the buyer. Choose the invoice method name is cash in the Invoice field.
Credit
The seller or the admin received the partial or pending payment, choose the invoice method name is credit. This type of Invoice generally used against Online Payment through Payment Gateway. for example ( google pay, Paytm etc.. )
Receipts
If selected the invoice method name is credit, the receipts tab will have appeared. If an online payment method was used for the order, choose payment method names like a bank or online payment and set Amount to the invoice.
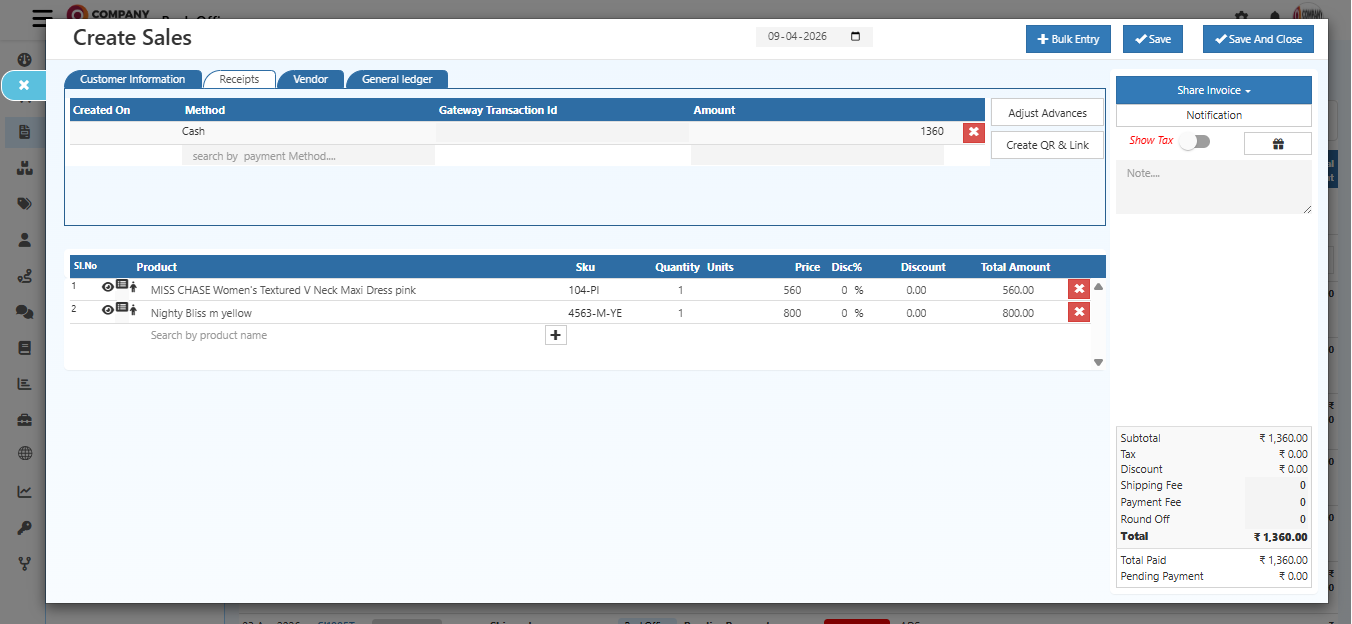
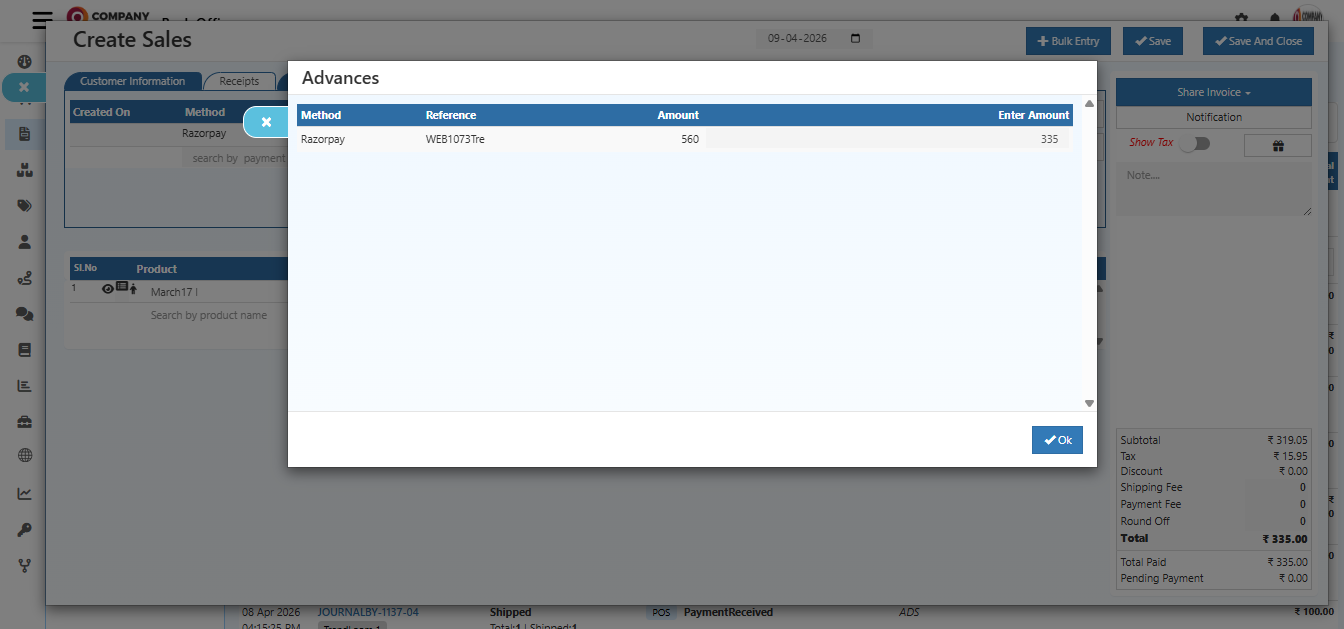
Adjust Advances
Adjust the advance paid against the created invoice. Click adjust advance button enter the amount then click OK.
Deliver From
Select the warehouse of the products want to delivered. Shipment is created after click Save button.
Customer
Search the customer name who can want to placed invoice.
Tip
Click Alt+C - Create a customer at the customer section.
Credit Days
If select payment method name is credit, credit days will appeared. The credit days is the number of days that a customer is allowed to wait before paying an invoice.
Transport
Select the transport name like van, bus or auto etc.
Referrence
Reference numbers are commonly used to identify items for a particular customer, admin can enter the reference number of incomplete or new orders for the specific customer.
Receipts
Add the payment method customer paid for this orders.
Goods issue
The Goods issued items are displayed in this goods issue tab.
Note
Entered order note are displayed in order note tab.
History
The updated order status are displayed in the order history tab.
Product
Search the product customer want to buy. This field allows to add and edit the products. When adding the products it fills the product details in all the field.
Tip
Click Alt+C - Create a product at the product section.
Quantity
Enter the minimum or maximum quantity of the product want to sell.
Units
Units of Measure (UOM) are used to define the measurement of the items.
Price
The product price is updated in this field. It allows to edit or change the price of the products.
Discount
Enter the discount amount on this field.
Total Amount
It shows the total amount of products. The total amount is reduced when the product has a discount.

Steps to Create Sales
- Click Create Sales button in the top right corner.
- Enter the customer name in the customer search box. The available customer list will show the search dropdown related on search.
- Select the customer name, then the customer-related information will fill automatically.
- After selecting the customer name enter to fill billing address, shipping address
- Select product name by entering the product name in a Product Name search box. The available product list will show the search dropdown related on search.
- Order Summary will show at the end of the page. Kindly check the Order summary before saving the order.
- Finally, Click the top right corner Save or click Ctrl+S button to create order.