Goods Delivery Note (GDN) | Ship Orders from Sales Invoice
Learn how to create a Goods Delivery Note (GDN) in O2VEND to ship customer orders. Step-by-step guide covering goods issue, package management, quantity approval, and stock update.
A Goods Delivery Note (GDN) — also called a Goods Issue — is an official record that confirms goods have been physically packed and dispatched to your customer. It is created directly from a sales invoice in O2VEND.
When you create and save a GDN:
- Your warehouse stock is automatically reduced
- The sales invoice status updates to Shipped or Partially Shipped
- A unique GDN number is assigned to the shipment for tracking
- The entire dispatch is recorded in Stock History for audit purposes
Before You Begin
Before creating a GDN, make sure the following are in place:
- A Sales Invoice has already been created in Back Office
- The products in the invoice are available in your warehouse stock
- The correct Branch / Location is configured and mapped
- Package materials (if using package workflow) are set up under Settings → Inventory → Package Material
How to Create a GDN
Step 1 — Open the Sales Invoice
Go to Back Office → Voucher → Sales.
You will see a list of all your sales invoices. Find the invoice for the order you want to ship and click its Invoice Number to open it.
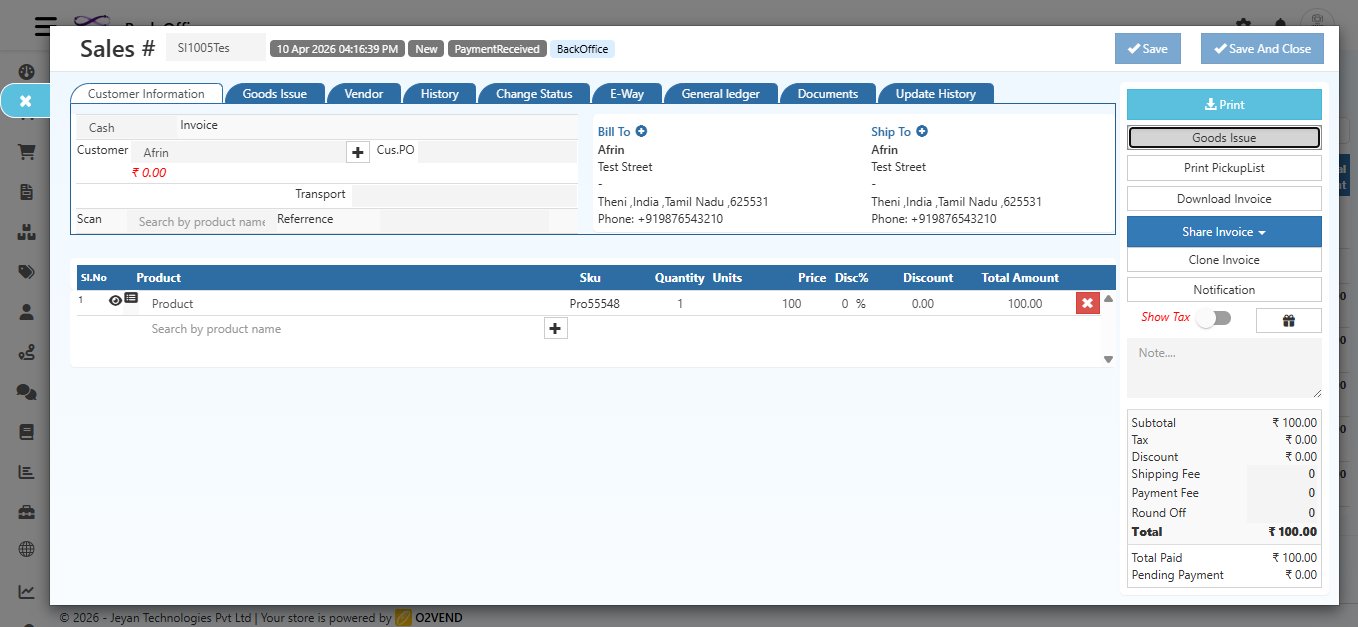
Inside the invoice, you will see several tabs at the top — Customer Information, Goods Issue, Vendor, History, Change Status, E-Way, General Ledger, Documents, and Update History.
On the right panel, you will find action buttons. Click the Goods Issue button to begin creating the GDN.
Step 2 — Fill in the Goods Issue Form
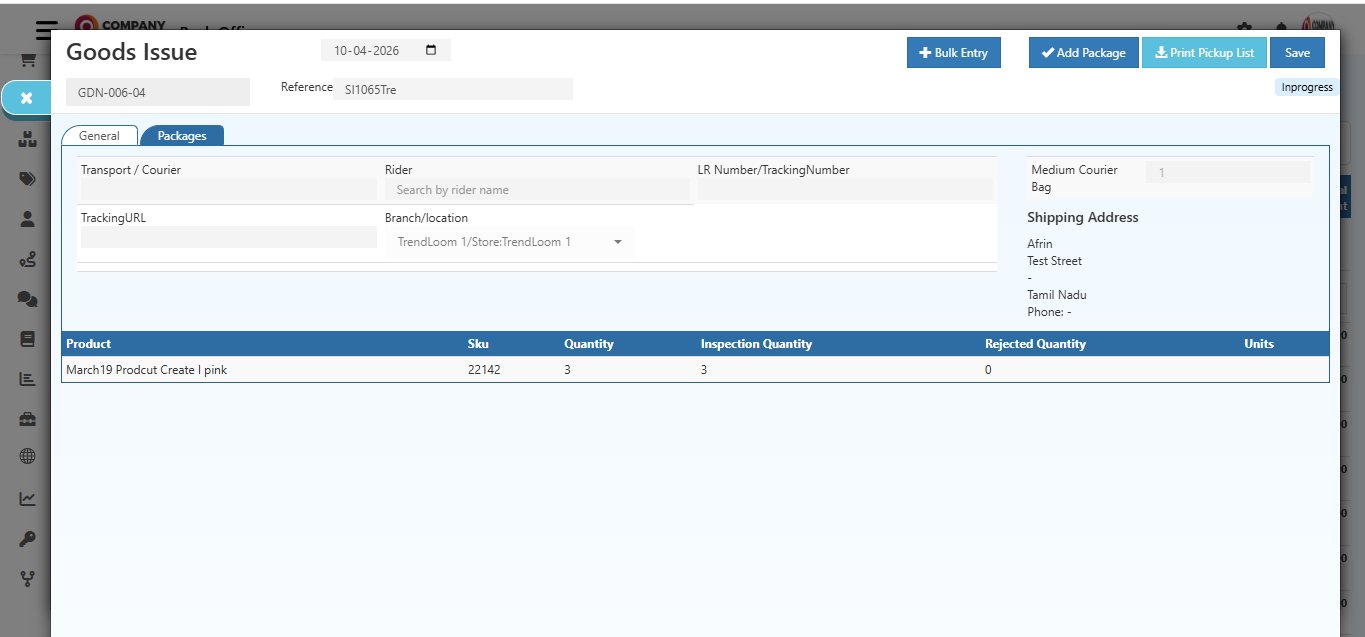
The Goods Issue screen opens automatically. The Reference field is pre-filled with your sales invoice number and the Shipping Address is pulled from the invoice.
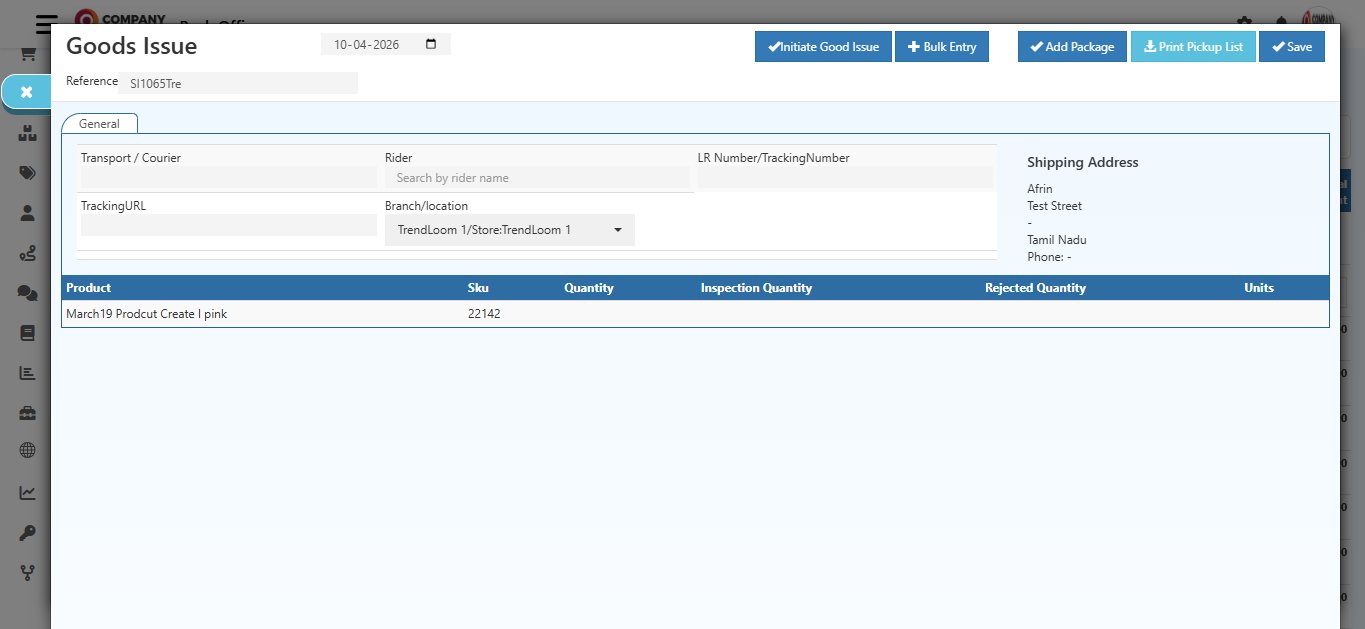
Fill in the delivery details:
- Transport / Courier — Enter the name of the delivery or courier company (e.g., FedEx, Blue Dart, DTDC)
- Rider — If you have an in-house delivery person, search and assign them here
- LR Number / Tracking Number — Enter the shipment's tracking number. This helps your customer track where their order is and when it will arrive
- Tracking URL — Paste the live tracking link from your courier's website
- Branch / Location — Select the warehouse or store location from which the goods are being dispatched
In the product table at the bottom, enter the Quantity to Ship for each product — this is how many units you are sending in this shipment.
Partial Shipments are supported. If you cannot ship everything at once, enter only the quantity you are shipping now. The invoice status will show as Partially Shipped and you can create another GDN later for the remaining items.
The Quantity to Ship cannot exceed the original ordered quantity or the remaining unshipped quantity.
Step 3 — Initiate the Goods Issue
Once the form is filled, click the ✓ Initiate Good Issue button at the top.
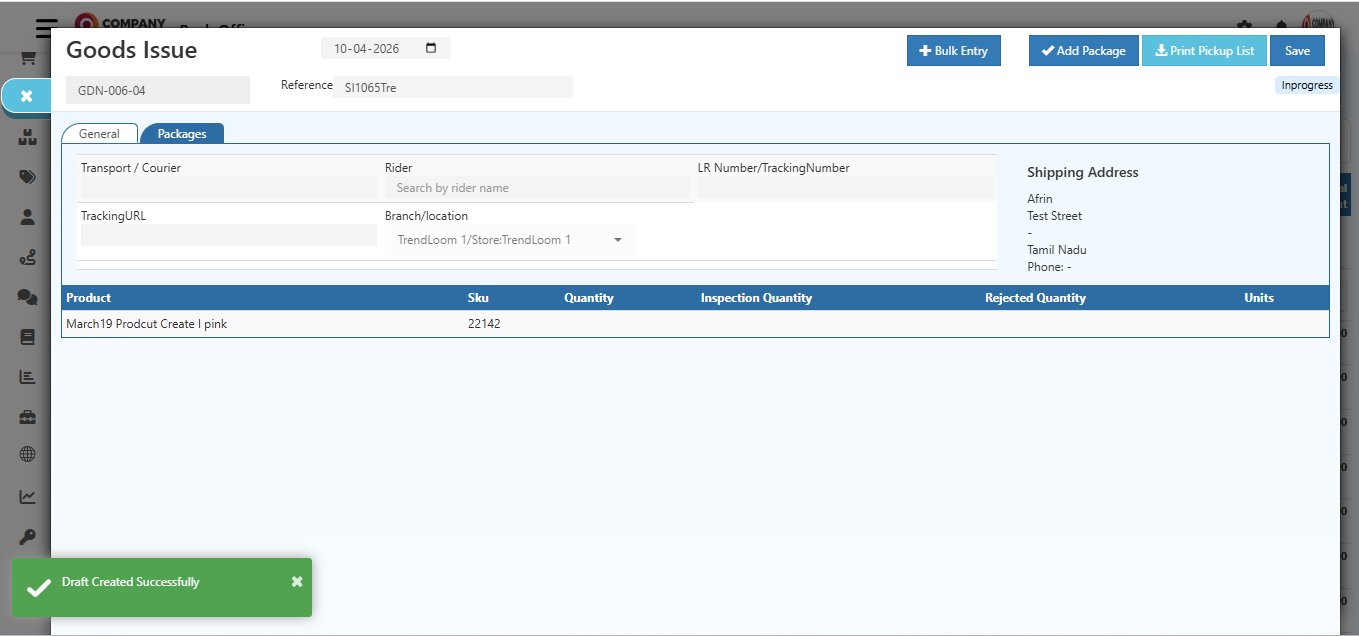
This creates a GDN draft and:
- Assigns a unique GDN Number (e.g., GDN-006-04)
- Changes the status to Inprogress
- Shows a "Draft Created Successfully" confirmation message
- Makes the Packages tab available for adding package details
Step 4 — Add a Package
Click the Packages tab. This is where you assign physical packaging to the shipment.
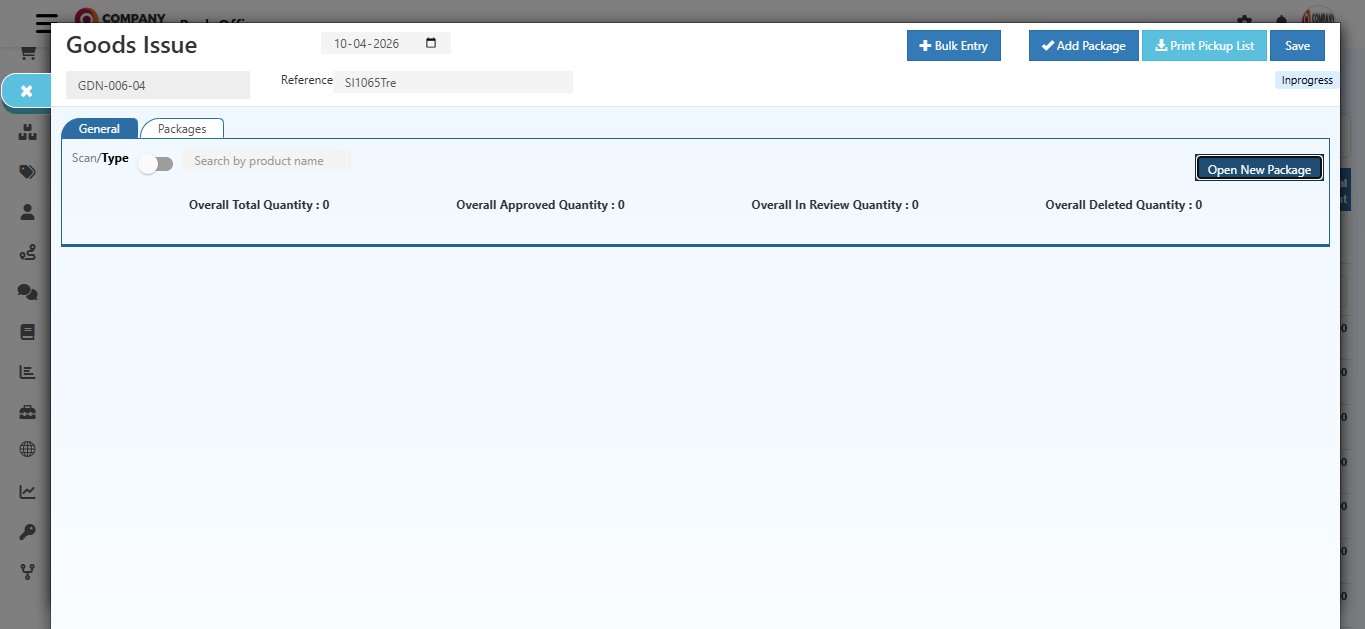
The tab shows a summary of package quantities:
| Counter | What It Tracks |
|---|---|
| Overall Total Quantity | All items added across all packages |
| Overall Approved Quantity | Items confirmed and ready to dispatch |
| Overall In Review Quantity | Items added but not yet approved |
| Overall Deleted Quantity | Items removed from packages |
Click Open New Package or + Add Package to begin.
A package selection screen appears. Search for the package type you want to use (e.g., Medium Courier Bag, Small Box) and click it to select.
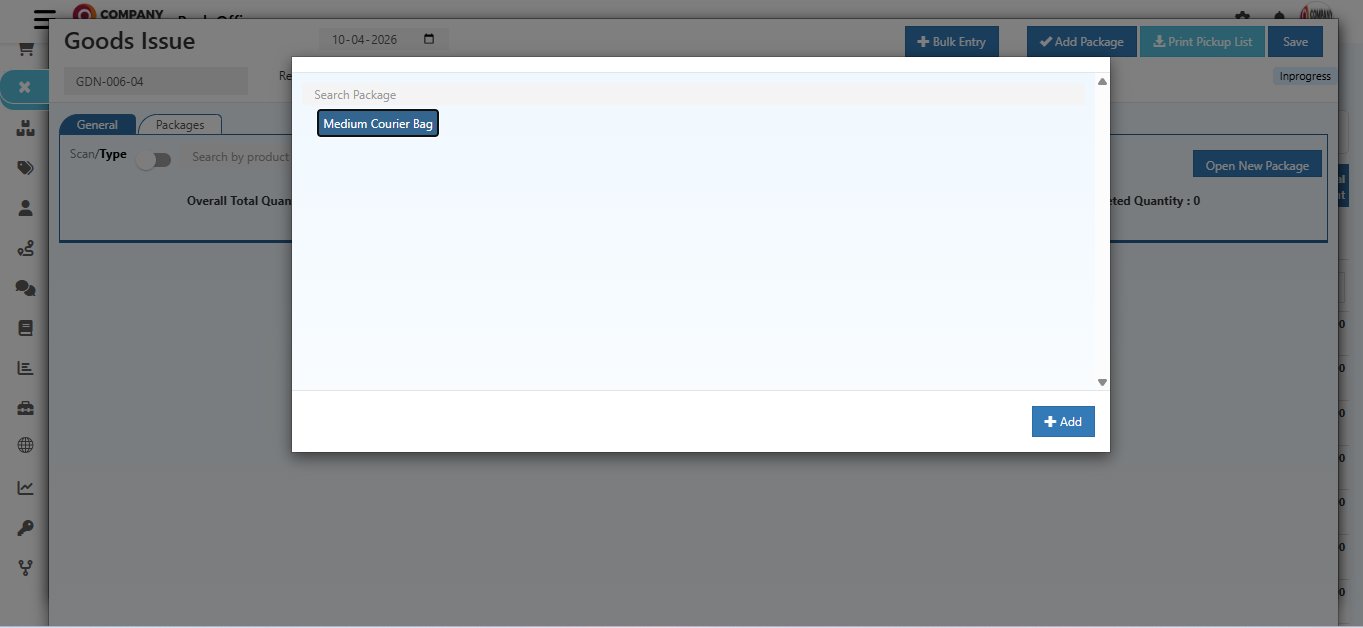
Click + Add. A confirmation dialog will appear asking "Are you sure you want to add this?"
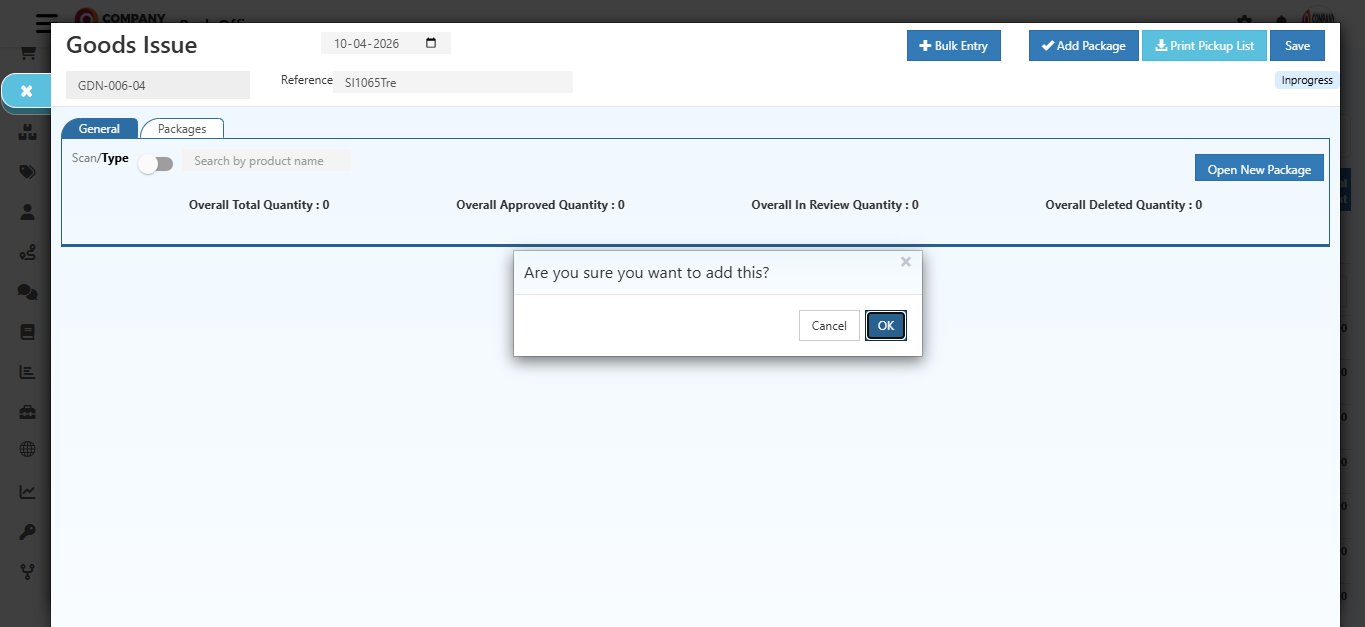
Click OK to confirm. The package is now added and its details are shown — including dimensions, weight, scan code, and package type.

Step 5 — Add Products to the Package
Now you need to add the products that go inside this package.
Use the Scan / Type toggle at the top of the Packages tab:
- Scan — scan the product's barcode using a scanner
- Type — search the product by name manually
Once scanned or typed, the product appears in the package table with an InReview status — meaning it has been added but not yet confirmed.
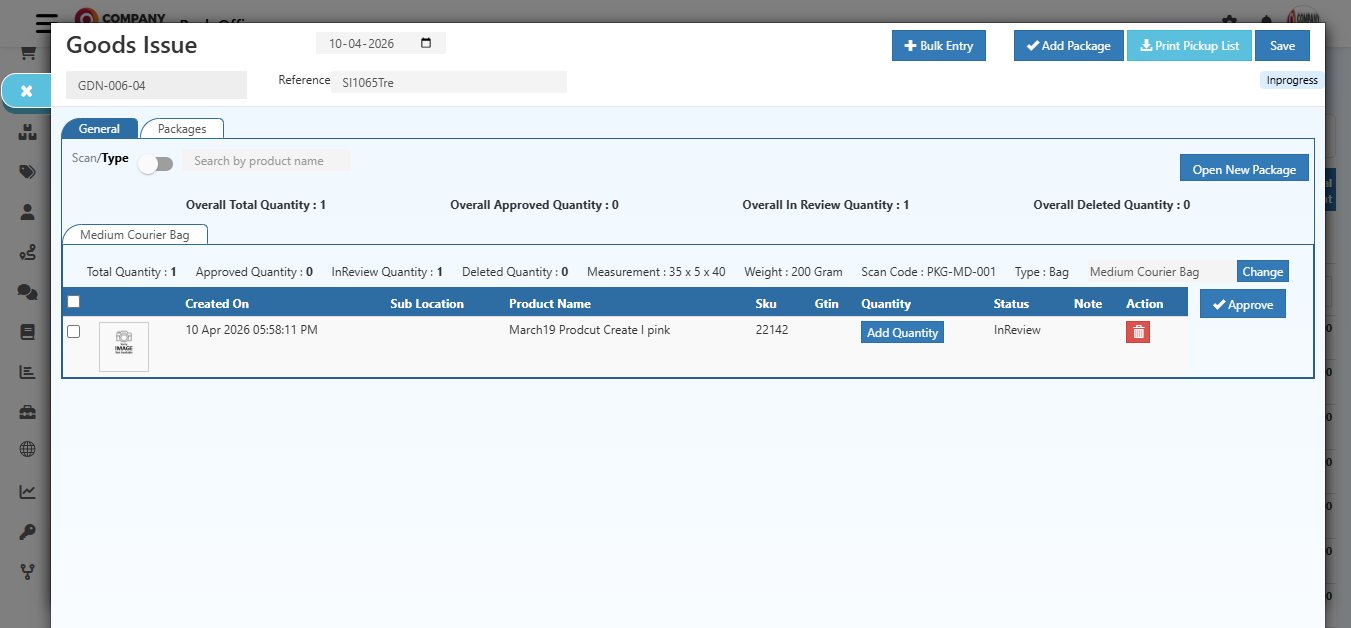
Click the Add Quantity button on the product row to specify how many units of this product go into this package.
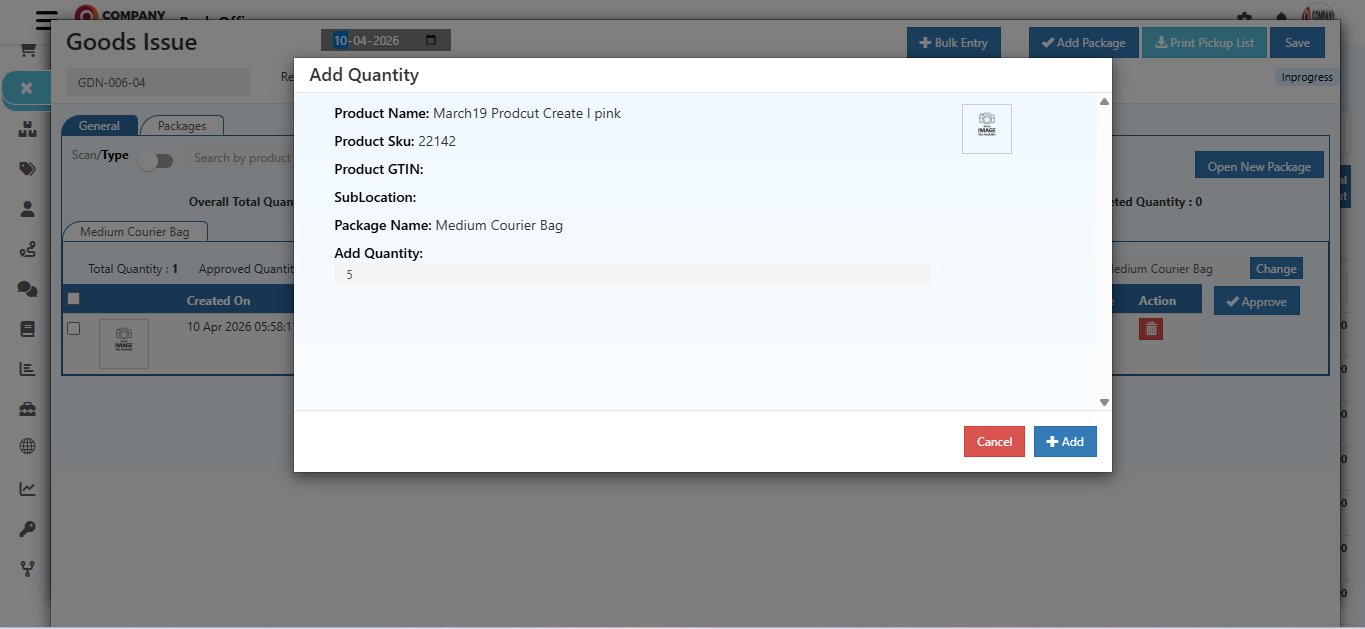
The popup shows:
- Product Name & SKU — confirms which product you are adding
- SubLocation — the sub-location within the warehouse
- Package Name — the package this quantity is being assigned to
- Add Quantity — enter the number of units going into this package
Click + Add to save. The quantity is recorded and the package summary counters update.
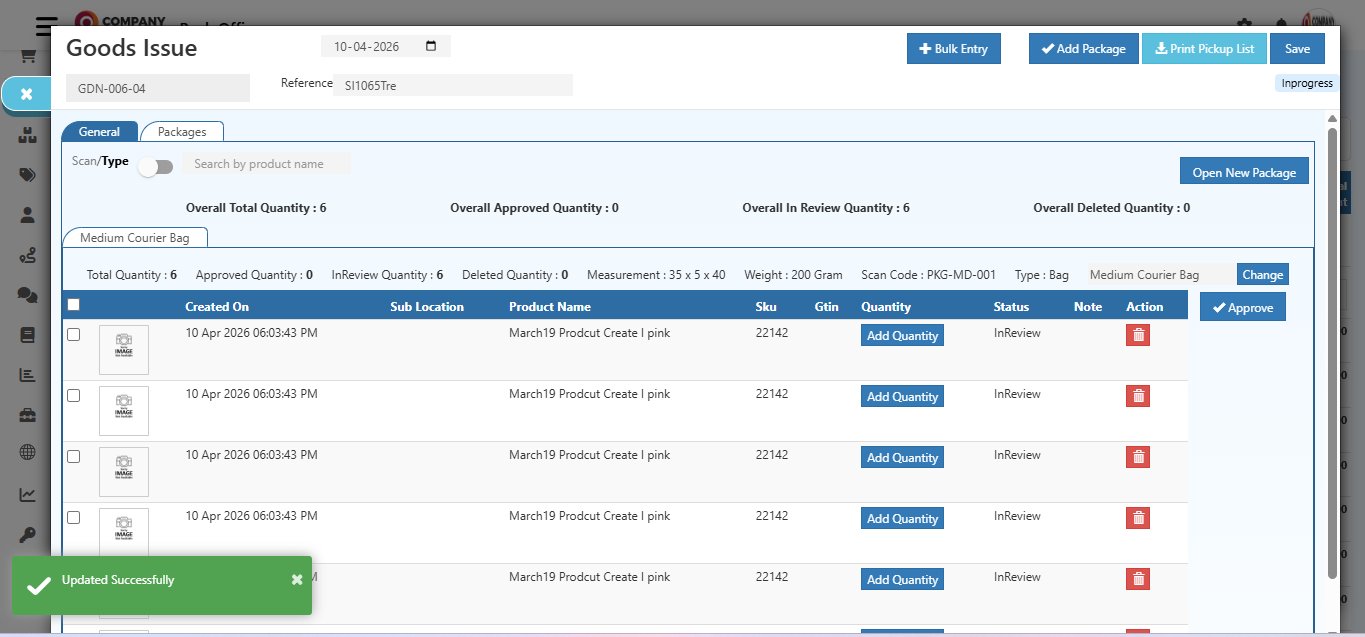
You will see a "Updated Successfully" message confirming the quantity has been saved.
Step 6 — Verify in the General Tab
Before approving, switch to the General tab to double-check the quantities.
The product table shows three important columns:
| Column | What It Means |
|---|---|
| Quantity | Total units being shipped in this GDN |
| Inspection Quantity | Units currently in the review/inspection queue |
| Rejected Quantity | Units that were rejected and will not be shipped |
Make sure the quantities look correct before proceeding to approve.
Step 7 — Approve the Items
Go back to the Packages tab. Select the items you want to confirm and click ✓ Approve.
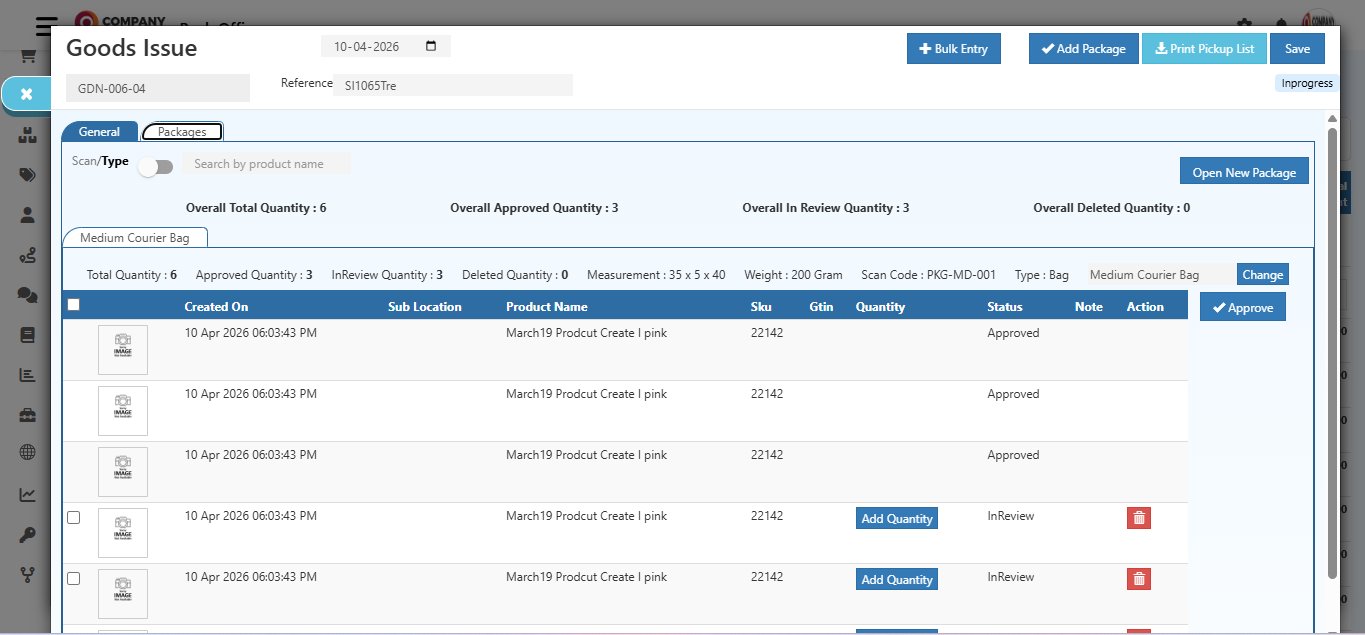
Approved items move from InReview to Approved status. The Overall Approved Quantity counter updates in real time.
This is important: Only items with Approved status are deducted from your warehouse stock when you save. InReview items are not counted — so always approve before saving.
Step 8 — Save the GDN
When all items are approved and everything looks correct, click Save at the top right.
After saving:
- The GDN status changes to GoodsDispatched
- Stock is reduced from the warehouse for all approved items
- The sales invoice status updates to Shipped (all items) or Partially Shipped (some items)
- The shipment is recorded in Stock History
Viewing the Shipment Record
After saving, you can open the shipment record to see the full delivery summary.
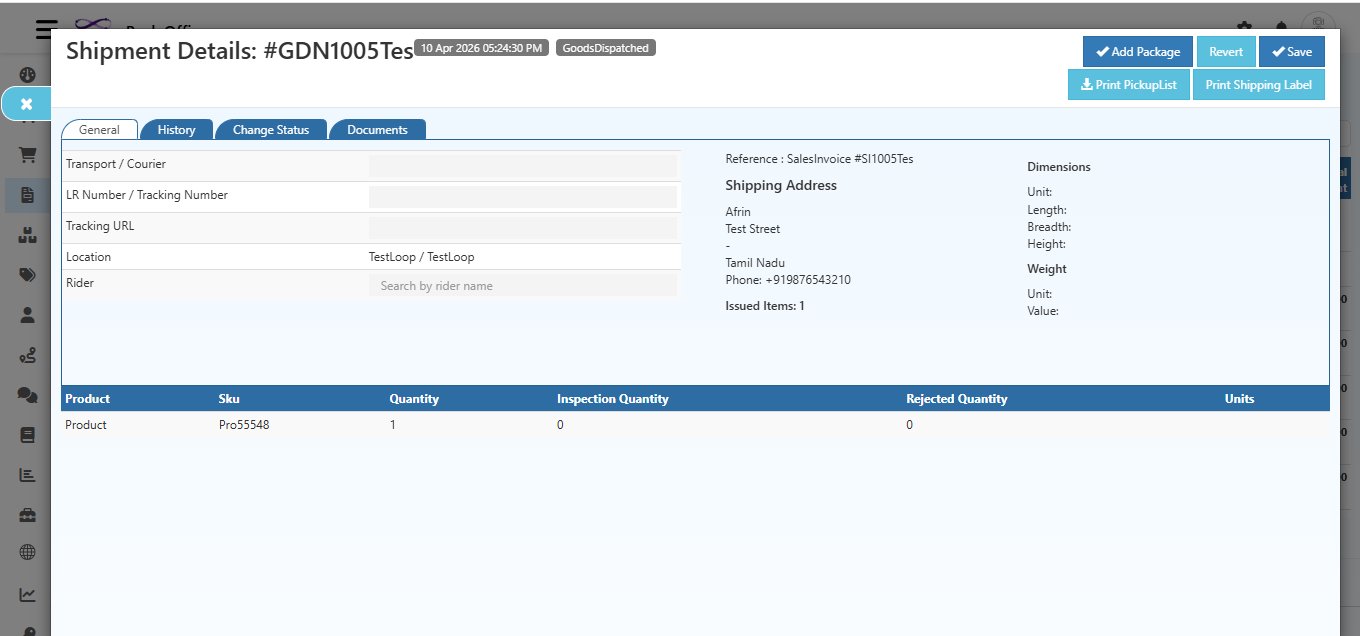
The shipment record shows:
- The GDN number and creation timestamp
- Transport, Tracking Number, and Tracking URL for the shipment
- The Shipping Address for delivery
- Issued Items count — total number of items dispatched
- Product table with quantity, inspection quantity, and rejected quantity
- Package dimensions and weight for reference
From this screen you can also:
- Print Shipping Label — print and attach to the package before dispatch
- Print Pickup List — hand to warehouse staff for picking
- Revert — undo the shipment if it was created by mistake
After the GDN is Saved
Once the GDN is complete, the sales invoice status updates automatically:
| Invoice Status | When It Appears |
|---|---|
| Shipped | All items in the invoice have been dispatched |
| Partially Shipped | Some items are dispatched, rest are still pending |
You can verify the stock deduction anytime by going to Back Office → Stock History and searching by the GDN reference number.
Good Practice: After saving the GDN, open the sales invoice and go to the History tab. Add a note or update the status so your team always knows the latest state of the order.
Quick Reference
| Task | Where to Go |
|---|---|
| Start a new shipment | Sales Invoice → Goods Issue button (right panel) |
| Create a GDN draft | Click ✓ Initiate Good Issue |
| Add a package | Packages tab → Open New Package |
| Add products to package | Use Scan / Type toggle |
| Set quantity per package | Click Add Quantity on the product row |
| Confirm items for dispatch | Click ✓ Approve in Packages tab |
| Finalize and reduce stock | Click Save |
| Print shipping label | Inside shipment record → Print Shipping Label |
| Check stock deduction | Back Office → Stock History |
| Undo a shipment | Inside shipment record → Revert |