View Purchase Details | O2VEND Purchase Invoice Information
Learn how to view and manage purchase details in O2VEND. Access supplier info, GRN records, documents, history all from one invoice page.
The purchase details page displays comprehensive information about each purchase invoice, including supplier details, GRN records, purchase history, documents, and financial ledger information.
Step 1 — Access the purchase list
- Go to Back Office → Voucher → Purchase
- View all purchase invoices in the section
- Click the purchase invoice Number to open the details page
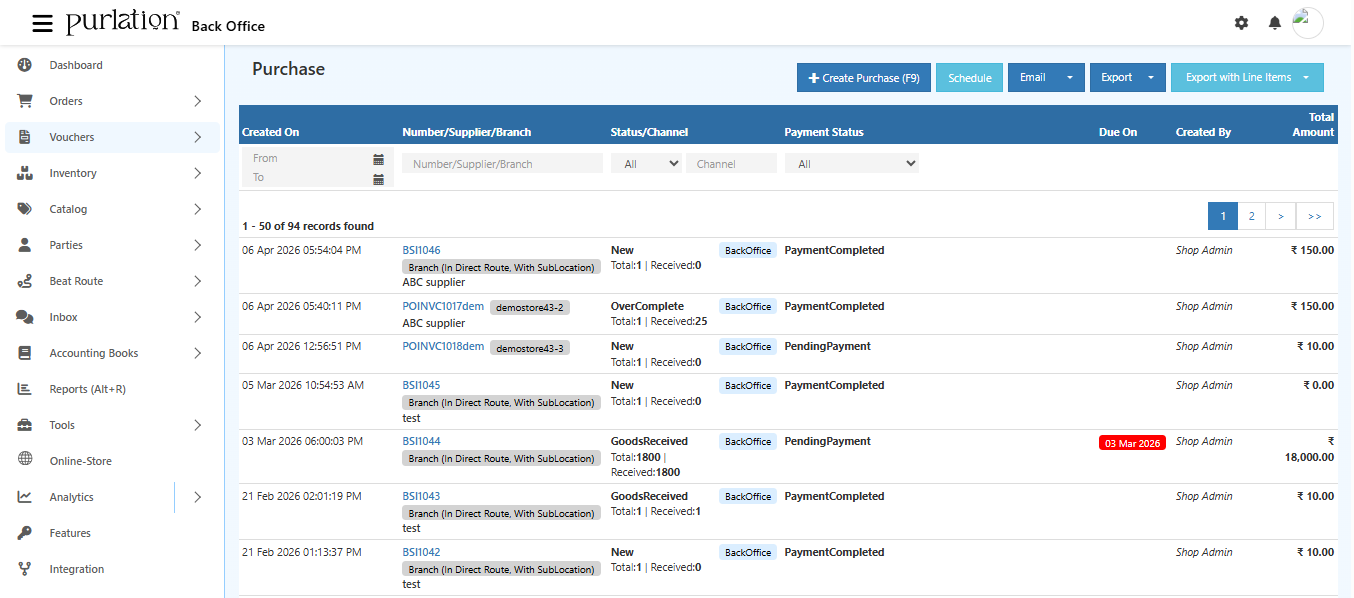 View all purchase invoices and select one to see detailed information.
Purchase Details Page Overview
The purchase details page is organized into multiple sections:
- General Information – Supplier name, invoice date, and purchase status
- Supplier Info – Complete supplier details and address
- Goods Receipt Note (GRN) – Received goods tracking and lot information
- Purchase Documents – Attached files and receipts
- Purchase History – Complete transaction log
- Purchase General Ledger – Accounting entries and financial impact
Section 1 — Supplier Information
The supplier info section displays the vendor details and delivery address for the purchase.
Supplier Details Tab
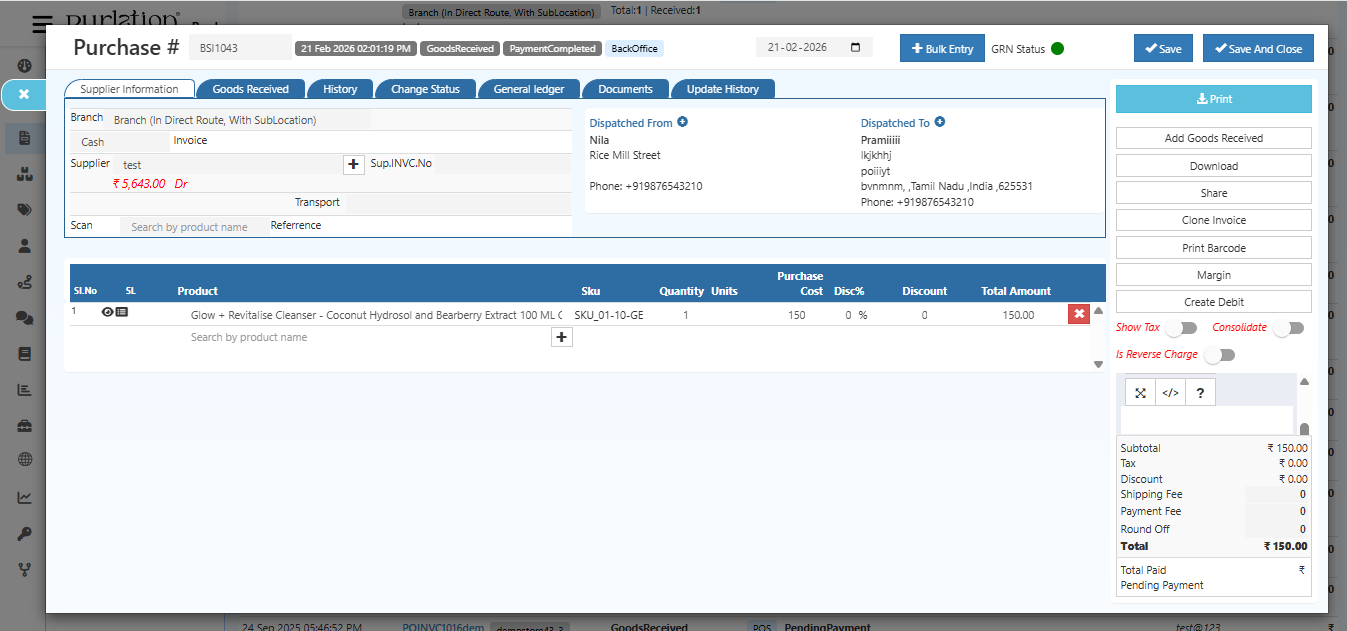 Supplier info showing vendor name, address, contact details, and delivery location.
Key information displayed:
- Supplier name and contact details
- Billing address
- Shipping address
- Payment terms and due date
- Purchase invoice date and status
Section 2 — Goods Receipt Note (GRN)
Track received goods and allocated lots from this section.
.png) Goods Receipt Note showing received items, quantities, and lot allocations.
Goods Receipt Note showing received items, quantities, and lot allocations.
The GRN displays:
- Products ordered vs. received quantity
- Allocated lot numbers (if applicable)
- Expiry dates for lot-tracked items
- Sub-location where stock is stored
- Stock adjustment status
Section 3 — Print Barcode Labels
Generate barcode labels directly from the purchase details page.
- Click the Print Barcode button at the top right
- Select the barcode template you want to use
- Enter the number of barcode labels to generate
- Verify the final print setup
- View the generated barcode result
Section 4 — Change Purchase Status
Update the purchase invoice status from the details page.
 Click to change the purchase invoice status.
Available status options:
- Open – Purchase order created and open
- SentToParty – Purchase order sent to supplier
- PartiallyGoodsReceived – Some goods received, more expected
- PartiallyReStocked – Partial stock added to inventory
- GoodsReceived – All goods received from supplier
- ReStocked – All stock added to inventory
- Closed – Purchase order completed and closed
- PartiallyGoodsReturned – Some goods returned to supplier
- GoodsReturned – All goods returned to supplier
- Void – Purchase order cancelled or voided
Section 5 — Purchase Documents
Attach and view supporting documents for the purchase.
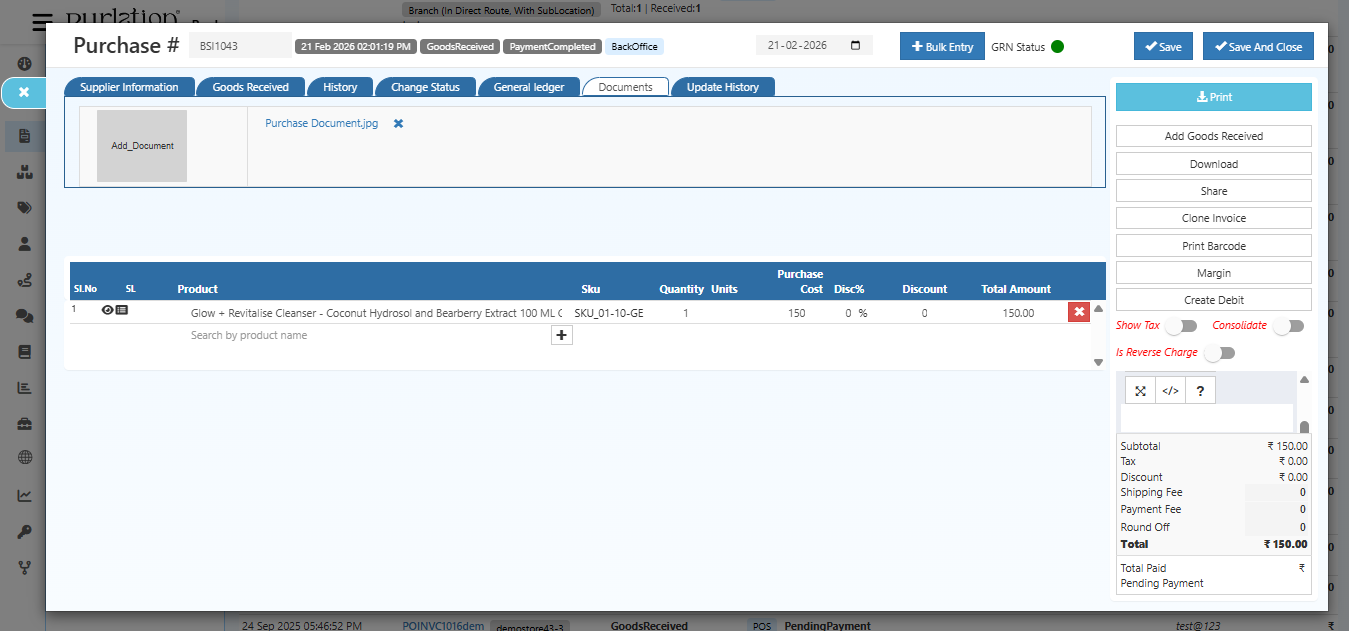 Upload and download purchase-related documents such as receipts and invoices.
You can:
- Upload purchase order copies
- Attach GRN receipts
- Store supplier invoices
- Add payment proofs
- Download and reference documents anytime
Section 6 — Purchase History
View the complete transaction history for the purchase invoice.
 Complete log of all changes, approvals, and status updates for the purchase.
The history shows:
- Who created or modified the purchase
- When each change was made
- Previous status/amount changes
- Payment receipts and adjustments
- GRN and return note references
Section 7 — Purchase General Ledger
View accounting entries and financial impact of the purchase.
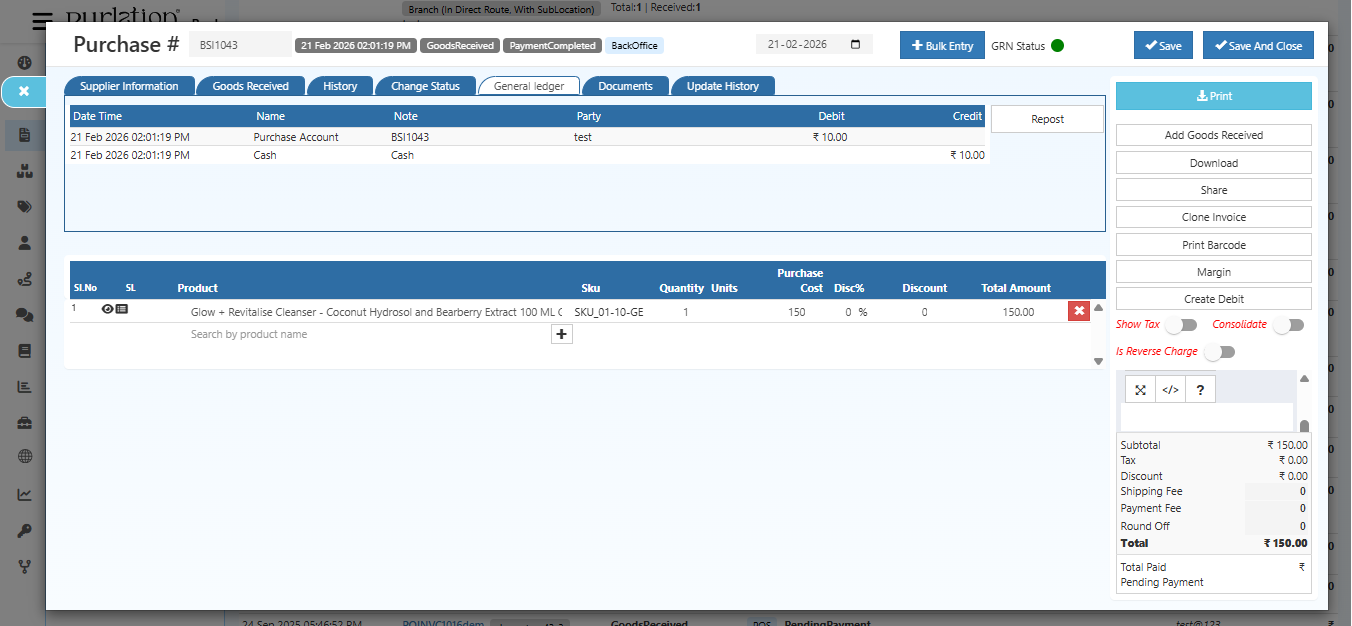 Accounting entries for the purchase showing debit/credit impact on accounts.
The general ledger displays:
- Account codes affected by the purchase
- Debit and credit amounts
- Cost center allocation
- Tax calculations
- Payment status for accounting purposes
Quick Summary
| Step | Action |
|---|---|
| 1 | Go to Back Office → Voucher → Purchase and click invoice Number |
| 2 | View supplier info, delivery address, and payment terms |
| 3 | Check GRN section for received quantities and lot allocations |
| 4 | Use Print Barcode to generate product labels |
| 5 | Change Status as needed (Draft, Submitted, Approved, etc.) |
| 6 | Attach supporting documents in Purchase Documents |
| 7 | Review complete history in Purchase History |
| 8 | Check accounting entries in General Ledger |
Pro Tips
- Edit Supplier Details – Update address and payment terms if needed
- Download Invoice – Export the purchase as a PDF for records
- Allocate Lots – For products with expiry dates, use the GRN section to track lot numbers
- Export Data – Export purchase details to CSV for reporting
- Track Changes – Use the History section to verify all modifications to the purchase