Manage Receipts in Back Office | Receipt Creation & Ledger Guide
Quickly create, track, and verify receipts in Back Office with clear steps for receipt creation, payment tracking, and ledger validation. Learn how to manage receipts, view transactions, and ensure accurate accounting entries for daily operations and audits with this complete user guide.
Receipt: List View
The Receipt screen provides a consolidated view of all receipts generated from Sales Invoices, POS Sales, Debit Notes, and Cash In entries.
Navigation path: Back Office – Vouchers – Receipt
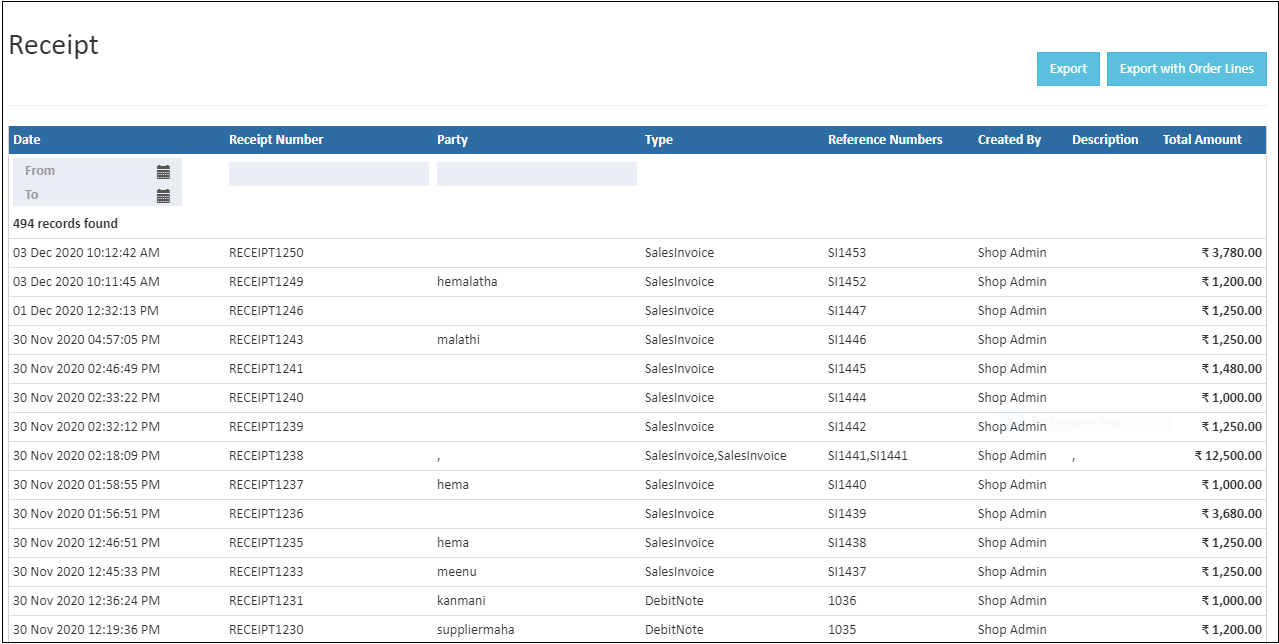
Filters and Actions
Date Filter (From / To)
The Date filter is used to view receipts based on the creation date.
- By default, receipts for the current date are displayed.
- Start Date and End Date can be selected to view receipts for a specific period.
- Once dates are updated, the receipt list refreshes automatically.
Create Receipt
The Create Receipt button (shortcut key: F6) is used to create a new receipt entry.
Export
The Export option allows receipt data to be downloaded in CSV format for reporting and accounting purposes.
Receipt List Columns
Date
Displays the date and time when the receipt was created.
Receipt Number / Branch
Shows the system-generated receipt number along with the branch where the receipt was created. Each receipt number is unique and used for identification and tracking.
Party
Displays the name of the customer associated with the receipt.
- Sales receipts show customer names.
- Debit notes and cash entries show the related party name.
Type
Indicates the receipt type. Supported types include:
- Sales
- POS Sales Order
- Debit Note
- Cash In
Reference Numbers
Displays reference documents linked to the receipt, such as sales invoice numbers. Multiple references are shown as comma-separated values when applicable.
Created By
Displays the name of the user who created the receipt. This supports audit and verification needs.
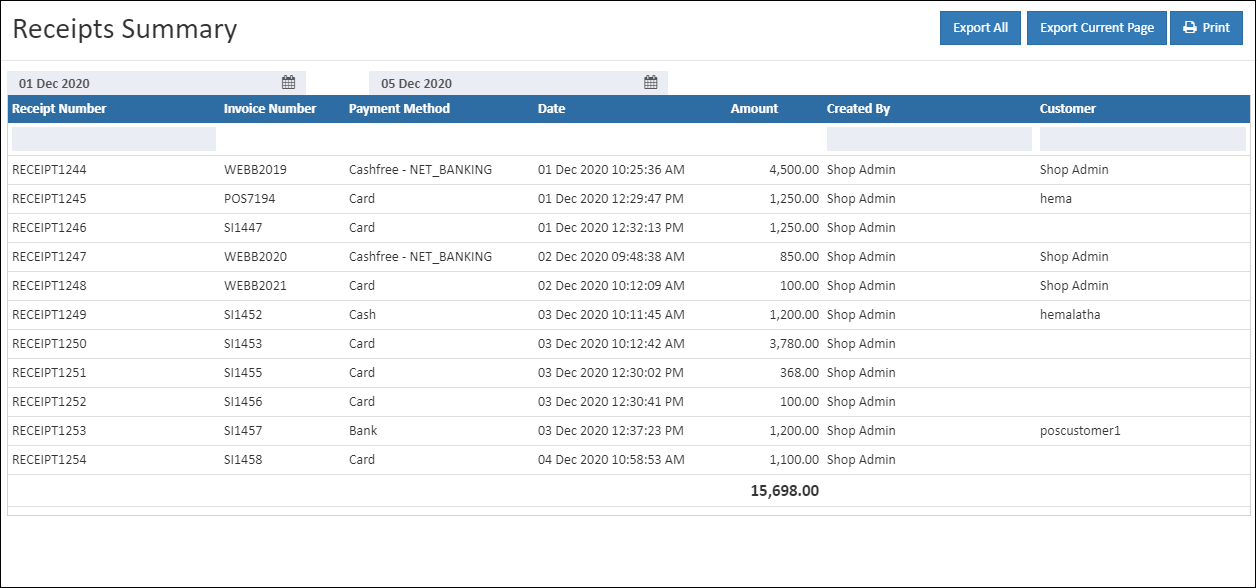
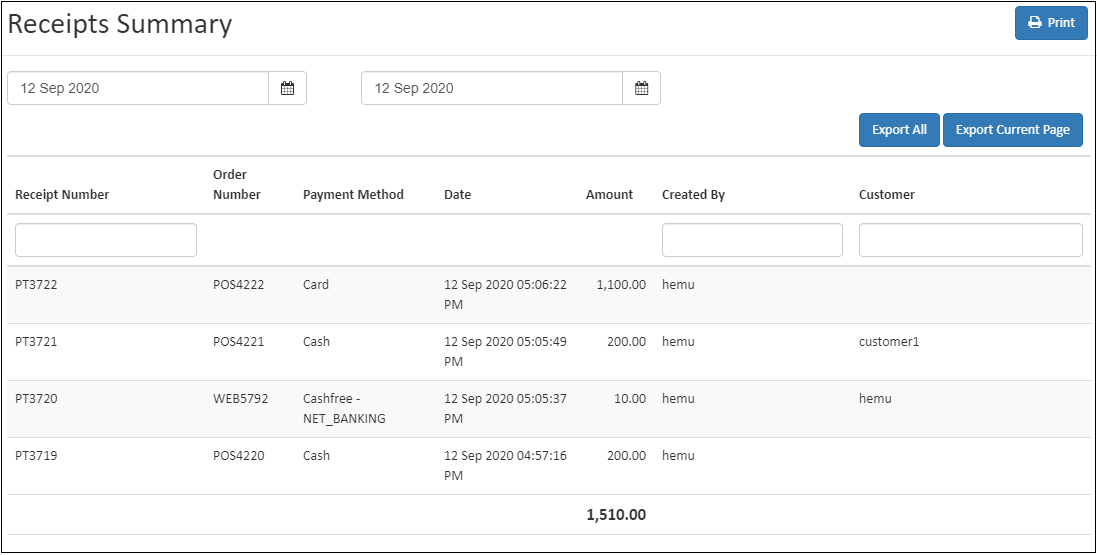
Payment Method
Shows the payment mode used for the transaction, such as Cash, Razorpay, Cashfree, Loyalty Points, or other configured gateways.
Description
Displays optional remarks or notes related to the receipt, including payment or transaction references.
Total Amount
Displays the total amount received along with the applicable currency symbol.
Pagination
Pagination controls at the bottom of the screen allow navigation through receipt records when a large number of entries are available.
Make Retail Sustainable with Smart POS
Discover how eco-friendly POS systems are revolutionizing retail operations, reducing waste, and supporting greener business practices across all stores.
Receipt Details: Create Receipt Screen
The Receipt Details screen is used to create and record a receipt against a sales transaction, adjustment, or cash entry. This screen captures accounting and ledger information required for accurate financial records.
Navigation path: Back Office – Vouchers – Receipt – Create Receipt
Screen Header
Receipt Details
Displays the receipt creation screen title.
Branch
Shows the branch under which the receipt is recorded.
Save
Stores the receipt entry after validating all details.
Delete Receipt
Available for removing an already created receipt, subject to permissions.
Get Insights from the O2VEND Dashboard
Access key business metrics, track receipts, sales, and transactions efficiently, and make informed decisions using the Back Office dashboard.
Tabs
General
Contains ledger and payment allocation details for the receipt.
Receipt Ledger
This section displays the accounting entries generated for the receipt.
To / Cr (Credit Account)
Displays the party account to which the receipt amount is credited.
- Select a customer account
- Credit or debit value is displayed below the party name
- Reflects the impact on the party ledger
Reference
Displays the reference number linked to the receipt, such as an invoice number or external reference ID.
By / Dr (Debit Account)
Shows the payment account used to receive the amount.
- Examples include Cash, Bank, Razorpay, or Wallet
- Debit or credit value shows how the payment account is affected.
Narration
Optional field used to record remarks related to the receipt. Helpful for internal notes and audit tracking.
Total Amount
Displays the total amount recorded in the receipt entry. The currency symbol is applied automatically.
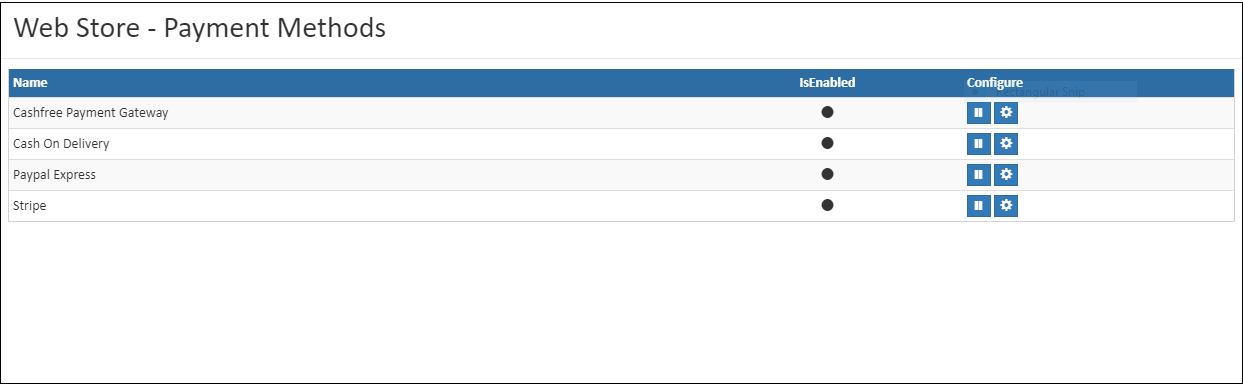
Simplify Payments with O2VEND
Manage all payment methods efficiently, track transactions, and ensure smooth operations with O2VEND integrated payment solutions.
Edit / View Receipt – General Ledger Screen
The Edit / View Receipt screen is used to review and verify ledger postings created for a receipt. Limited updates are allowed based on system rules and permissions.
Navigation path: Back Office – Vouchers – Receipt – Open Receipt – General tab

General Ledger Details
Receipt Number
Displays the unique receipt reference number for tracking and traceability.
Receipt Date and Time
Shows when the receipt was created.
Branch
Indicates the branch under which the receipt is recorded.
Generates a printable version of the receipt for records or sharing.
Delete Receipt
Removes the receipt entry from the system, subject to validation rules.
Navigation path: Back Office – Vouchers – Receipt – Open Receipt – General Ledger tab
Ledger Posting Grid
Shows accounts affected by the receipt.
Repost
Regenerates ledger entries if recalculation is required.
Date Time
Ledger posting time.
Name
Ledger account name (Cash, Customer).
Note
Additional remarks if provided.
Party
Associated customer.
Debit
Amount debited to account.
Credit
Amount credited to account.
This document serves as a complete reference for managing receipts in the Back Office, covering list view, creation, and ledger verification in a structured and easy-to-understand format.
Streamline Receipt Management with O2VEND
Efficiently create, track, and verify receipts while maintaining accurate ledgers and financial records. Centralized tools simplify voucher management across all branches.