Manage Product Lots in GRN
This guide explains how to enable and allocate product lots when receiving goods via a GRN (Goods Receipt Note) in O2VEND.
What is a Product Lot?
A Lot is a batch identifier assigned to a group of products. It helps you track:
- Which batch a product belongs to
- Manufacturing date and Expiry date of the batch
- Stock levels per lot in your warehouse
Lot tracking is useful for products like medicines, food items, cosmetics, or any product with an expiry date.
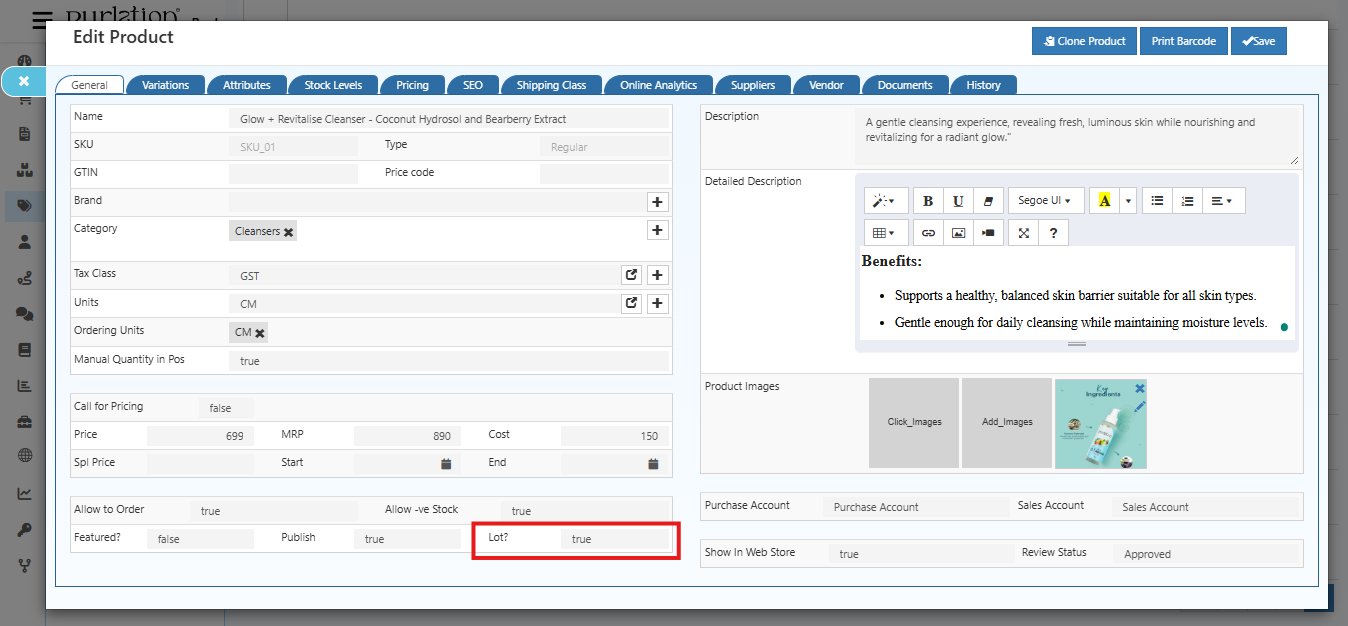
Step 1 — Enable Lot for a Product
Before allocating lots in GRN, you must first enable the Lot option on the product.
- Go to Catalog → Products
- Open the product you want to enable lots for
- In the General tab, find the Lot? field
- Set it to true
- Click Save
Step 2 — Open the Goods Receive Screen
- Go to Back Office → Voucher → Purchase
- Open the purchase invoice that contains the lot-enabled product
- Click Add Goods Received from the right panel
The Goods Receive screen opens with the product listed in the table.
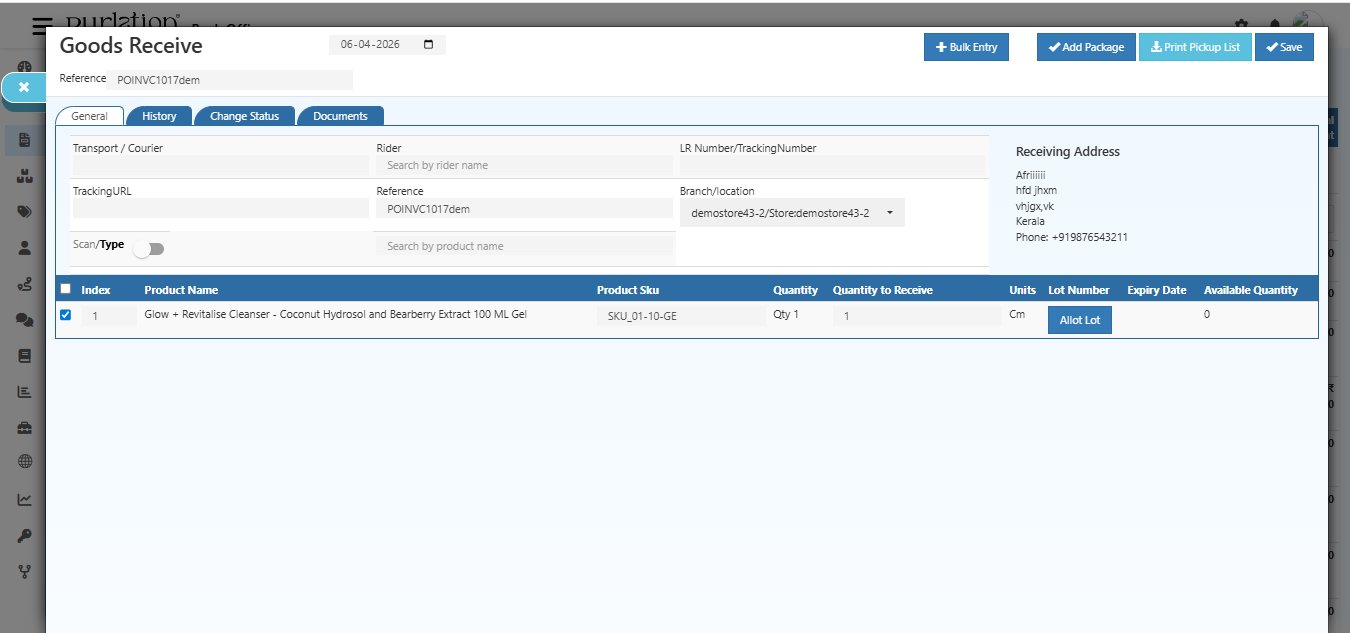
Product Table Columns (for Lot Products)
| Column | Description |
|---|---|
| Index | Row number |
| Product Name | Name of the lot-enabled product |
| Product SKU | SKU code of the product |
| Quantity | Original ordered quantity |
| Quantity to Receive | Enter how many units you are receiving |
| Units | Unit of Measure |
| Lot Number | Shows Allot Lot button for lot-enabled products |
| Expiry Date | Filled automatically after lot is allocated |
| Available Quantity | Current stock in the selected warehouse |
Step 3 — Click Allot Lot
Click the Allot Lot button next to the product row.
The Lot dialog box opens.
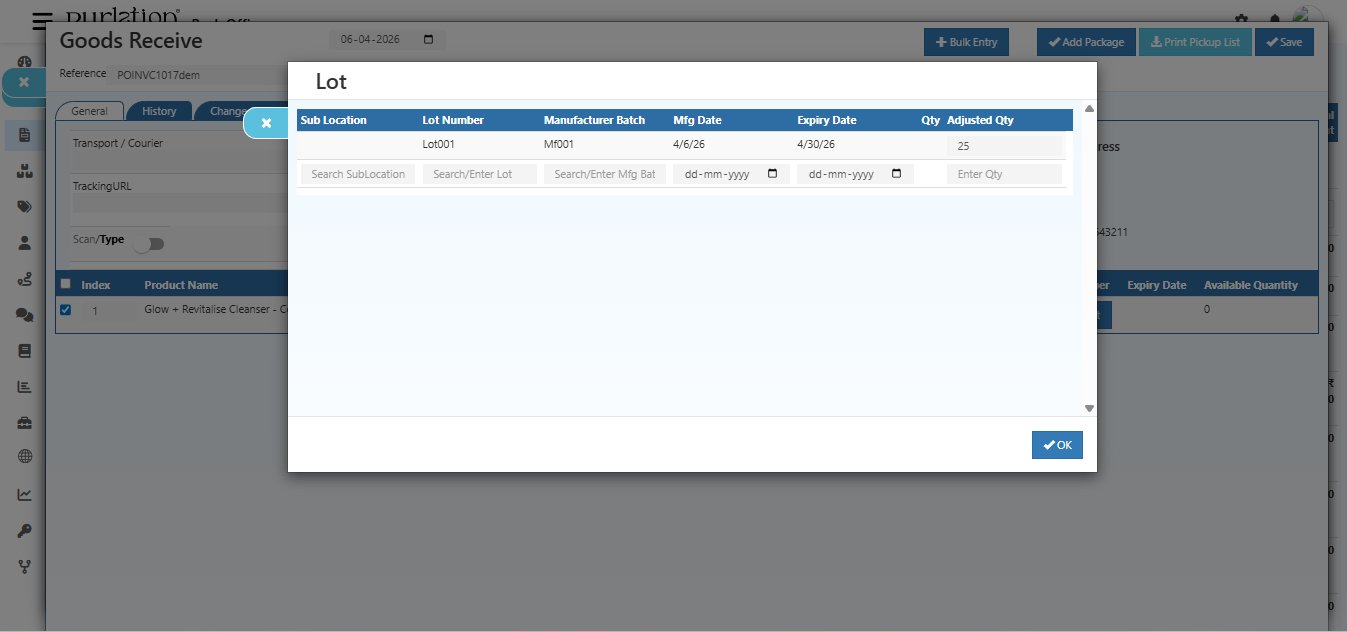
Lot Form Fields
| Field | Description |
|---|---|
| Sub Location | Search and select the sub-location within the warehouse where this lot will be stored |
| Lot Number | Enter a unique lot number (e.g., Lot001) or search for an existing lot |
| Manufacturer Batch | Enter the manufacturer's batch code (e.g., Mf001) |
| Mfg Date | Enter the manufacturing date of this batch |
| Expiry Date | Enter the expiry date of this batch |
| Qty | Enter the quantity to receive |
| Adjusted Qty | Enter the adjusted quantity for this lot if different |
💡 You can add multiple lot rows for the same product — useful when a single delivery contains items from different batches.
After filling in all the details, press Enter to save the lot row, then click OK to confirm.
Step 4 — Save the GRN
After allocating the lot, click the Save button at the top right of the Goods Receive screen.
- The lot is allocated to the product
- Stock is added to the selected warehouse and sub-location
- The purchase invoice status updates to GoodsReceived
Step 5 — Verify in Stock History
After saving, verify the lot update in Stock History.
- Go to Back Office → Stock History
- Look for the GRN reference (e.g., GRN1010dem-POINVC1017dem)
- The entry will show:
- Movement: In
- Lot Number: Lot001
- Adjusted Quantity: 25
- Branch / Location: Your selected warehouse
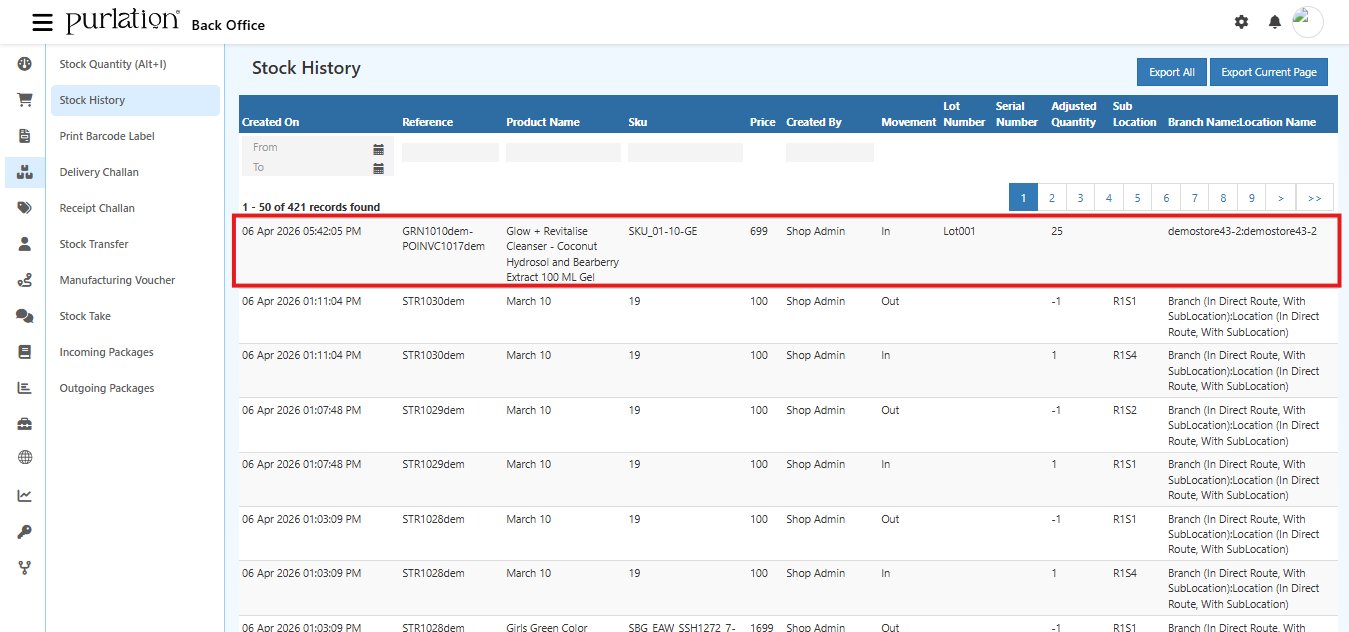
Stock History Columns
| Column | Description |
|---|---|
| Created On | Date and time the stock movement was recorded |
| Reference | GRN reference number linked to the purchase invoice |
| Product Name | Name of the product received |
| SKU | Product SKU code |
| Price | Product cost price |
| Created By | Admin who created the GRN |
| Movement | In = stock added, Out = stock removed |
| Lot Number | The lot number allocated during GRN |
| Serial Number | Serial number if applicable |
| Adjusted Quantity | Enter the actual quantity received for this lot (this will be added to stock) |
| Sub Location | Sub-location within the warehouse |
| Branch / Location Name | Warehouse branch where stock is stored |
Quick Summary
| Step | Action | |
|---|---|---|
| 1 | Enable Lot? = true on the product in Catalog → Products | |
| 2 | Open the Purchase Invoice and click Add Goods Received | |
| 3 | Click Allot Lot — fill in Lot Number, Batch, Mfg Date, Expiry Date, Enter Adjusted Qty for the lot-enabled product | |
| 4 | Click OK then Save — lot is allocated and stock is updated | |
| 5 | Verify the update in Stock History |