How to View Sales Invoice Details in O2VEND | Tabs, Receipts, Shipments & PDF Guide
Learn how to view and manage sales invoice details in O2VEND Back Office. Explore all tabs including Receipts, Goods Issue, History, E-Invoice, E-Way Bill, and General Ledger. Print, download, and share invoices as PDF.
How to Open a Sales Invoice
Go to Back Office → Voucher → Sales.
You will see a list of all your sales invoices with their status, payment status, channel, and total amount.
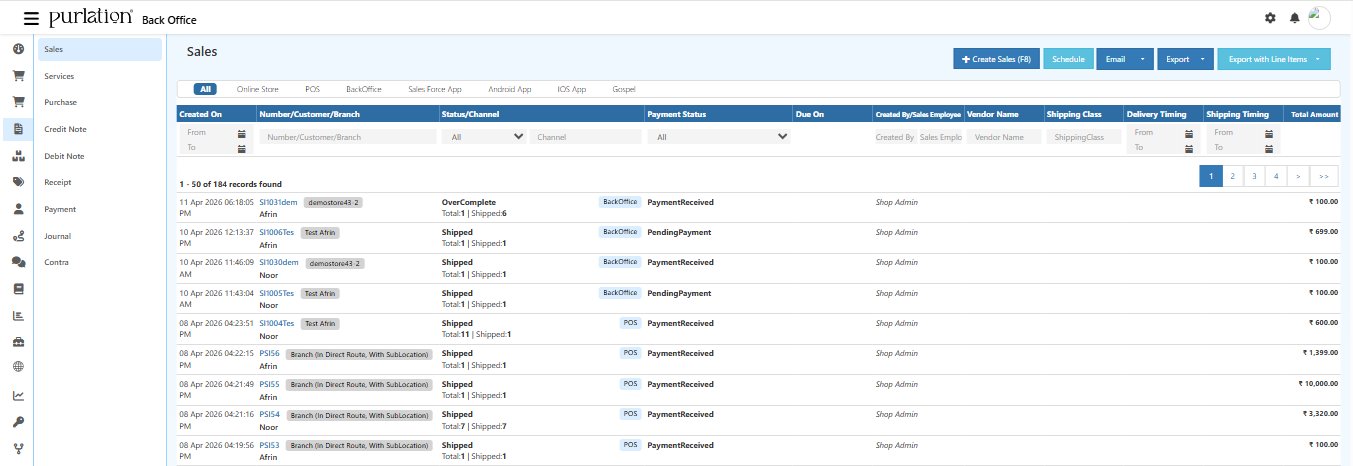
Click any Invoice Number (e.g., SI1031dem, SI1006Tes) to open the full invoice detail page.
Sales Invoice Detail — Overview
Once inside the invoice, you will see:
- The Invoice Number, Date, and Status badges (Shipped, PendingPayment, BackOffice) at the top
- A row of tabs for navigating different sections of the invoice
- The product table showing all items in this invoice
- An Invoice Summary on the bottom right showing totals
- A right panel with quick action buttons
Invoice Summary
| Field | Description |
|---|---|
| Subtotal | Total product amount before tax and discounts |
| Tax | Tax applied on the order |
| Discount | Total discount applied |
| Shipping Fee | Shipping charges if applicable |
| Payment Fee | Payment gateway charges if applicable |
| Round Off | Rounding adjustment |
| Total | Final invoice amount |
| Total Paid | Amount already paid by the customer |
| Pending Payment | Balance remaining to be collected |
Invoice Tabs — Explained
1. Customer Information Tab
The Customer Information tab is the main view of the invoice. It shows all the customer details, payment method, product table, billing and shipping addresses.
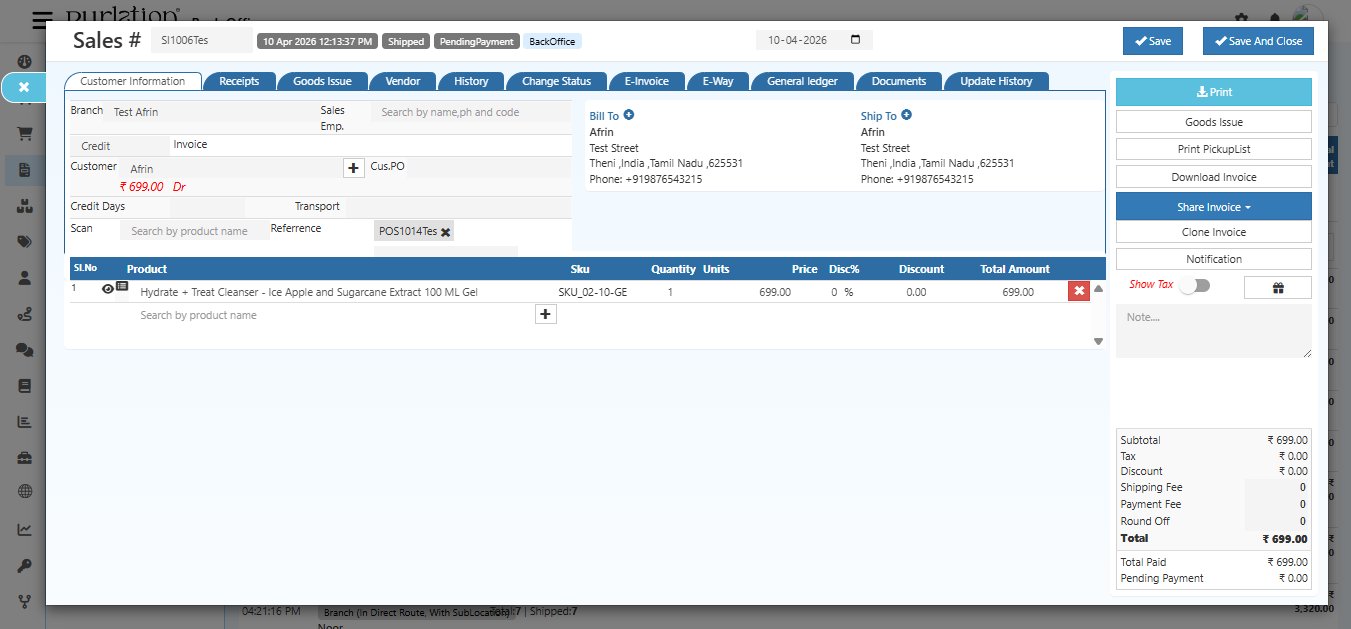
This tab contains:
- Branch — the store or branch this invoice belongs to
- Sales Employee — the sales rep who handled this order
- Invoice Type — Cash or Credit
- Customer — customer name with their outstanding balance (shown in red if overdue)
- Credit Days — number of days allowed before payment is due (for Credit invoices)
- Transport — delivery transport method
- Scan — scan a product barcode to add it to the invoice
- Reference — customer PO or reference number
- Bill To — customer's billing address
- Ship To — customer's shipping/delivery address
- Product Table — all items in this invoice with quantity, price, discount, and total
You can directly edit customer information, add or remove products, and update addresses from this tab.
2. Receipts Tab
The Receipts tab shows all payment records collected against this invoice.
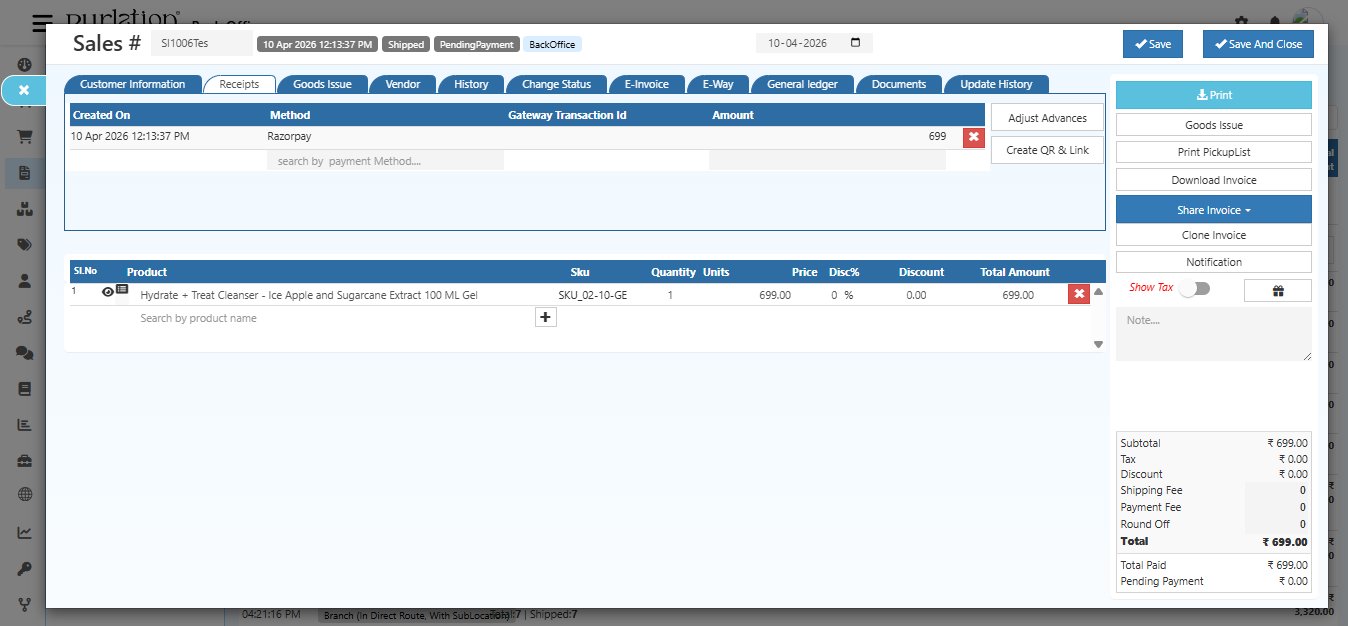
Each receipt entry shows:
| Column | Description |
|---|---|
| Created On | Date and time the payment was received |
| Method | Payment method used (e.g., Razorpay, Cash, Bank Transfer) |
| Gateway Transaction ID | Transaction reference from the payment gateway |
| Amount | Amount received in this payment |
From this tab you can also:
- Adjust Advances — apply any advance payment made by the customer against this invoice
- Create QR & Link — generate a payment QR code or payment link to share with the customer
3. Goods Issue Tab
The Goods Issue tab shows all shipments (GDNs) created for this invoice.
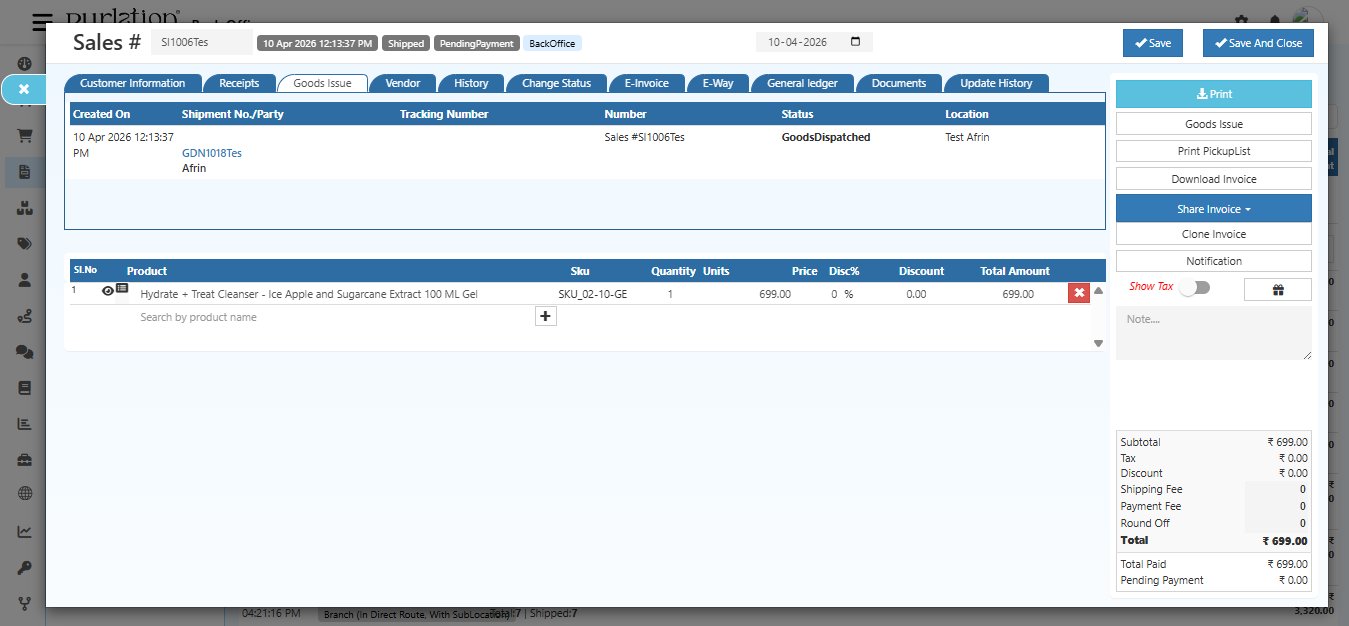
Each row represents one GDN (shipment) with:
| Column | Description |
|---|---|
| Created On | Date the GDN was created |
| Shipment No. / Party | GDN number and customer name — click the GDN number to open the full shipment details |
| Tracking Number | Courier tracking number for this shipment |
| Number | Linked sales invoice number |
| Status | Current shipment status (e.g., GoodsDispatched) |
| Location | Warehouse from which goods were dispatched |
Click the GDN number (e.g., GDN1018Tes) to open the full Goods Issue record and see package details, product quantities, and dispatch information.
4. Vendor Tab
The Vendor Tab shows the vendor associated with this sales invoice. When a vendor is linked to an order, only that vendor can view and fulfill the products assigned to them through the Vendor Portal.
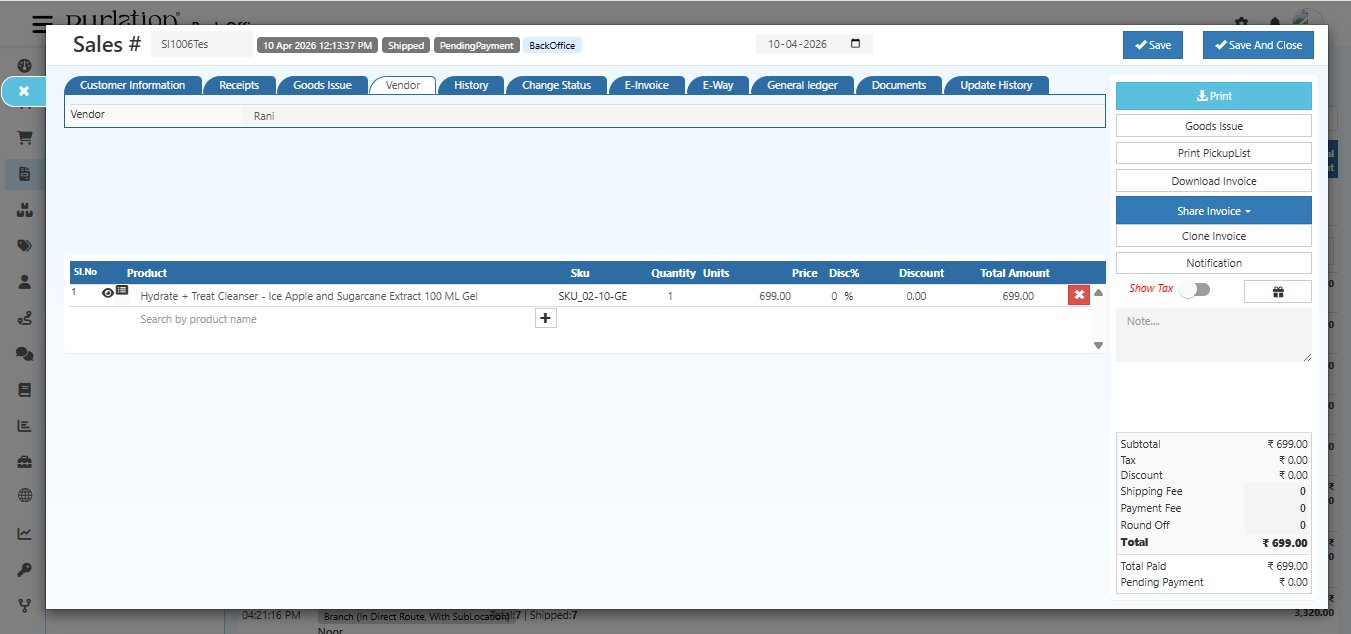
What you can see here:
- Vendor — the vendor name assigned to this invoice (e.g., Rani). This vendor will be able to see this order in their Vendor Portal and fulfill it independently.
How Vendor Fulfillment Works:
When a vendor is assigned to a sales invoice:
- The vendor logs into their Vendor Portal
- They can see only the orders and products assigned to them
- The vendor creates the Goods Issue (GDN) for their products directly from the portal
- Stock is updated and the invoice status changes to Shipped once the vendor completes fulfillment
Note: Vendors can only fulfill products that are assigned to them. They cannot view or manage other vendors' products or orders.
5. History Tab
The History tab shows a full timeline of all status changes made to this invoice.
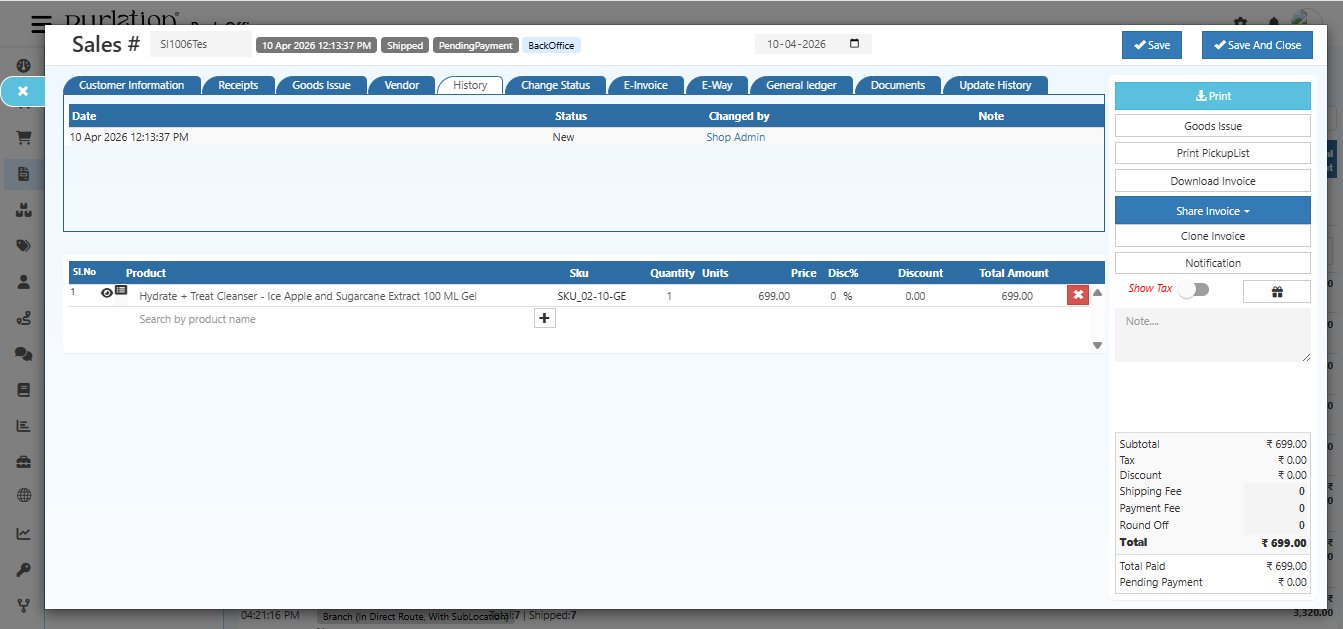
Each entry shows:
| Column | Description |
|---|---|
| Date | When the status change was made |
| Status | The status the invoice moved to (e.g., New, Shipped, Cancelled) |
| Changed By | The admin or user who made the change |
| Note | Any note added at the time of the status change |
Good practice: After any major action (shipping, payment, cancellation), update the status here with a note. This keeps a clear audit trail for your team.
6. Change Status Tab
The Change Status tab lets you manually update the invoice status without going through the normal workflow.
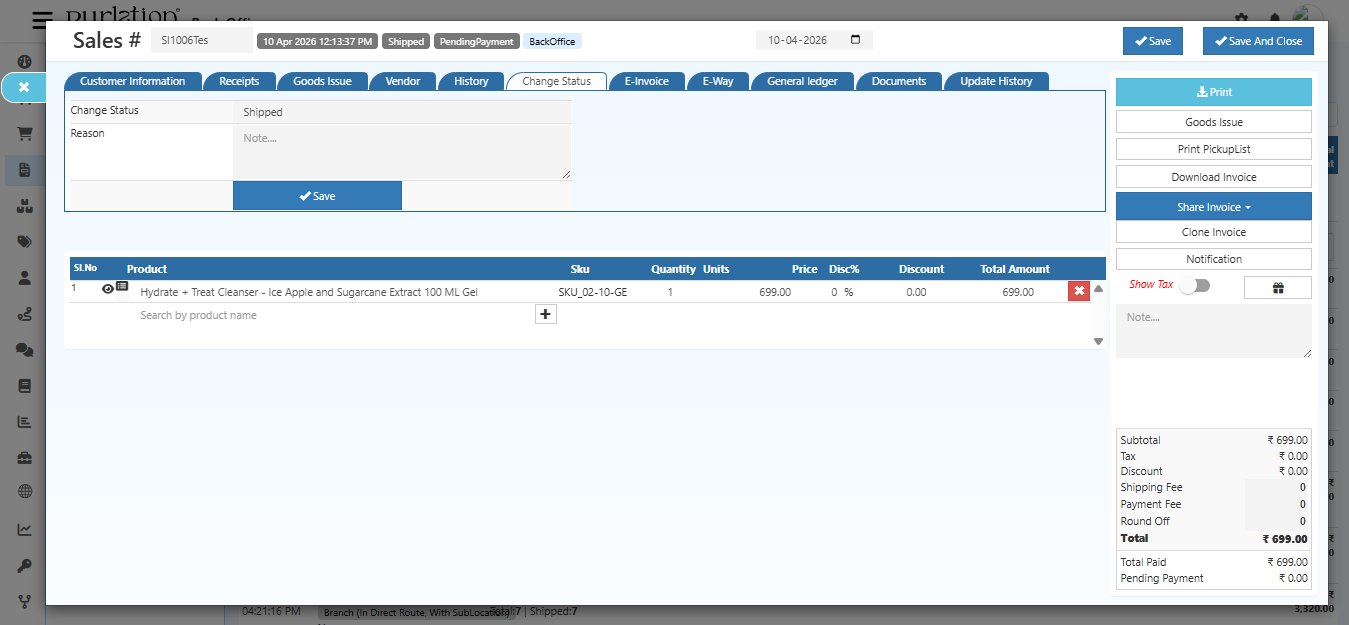
To change the status:
- Select the new status from the Change Status dropdown
- Enter a Reason in the text box — this is recorded in the History tab
- Click Save
This is useful for correcting statuses or marking orders that were completed through offline processes.
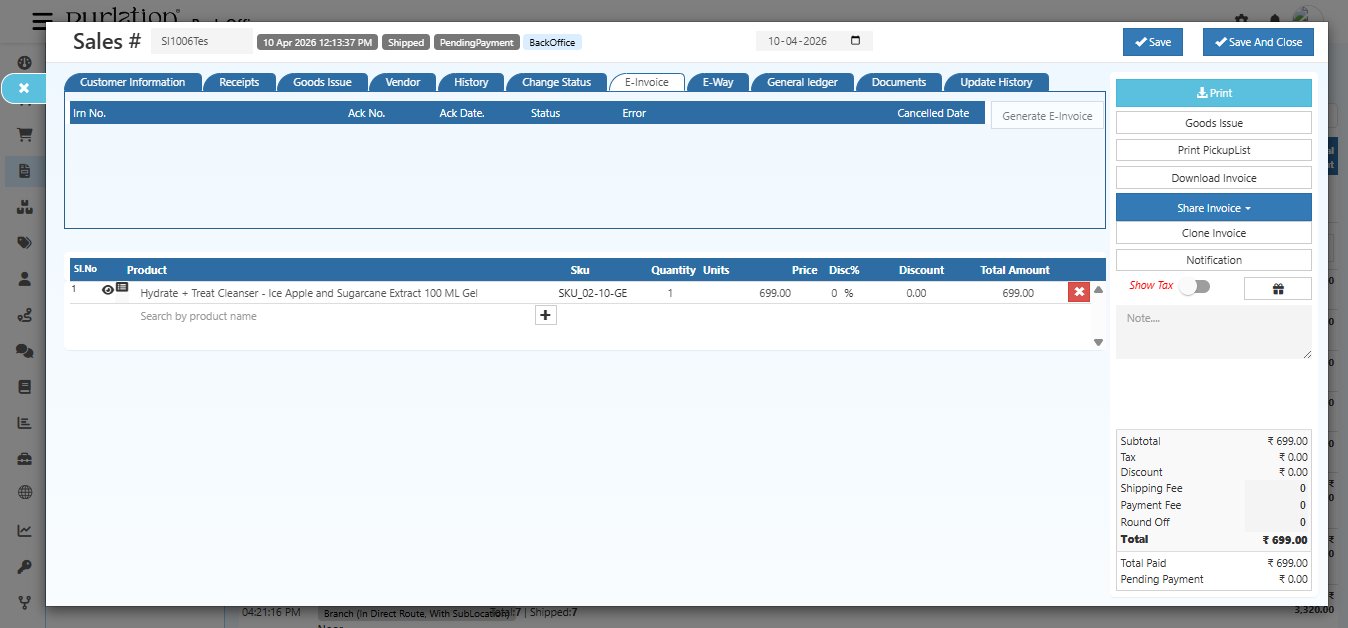
7. E-Invoice Tab
The E-Invoice tab is used for generating GST-compliant electronic invoices (IRN) for B2B transactions in India.
| Column | Description |
|---|---|
| IRN No. | Invoice Reference Number generated by the GST portal |
| Ack No. | Acknowledgement number from the portal |
| Ack Date | Date the e-invoice was acknowledged |
| Status | Current status of the e-invoice |
| Error | Any error message from the portal |
| Cancelled Date | Date the e-invoice was cancelled, if applicable |
Click Generate E-Invoice to submit this invoice to the GST e-invoicing portal.
8. E-Way Tab
The E-Way tab tracks E-Way Bills generated for this invoice — required for goods transport above ₹50,000 in India.
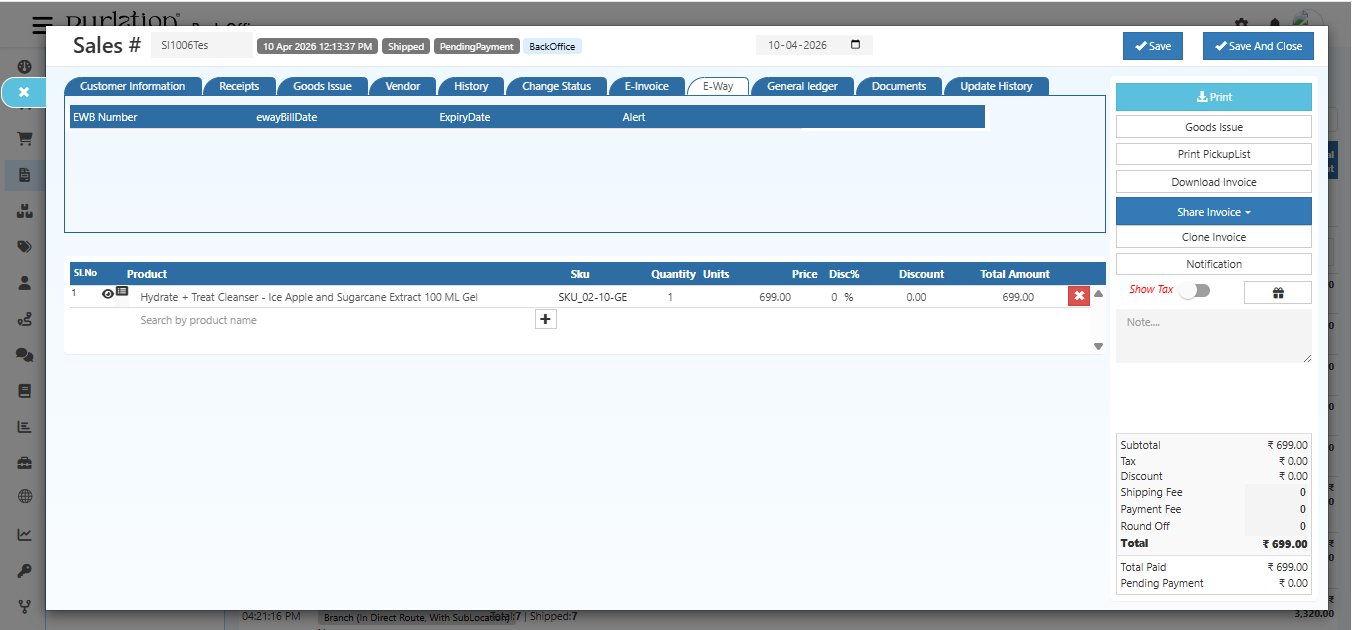
| Column | Description |
|---|---|
| EWB Number | E-Way Bill number |
| eWay Bill Date | Date the E-Way Bill was generated |
| Expiry Date | Date the E-Way Bill expires |
| Alert | Any alert or warning related to this E-Way Bill |
9. General Ledger Tab
The General Ledger tab shows all accounting entries automatically created for this invoice.
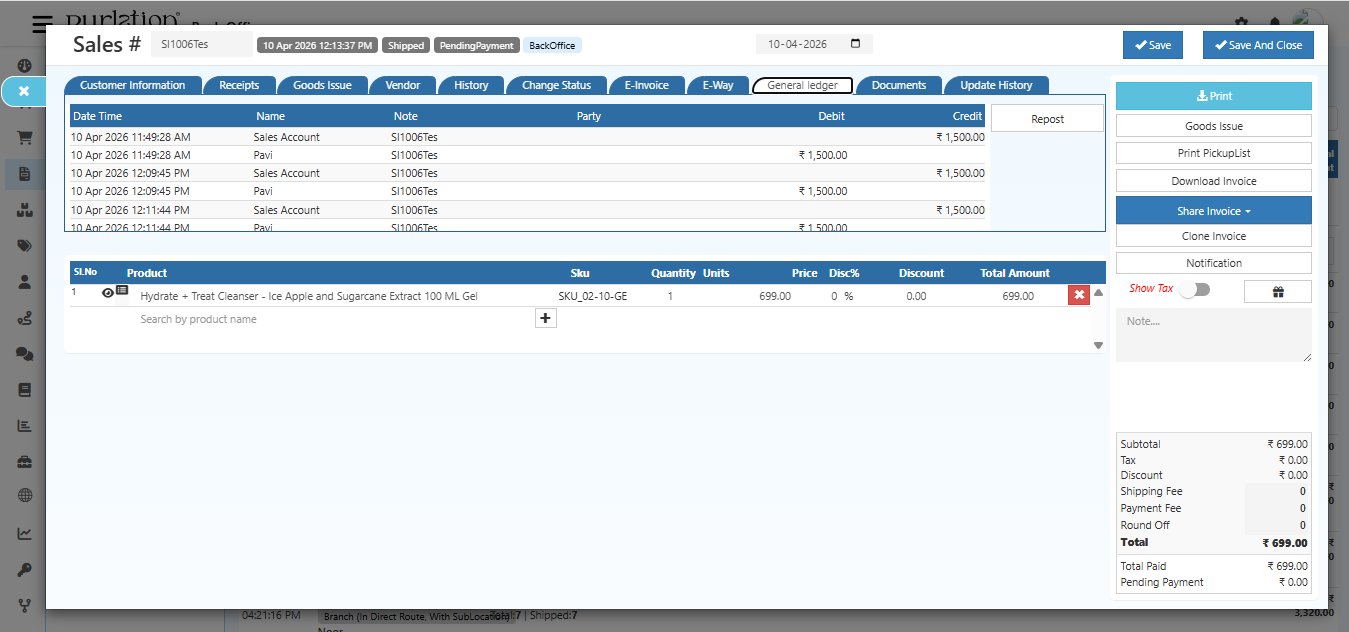
Each row is a double-entry bookkeeping record:
| Column | Description |
|---|---|
| Date Time | When the accounting entry was created |
| Name | Account name (e.g., Sales Account, Customer Account) |
| Note | Invoice reference number |
| Party | Customer or party involved |
| Debit | Amount debited to this account |
| Credit | Amount credited to this account |
Click Repost to regenerate the accounting entries if any changes were made to the invoice.
10. Documents Tab
The Documents tab lets you attach and view files related to this invoice — such as purchase orders, contracts, or delivery proofs.
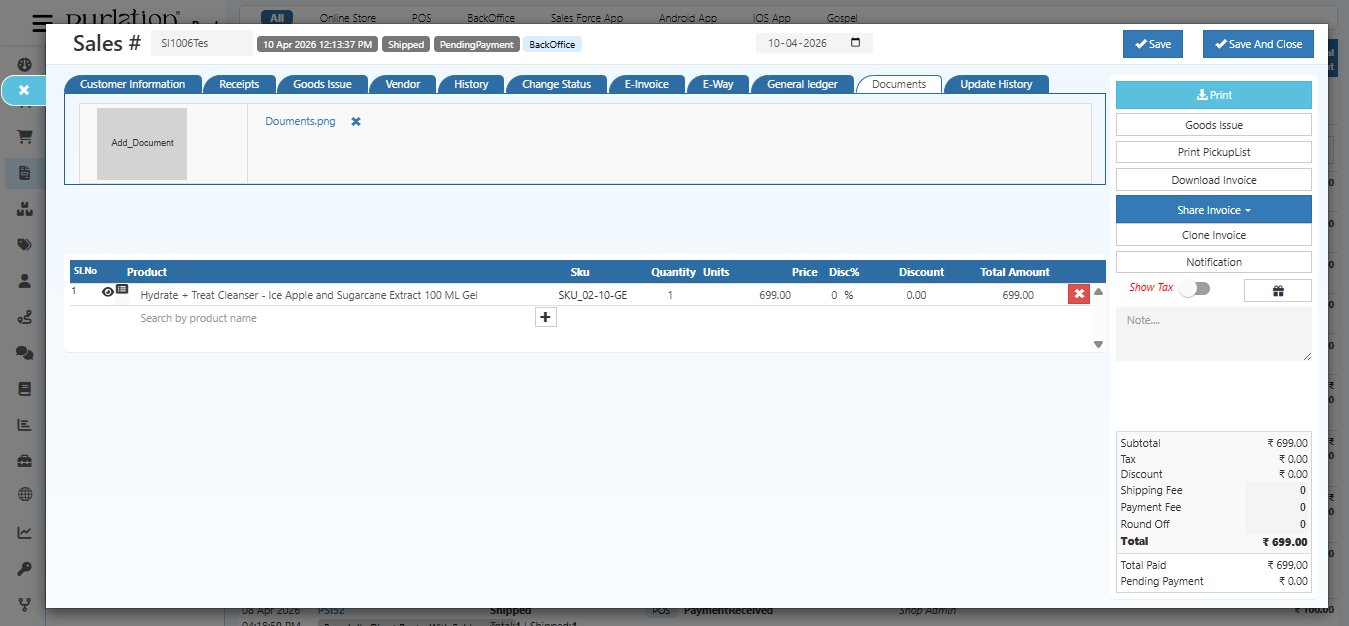
- Click Add Document to upload any file (PDF, image, etc.)
- Uploaded documents appear as thumbnails with their filename
- Click the ✕ icon to remove a document
11. Update History Tab
The Update History tab shows a complete log of every edit and change made to this invoice — who changed it, what was changed, and when.
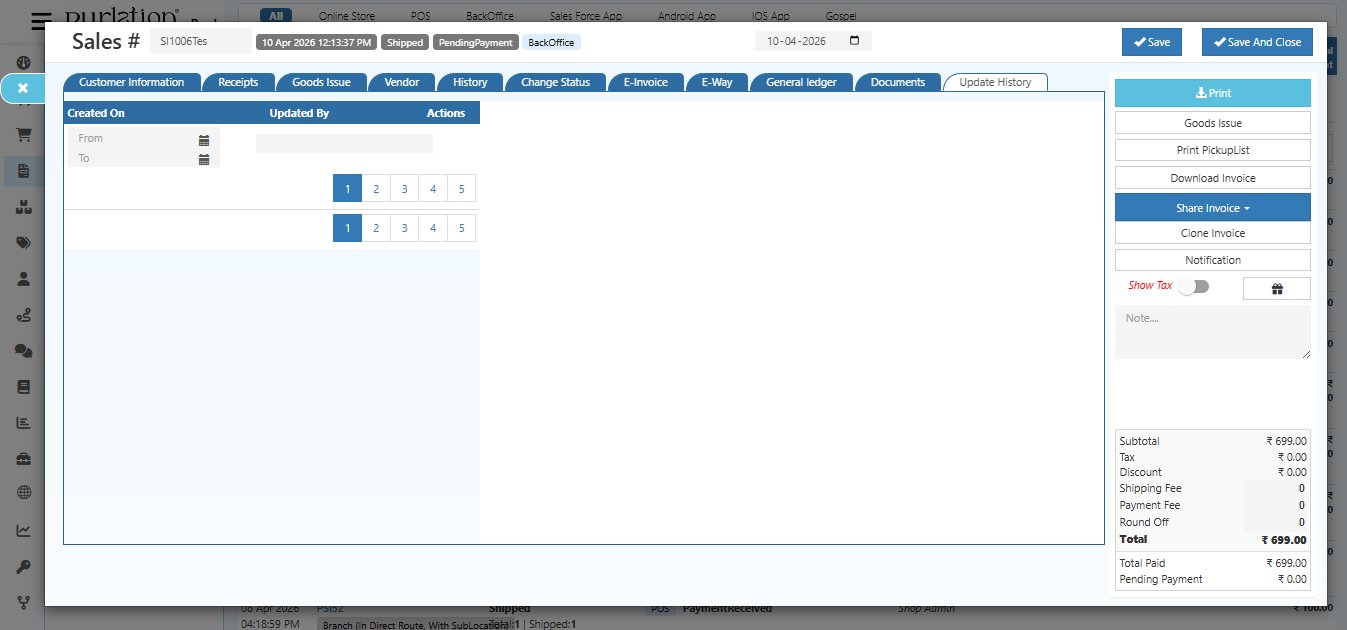
| Column | Description |
|---|---|
| Created On | Date and time the change was made |
| Updated By | The admin or user who made the edit |
| Actions | View details of what was changed in that edit |
Use the From / To date filter to search for changes within a specific period. This is useful for audits and tracking who made changes to the invoice.
Quick Action Buttons (Right Panel)
Every sales invoice has these action buttons on the right side:
| Button | What It Does |
|---|---|
| Open the print preview of the invoice | |
| Goods Issue | Create or view shipment (GDN) for this invoice |
| Print Pickup List | Print the picking list for warehouse staff |
| Download Invoice | Download the invoice as a PDF |
| Share Invoice | Share the invoice via email or payment link |
| Clone Invoice | Create a duplicate copy of this invoice |
| Notification | Send a notification to the customer |
| Show Tax | Toggle to show or hide tax breakdown |
Printing the Invoice
Click Print to open a print preview of the invoice.
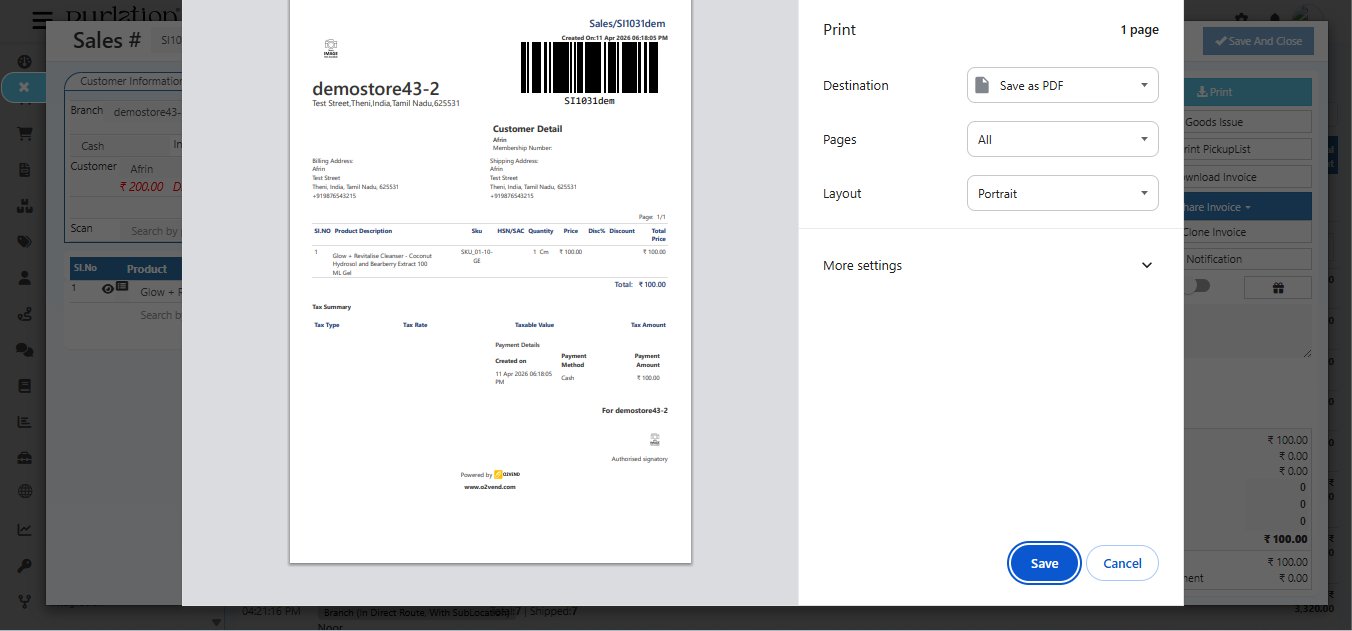
The print preview shows the full invoice layout including:
- Company logo and name
- Invoice number and date with barcode
- Customer billing and shipping addresses
- Product table with HSN/SAC codes, quantity, price, discount, and total
- Tax summary section
- Payment details — payment method and amount
Select your print settings (destination, layout) and click Save to download as PDF or send to printer.
Downloading the Invoice PDF
Click Download Invoice to download the invoice directly as a PDF file.
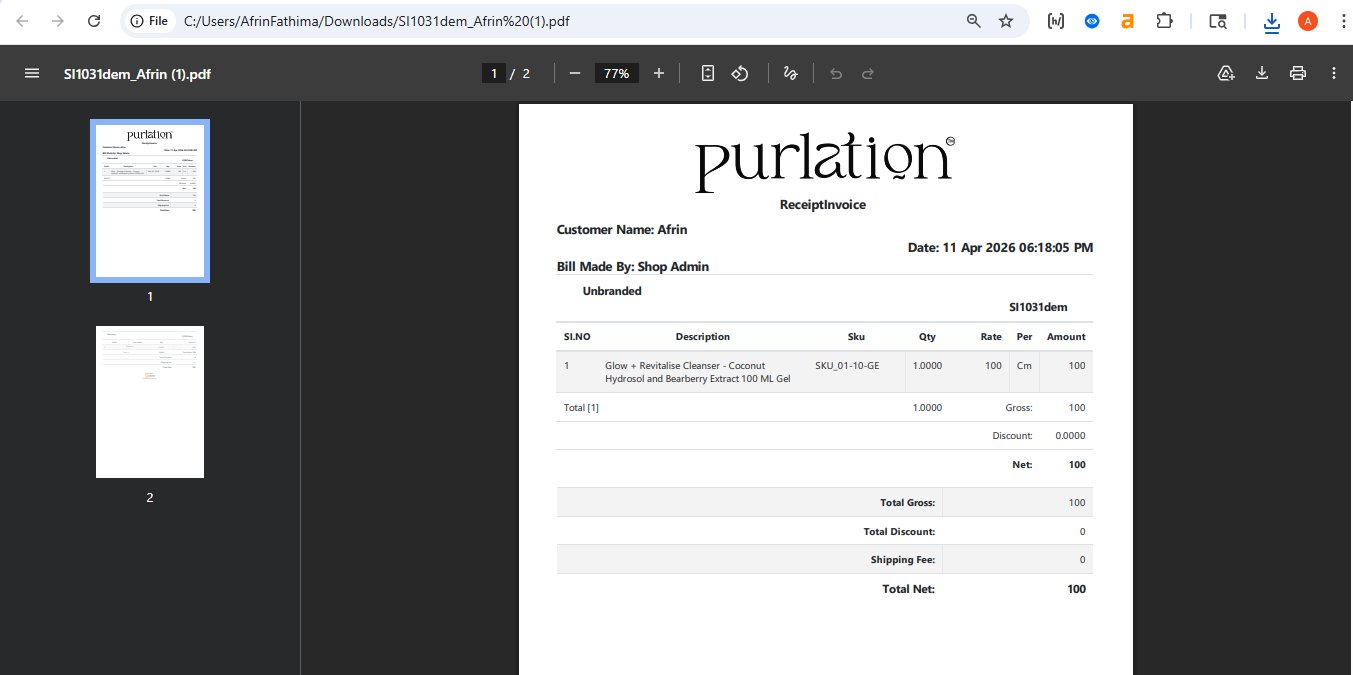
The downloaded PDF includes:
- Company name and branding
- Customer name, date, and admin who created the invoice
- Product table with SKU, quantity, rate, and amount
- Total Gross, Total Discount, Shipping Fee, and Total Net
- Authorised signatory section
Use Export or Export with Line Items from the Sales list page to download multiple invoices at once as a
.csvfile.
Quick Summary
| Task | Where to Go |
|---|---|
| View invoice details | Sales list → Click Invoice Number |
| Edit customer or products | Customer Information tab |
| View payment records | Receipts tab |
| View shipment details | Goods Issue tab → Click GDN number |
| Track status changes | History tab |
| Manually update status | Change Status tab |
| Generate E-Invoice (GST) | E-Invoice tab → Generate E-Invoice |
| View E-Way Bill | E-Way tab |
| View accounting entries | General Ledger tab |
| Attach files | Documents tab |
| See edit audit log | Update History tab |
| Print invoice | Click Print (right panel) |
| Download PDF | Click Download Invoice (right panel) |
| Share with customer | Click Share Invoice (right panel) |