How to Print Barcode Labels in O2VEND
Print barcode labels from Stock History, Purchase Voucher, or the Product page — supports bulk and single product printing for faster billing and accurate stock tracking.
Method 1: From Stock History (Bulk Printing)
- Back Office → Stock History → Print Barcode Label
- Apply filters if needed (date, brand, category, SKU, price range)
- Select products using checkboxes
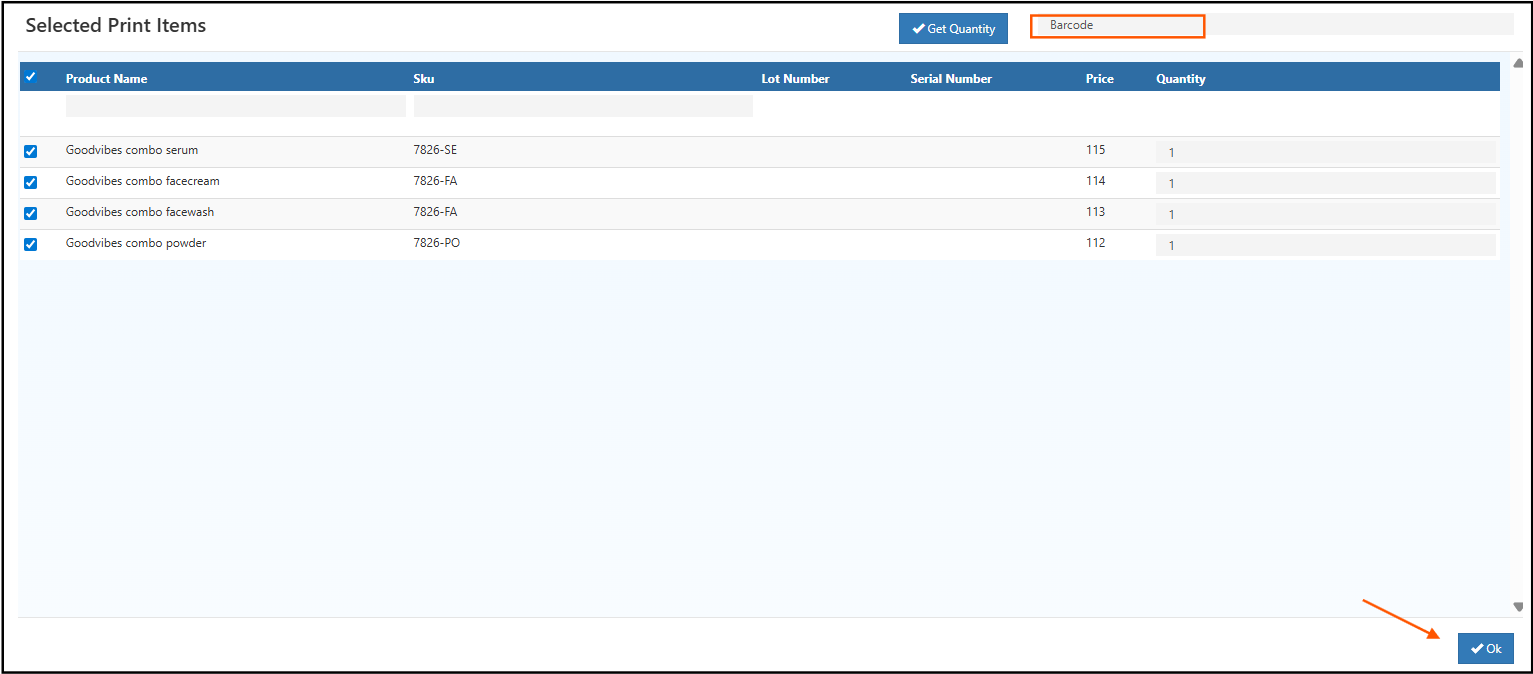
- Click Print Barcode → verify selected items → enter quantity → OK
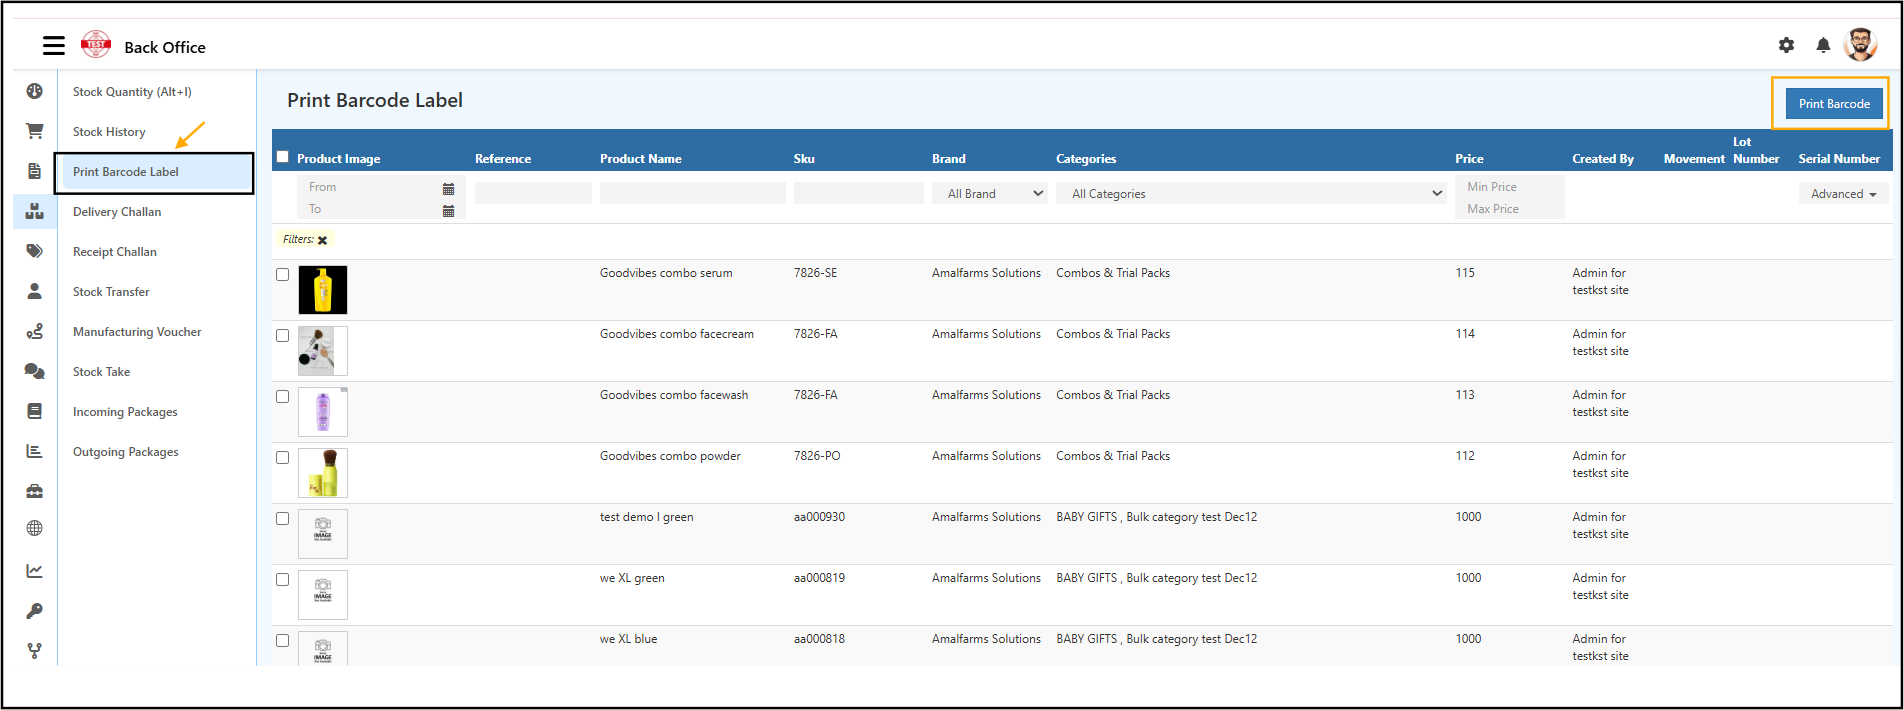
💡 Verify selected products before bulk printing to avoid sticker waste.
Method 2: From Purchase Voucher
- Back Office → Vouchers → Purchase → open the invoice
- Click Print Barcode → select template → enter quantity → OK
Labels new stock before it moves to shelves.
Method 3: From Product Page (Single Item)
- Back Office → Catalog → Products → open the product
- Click Print Barcode → select template → enter quantity → OK
Useful for reprinting damaged or missing labels.
Quick Checklist
- Barcode generated in product settings
- Correct template selected for sticker size
- Test print done before bulk run
- Quantity confirmed before final print
Troubleshooting
Not printing? Check printer connection, template selection, barcode setup, and browser popup permissions.
Alignment issue? Adjust printer margins and recheck label template size.