O2VEND Retail ERP
  • Getting Started
  • Ecommerce
  • Back Office
  • POS
  • Agent App
  • PIM
  • Communication
  • CMS
  • OMS
  • WMS
  • O2C
  • Accounting
  • Reports
  • Themes and Apps
Search Results for

    Show / Hide Table of Contents
    • Retail ERP Back Office Overview
    • Back Office Dashboard
    • Analytics & Reports
      • Visitor Analytics
      • E-commerce Analytics
      • Product Analytics
      • Campaigns Analytics
    • API & Webhook Integration
      • Webhook
      • Examples of JSON format data via webhook
      • Testing webhook
    • System Settings
      • Settings
      • Business Settings
        • Business Details
        • Tax Classes
        • Tax Rates
        • Operating Countries
        • Operating State or Province
        • Branches
        • Sales Channels
        • Return Rule
        • Backoffice Print Detail
        • Download Template
      • Point Of Sale
        • Quick Add Buttons
        • Print Settings
        • Payment Methods
        • Delivery Settings
        • Language
        • POS Offline Mode
      • Agent App
        • Agent App Print Details
      • Inventory
        • Unit Of Measure
        • Location
        • Unit Of Measure Conversions
        • Stock Levels
        • Sub Location
        • Print Barcode Label Settings
        • Package Material
      • userSettings
        • vendors
        • User Date Setup
        • Employees
          • Set Up Employee Roles
          • Ecommerce
          • Point Of Sale
          • Back Office
          • Sales App
        • Vendors Commission
        • Credit Rules
        • Automatic User Code
      • Loyalty and Promotions
        • Reward Points
        • Coupons
        • Gift Vouchers
        • Offers and Discounts
        • Benefits
        • Affiliate
        • Coupon Print Setting
      • Account
        • Financial Year
        • Voucher Numbering
        • Sales Account Map
        • Voucher Numbering Rules
    • Profile

    Automatic User Code Setup – O2VEND

    The Automatic User Code feature in O2Vend simplifies generating unique identification codes for users such as Employees, Suppliers, and Customers. This ensures consistent code formats and eliminates manual entry errors during user creation.

    Accessing the Automatic User Code Settings

    1. Navigate to the Settings page in the Admin Panel.
    2. Select the Account tab.
    3. Choose Automatic User Code from the available options. Automatic User Code Setup – O2VEND

    The system displays a configuration window with fields for Prefix, Number, Suffix, and an Enable switch for each user category.

    Field Descriptions

    • Prefix: Alphanumeric value added before the user code (e.g., EMP, SUP, CUS).
    • Number: Numeric part of the code that increments automatically (e.g., 001, 002).
    • Suffix: Optional text added at the end of the code (e.g., -T, -B).
    • Enable: Activates automatic code generation for the selected category.
    Automatic User Code Setup – O2VEND

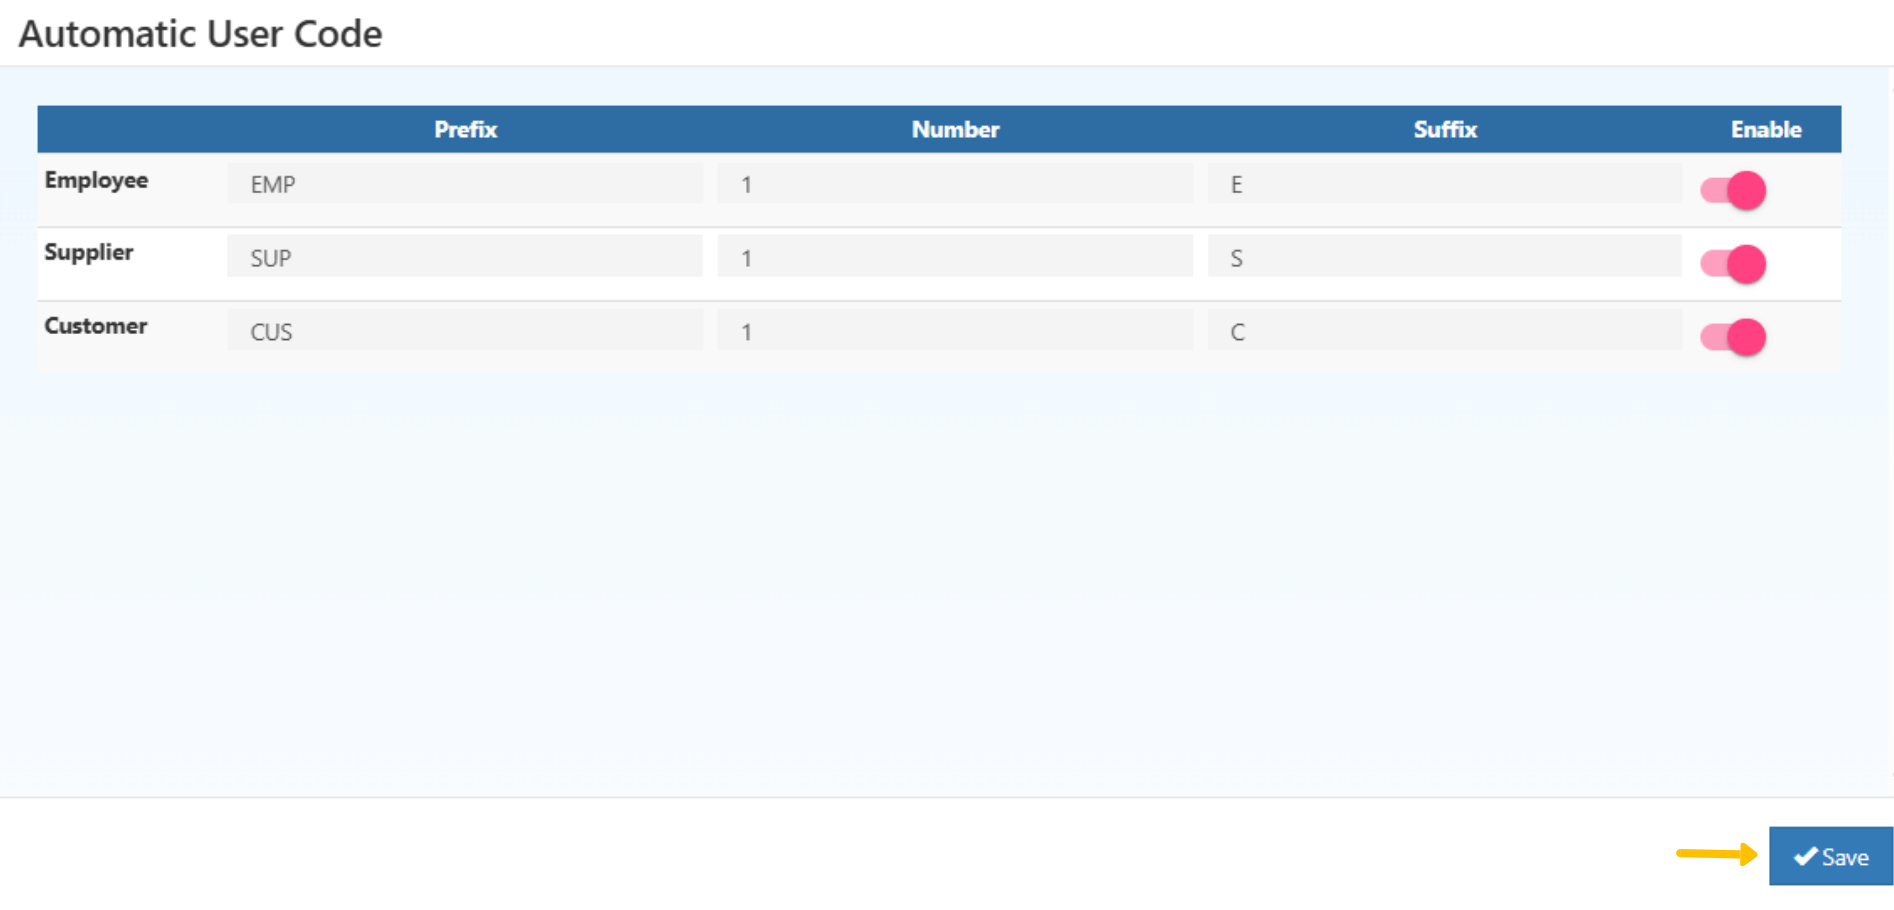
    Configuration Example

    User Type Prefix Number Suffix Enable
    Employee EMP 1 E ✅
    Supplier SUP 1 S ✅
    Customer CUS 1 C ✅

    Once configured and saved, the system automatically generates codes in sequence. Examples:

    • EMP1E, EMP2E
    • SUP1-S
    • CUS1-C

    Benefits of Automatic User Code Setup

    • Reduces manual entry errors.
    • Maintains consistent code formats across all user types.
    • Saves time during user onboarding.
    • Scalable for large organizations.
    In this article
    Back to top _includes/footer.html
    © 2019–2026 Jeyan Technologies Private Limited • www.o2vend.com • Create your own store