O2VEND Retail ERP
  • Getting Started
  • Ecommerce
  • Back Office
  • POS
  • Agent App
  • PIM
  • Communication
  • CMS
  • OMS
  • WMS
  • O2C
  • Accounting
  • Reports
  • Themes and Apps
Search Results for

    Show / Hide Table of Contents
    • Retail ERP Back Office Overview
    • Back Office Dashboard
    • Analytics & Reports
      • Visitor Analytics
      • E-commerce Analytics
      • Product Analytics
      • Campaigns Analytics
    • API & Webhook Integration
      • Webhook
      • Examples of JSON format data via webhook
      • Testing webhook
    • System Settings
      • Settings
      • Business Settings
        • Business Details
        • Tax Classes
        • Tax Rates
        • Operating Countries
        • Operating State or Province
        • Branches
        • Sales Channels
        • Return Rule
        • Backoffice Print Detail
        • Download Template
      • Point Of Sale
        • Quick Add Buttons
        • Print Settings
        • Payment Methods
        • Delivery Settings
        • Language
        • POS Offline Mode
      • Agent App
        • Agent App Print Details
      • Inventory
        • Unit Of Measure
        • Location
        • Unit Of Measure Conversions
        • Stock Levels
        • Sub Location
        • Print Barcode Label Settings
        • Package Material
      • userSettings
        • vendors
        • User Date Setup
        • Employees
          • Set Up Employee Roles
          • Ecommerce
          • Point Of Sale
          • Back Office
          • Sales App
        • Vendors Commission
        • Credit Rules
        • Automatic User Code
      • Loyalty and Promotions
        • Reward Points
        • Coupons
        • Gift Vouchers
        • Offers and Discounts
        • Benefits
        • Affiliate
        • Coupon Print Setting
      • Account
        • Financial Year
        • Voucher Numbering
        • Sales Account Map
        • Voucher Numbering Rules
    • Profile

    Financial Year

    In O2VEND Back Office, the Financial Year section helps record and monitor all financial transactions for an organization within a specific period. Setting up the financial year accurately ensures proper accounting, reporting, and performance analysis.

    A financial year defines the start and end dates for recording sales, purchases, income, and expenses. Once set, these dates are used to generate reports such as Balance Sheets, Profit & Loss Statements, and Cash Flow Statements.

    After defining a financial year, changes cannot be made until it is formally closed. This process ensures that all transactions for the current year are complete and verified before opening a new one.


    Create a Financial Year

    Follow these steps to create a new financial year:

    1. Open Back Office.
    2. Go to the Settings section or press Alt + S.
    3. Select Financial Year under the Accounts section.
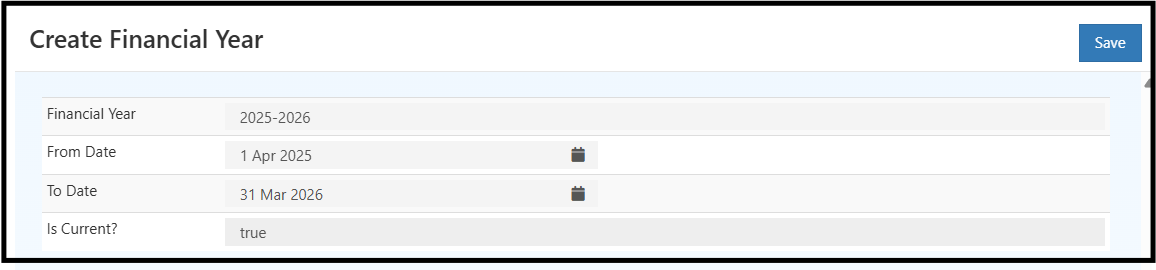
    4. Enter the financial year name.
    5. Choose the Start Date and End Date.
    6. Click Save to confirm.

    Once saved, all transactions within that range will be recorded under the defined financial year for accurate reporting. Financial Year

    Example

    Example:

    • Financial Year: 2024�2025
    • Start Date: 01-Apr-2024
    • End Date: 31-Mar-2025

    Purpose

    The financial year setup helps:

    • Maintain consistent reporting periods.
    • Analyze yearly performance.
    • Ensure accounting compliance.
    • Generate accurate financial reports.

    Video Tutorial

    Watch the tutorial

    In this article
    Back to top _includes/footer.html
    © 2019–2026 Jeyan Technologies Private Limited • www.o2vend.com • Create your own store