O2VEND Sub Location Setup Guide
Efficient warehouse and inventory management starts with proper sub-location configuration.
In O2VEND, you can create, assign, and manage sub-locations within warehouses to track and move stock accurately.
How to Set Up Sub-Locations in O2VEND
To configure sub-locations:
Back Office → Settings → Stock Settings → Sub Location
Key Features of O2VEND Sub Locations
- Create and assign sub-locations to specific warehouses.
- Update product sub-locations manually from the Product section.
- Use the Stock Transfer feature to move products between sub-locations.
- Assign specific quantities to sub-locations during transfers, receipts, and shipments.
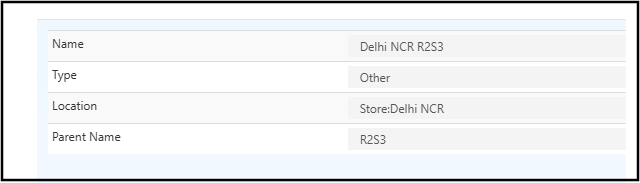
Creating and Assigning Sub-Locations to Warehouses
Follow these steps to set up a new sub-location:
- Open the Back Office.
- Go to Settings → Stock Settings → Sub Location.
- Enter a Sub Location Name (e.g., Bin 1, Rack A1).
- Select the Sub Location Type.
- Associate the sub-location with a Warehouse Location.
- (Optional) Choose a Parent Sub Location if you want to create a hierarchical structure (child sub-location).
- Click Save to finalize the setup.
Updating Product Quantity in a Sub-Location
You can update stock quantities for each sub-location directly from the product catalog.
Steps:
- Go to the Back Office → Catalog → Products.
- Click the Update Quantity icon for a product.
- Select the required Sub Location.
- Enter the Quantity and press Enter.
- Click Save to apply changes.
Transferring Stock Between Sub-Locations
The Stock Transfer module allows you to move inventory efficiently between sub-locations within the same warehouse.
Steps:
- Go to Back Office → Inventory → Stock Transfer.
- Select the same location for both From and To Location.
- Set Deliver and Receive Items to True.
- Choose the products to be moved.
- Specify From Sub Location and To Sub Location.
- Enter the transfer Quantity.
- Click Save to complete the transfer.
Adding Quantities to Sub-Locations in Purchase Invoices
When receiving stock, you can assign product quantities directly to sub-locations.
Steps:
- Go to Back Office → Voucher → Purchase.
- After creating a purchase, click Goods Received.
- Choose the Sub Location for each product.
- Enter the Received Quantity.
- Click Save to update inventory.
Viewing Updated Stock Quantity and History
Track your sub-location stock changes for complete visibility.
Steps:
- Go to Back Office → Inventory → Stock History.
- View updated product quantities by sub-location.
- Open the Stock Quantity section to verify real-time updates.
Benefits of Using Sub-Locations in O2VEND
- Improves inventory accuracy and reduces stock discrepancies.
- Enables faster picking and stock tracking.
- Supports multi-bin and multi-location warehouse structures.
- Enhances inventory visibility for better decision-making.