Customer Management
The Customers section in O2VEND helps you manage customer records, contact details, membership information, groups, pricing-related assignments, and address information from one place.
This page is useful when you want to:
- view all customers in one list
- add a new customer
- manage customer profile details
- assign customer groups, agents, and rules
- maintain address and contact information
Navigation Path
Back Office -> Parties -> Customer
Access Customers
- Login to the Back Office
- Open Parties
- Open the Customers section
This opens the customer list page where all customer records are displayed.
Customers List Screen
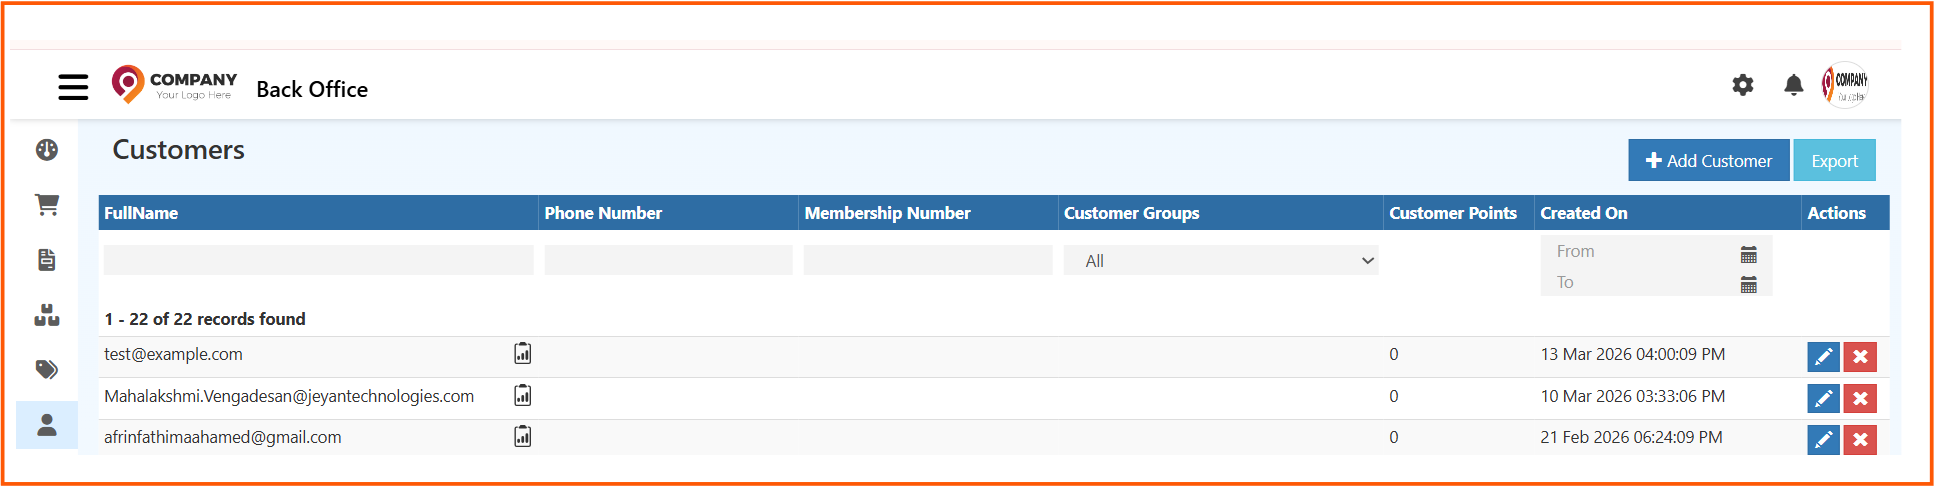
The Customers page shows all created customer records in one place.
Fields in the List Screen
FullName
Shows the customer name.
This helps identify the customer record quickly.
Phone Number
Shows the customer phone number.
This is useful for contact and verification.
Membership Number
Shows the membership ID linked to the customer.
This is useful when membership-based tracking is enabled.
Customer Groups
Shows the customer group linked to the customer.
This helps identify whether the customer belongs to a specific segment.
Customer Points
Shows the customer points balance.
This is useful for loyalty or rewards-based customer programs.
Created On
Shows the date and time when the customer record was created.
The date filter can also be used to search customers by creation period.
Actions
The action icons are used to:
- edit the customer
- delete the customer
Add Customer
The Add Customer button is used to create a new customer record.
Export
The Export button is used to export customer data.
How to Create a Customer
- Go to Back Office -> Parties -> Customers
- Click Add Customer
- Enter personal details such as name, username, email, and phone
- Enter membership and tax details if required
- Assign agent, timezone, affiliate, or credit rule if needed
- Add coupons, offers, and supply type if applicable
- Enter country, state, city, postal code, and address details
- Review the Opening Balance for Branches tab if required
- Click Save
Create Customer Screen
When you click Add Customer, the Create Customer screen opens.
The page contains customer profile details, contact information, address details, and other optional settings.
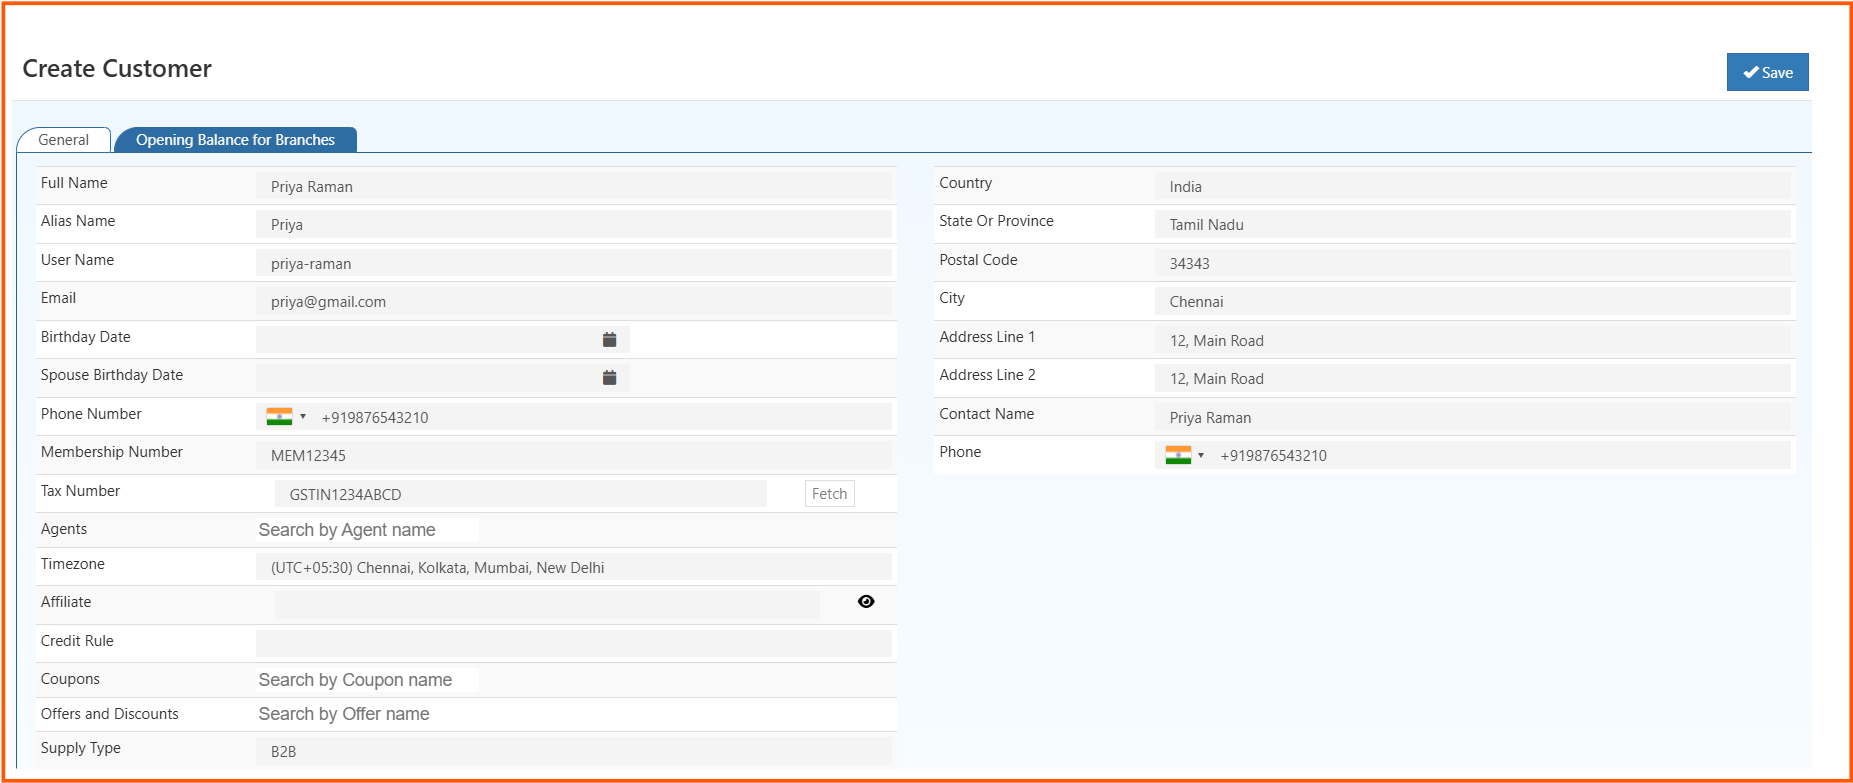
Create Customer Fields
Each field in the Create Customer screen has a specific purpose.
Full Name
Enter the full name of the customer.
Example: Priya Raman
Alias Name
Enter an alternate or short display name for the customer.
Example: Priya
User Name
Enter the username for the customer account.
Example: priya-raman
Enter the customer email address.
Example: [email protected]
Birthday Date
Use this field to store the customer’s date of birth.
Spouse Birthday Date
Use this field to store the spouse birthday date, if needed.
Phone Number
Enter the primary contact number of the customer.
Example: +919876543210
Membership Number
Enter the membership ID linked to the customer.
Example: MEM12345
Tax Number
Enter the customer’s tax-related number if required.
Example: GSTIN1234ABCD
The Fetch option can be used when tax-related details need to be retrieved or validated.
Agents
Use this field to assign an agent to the customer.
This is useful when customers are managed by a specific sales or relationship agent.
Timezone
Select the customer’s timezone.
Example shown in the screen:
(UTC+05:30) Chennai, Kolkata, Mumbai, New Delhi
Affiliate
Use this field when the customer is linked to an affiliate setup.
Credit Rule
Assign a credit rule if the customer should follow a specific credit policy.
Coupons
Use this field to associate available coupons with the customer.
Offers and Discounts
Use this field to attach offer or discount settings to the customer.
Supply Type
Defines the supply type linked to the customer.
Example shown in the screen:
B2B
Country
Select the country of the customer address.
Example: India
State Or Province
Select the state or province of the customer address.
Example: Tamil Nadu
Postal Code
Enter the postal code of the address.
Example: 34343
City
Enter the city name.
Example: Chennai
Address Line 1
Enter the primary address line.
Example: 12, Main Road
Address Line 2
Enter the secondary address line if needed.
Example: 12, Main Road
Contact Name
Enter the contact name for the address or business contact.
Example: Priya Raman
Phone
Enter the contact phone number related to the address section.
Opening Balance for Branches
This tab is used when branch-specific opening balance information needs to be maintained for the customer.
Save
Click Save after entering all required details.
Why Customer Management Is Useful
The Customers section helps you:
- maintain complete customer records
- organize customer contact and address details
- assign membership, pricing, and grouping details
- support loyalty, offers, and customer segmentation
Best Practices
- Enter the correct phone number and email for each customer
- Use meaningful usernames and membership numbers
- assign the correct customer group, agent, and credit rule
- review address information before saving
- use timezone and supply type correctly when needed
Result
After saving, the new customer record appears in the Customers list and can be used in customer management, loyalty programs, communication, pricing, and related business operations.