Sales Agent App - Receipts
Receipts Screen Overview
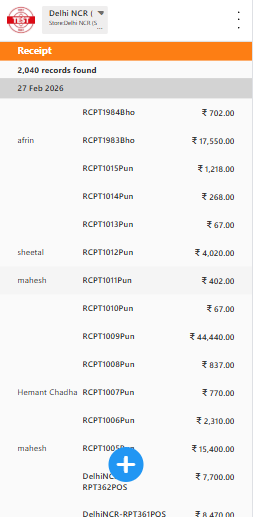
This screen in the Sales Agent App is designed to help agents view, track, and manage all receipts generated for their sales. It provides a complete transaction history for a specific store or sub-location, including customer names, receipt numbers, dates, and amounts.
Header Section
Store & Location Info: Displays the current store/sub-location being viewed (for example, Delhi NCR (Sub location)). This is useful when agents manage multiple locations.
Page Title: Receipt clearly identifies the current module.
Timestamp: Shows the current system date and time (for example, Feb 27, 2026 3:11:52 PM).
Records Summary
- Total Records: Displays the total number of receipts in the system (for example, 2,040 records found). This helps agents understand the amount of available data.
Date Sections
- Receipts are grouped by date, making daily review easier.
- Each date appears as a separate row for quick visual scanning (for example, 27 Feb 2026, 12 Dec 2025).
Receipt Entries
Each receipt entry typically includes:
| Field | Description |
|---|---|
| Customer Name | Name of the customer who made the purchase (for example, afrin, sheetal, mahesh). |
| Receipt Number | Unique transaction identifier (for example, RCPT1984Bho, DelhiNCR-RPT317POS). |
| Amount | Total amount for the receipt (for example, INR 702.00, INR 17,550.00). |
- Multiple receipts for the same customer on the same day are listed as separate entries.
Pagination
- Pagination appears at the bottom of the screen.
- It allows navigation through large numbers of receipts (for example, pages 1 to 10).
- This keeps the screen responsive even when many records exist.
Add New Receipt Button
- A blue circular + button at the bottom lets agents create a new receipt quickly.
- It opens the New Receipt flow.
Best Practices for Agents
- Use date groupings to quickly locate receipts from specific days.
- Check customer names to track repeat transactions.
- Verify receipt numbers and amounts before syncing or reporting.
- Use the + button for immediate new sales entries.
- Review all relevant pages while auditing historical data.