Sales Agent App - Customer Management Module
The Customers screen in the Sales Agent App is used to manage customer transactions and balances from one place.
This module allows:
- Viewing allocated customers
- Checking outstanding balances
- Creating orders
- Generating invoices
- Recording receipts
- Logging customer visits
Access Control
- Administrators can view all customers.
- Sales agents can view only assigned customers.
Customers Screen Overview
The Customers screen provides the ability to:
- Search customers using Search Customer
- View outstanding balances in the Amount column
- Open customer details using the Edit (pencil) icon
- Create new transactions using the blue Plus (+) button
- Switch between Order, Invoice, Receipt, and Visit tabs

Customer List Section
Columns Explained
| Column | Description |
|---|---|
| Customer | Displays customer name with a colored avatar (first letter of the name) |
| Amount | Shows outstanding balance (for example, INR 1,000.00 Cr) |
| Actions | Edit icon to open customer details |
Important Notes
- Cr indicates credit or outstanding balance.
- Use the search bar to quickly locate a customer.
- Use the blue + button to create transactions.
Customer Details View
Selecting the Edit icon opens the customer summary with the following tabs:
- Order
- Invoice
- Receipt
- Visit
Each tab displays records only for the selected customer.
Tab headers show record counts. If no records exist, the tab shows zero results.
Order Tab
The Order tab displays all customer orders.
Create Order
- Open customer details and select the Order tab.
- Click the blue Plus (+) button.
- Click Add.
- Select products.
- Click Add Item.
- Verify quantity and items.
- Click Create Order.
Order Information Includes
- Order ID
- Status (Complete / Pending / In Progress)
- Amount
- Payment mode

Invoice Tab
The Invoice tab displays invoices created for the customer.
Create Invoice
- Open customer details and select the Invoice tab.
- Click the blue Plus (+) button.
- Click Add.
- Select products.
- Click Add Item.
- Verify items and amount.
- Click Create Invoice.
Invoice Details Include
- Invoice ID
- Date
- Status (New / Shipped)
- Amount

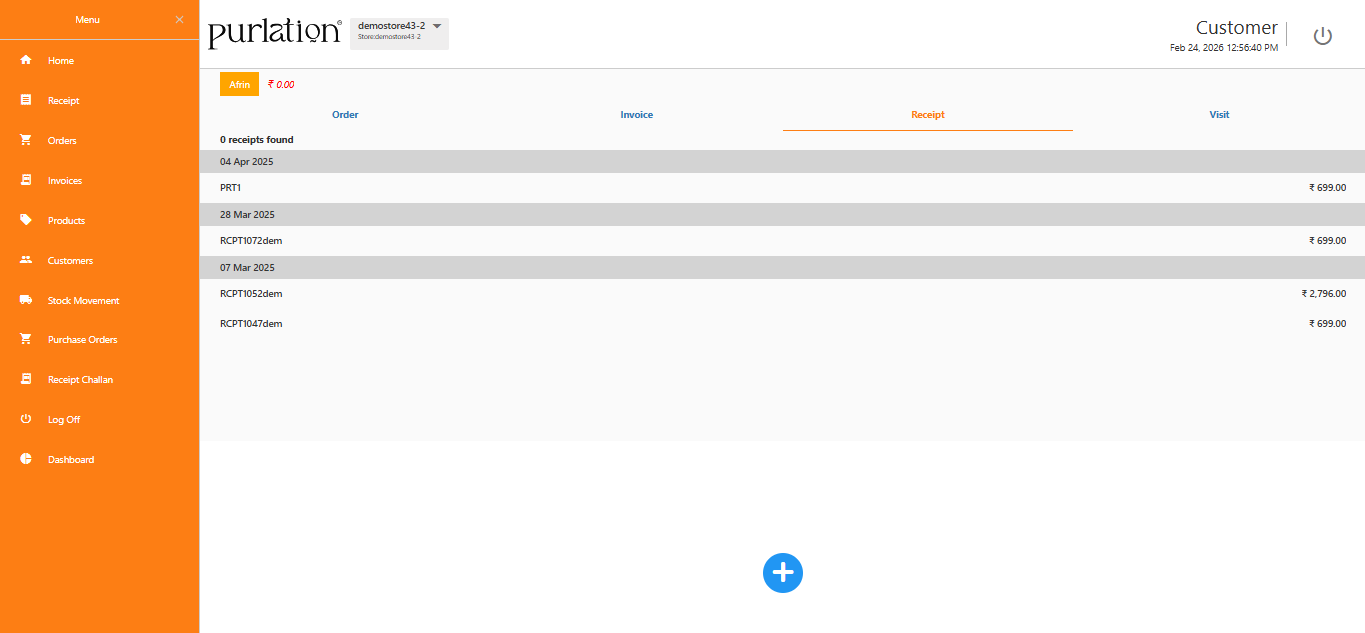
Receipt Tab
The Receipt tab records customer payments.
Create Receipt
- Open customer details and select the Receipt tab.
- Click the blue Plus (+) button.
- Click Add.
- Select invoice number(s).
- Click Add Item.
- Verify receipt details.
- Click Create Receipt.
After saving the receipt, the outstanding balance is adjusted automatically.
Visit Tab
The Visit tab is used to record on-site customer visits.

Create Visit Log
- Open customer details and select the Visit tab.
- Click the blue Plus (+) button.
- Verify Visit To and Visit By.
- Select Reason (for example,
Order). - Enter details in Note.
- Verify Latitude and Longitude.
- Click Start Camera, then Take Snapshot.
- Click Save.
Visit Records Display
- Visit date
- Activity details
- Notes
- Location coordinates
- Snapshot image
This helps track field sales activities and follow-ups.

Best Practices
- Review outstanding balances regularly.
- Verify invoice details before creating receipts.
- Maintain accurate visit logs for field tracking.
- Confirm order details before submission.
- Use search when managing large customer lists.
The Customers module centralizes customer records, orders, invoices, receipts, visit logs, and outstanding balances.